Duct Mount Kit (PIR 7000) Polytron 5000/8000 5
3 Transmitter in die Wartungspositi-
on bringen
1. Untere Schraube (22, Abb. 6) lösen und in Wartungsposition
A oder B schrauben.
2. Obere Schraube (21,Abb. 6) lockern.
3. Transmitter aus der Dichtung herausziehen, um 90° nach
links oder rechts drehen und auf untere Schraube stecken.
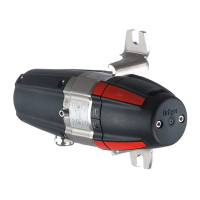
1 Intended use
The Duct Mount Kit (PIR7000) Polytron 5000/8000 is required
for mounting the Dräger Polytron 5000/8000 with PIR sensor if
concentrations are to be monitored in ducts. The duct mount
kit is intended for ducts with a diameter of at least 200 mm / 8"
or ducts with a rectangular cross-section of at least
170 x 170 mm / 6.7" x 6.7".
2 Mounting
1. Drill a hole in the duct (fig. 1) at the required measurement
point.
2. Mount the retaining bracket (1, fig. 2) onto the baseplate
(3, fig. 2) using 3 screws M6 x 8 (2, fig. 2) and washers:
When used with e-Box: Position A
When used without e-Box: Position B
3. Only for ducts with a round cross-section: Loosely screw in
the 4 stoppers (4, fig. 2; M6 x 10 with washers) into the
diagonally positioned guides on the baseplate.
4. Mount the rotary disk (6, fig. 3) onto the retaining bracket
using 2 screws M6 x 16, washers (5, fig. 3) and locking
disk (7, fig. 3). Fix the rotary disk in the top position.
5. Position the pre-assembled duct bracket onto the duct.
Observe the flow direction.
With a duct positioned crosswise to the duct
bracket: Fasten the duct bracket onto the duct using
2 straps (10, fig. 4; not included).
With a duct positioned lengthwise to the duct
bracket: Mount the duct bracket onto the duct using
2 screws M8 x 20 (9, fig. 4), 4 washers, 2 nuts, and
2 gaskets (not included).
6. Insert the gasket (8, fig. 4) and fasten it to the duct bracket
using 6 screws M5 x 10. Tighten the screws as far as they
will go.
7. Mounting onto the rotary disk:
When used with e-Box:
Mount the e-Box (11, fig. 5a) onto the rotary disk using
4 screws M6 x 65 (12, fig. 5a). With a standard
configuration, the hinge should be located in the top
position. Move the e-Box to the maintenance position
(see chapter 3 on page 5).
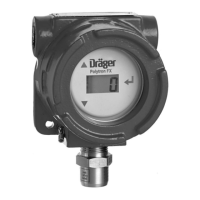
When used without e-Box: Fasten the mounting
spacer (14, fig. 5b) and the transmitter (15, fig. 5b) onto
the rotary disk using 4 screws M6 x 50. During this
process the sensor points towards the duct.
8. Only for ducts with a round cross-section:
Align the 4 stoppers so that the duct bracket is supported
on the duct by the stoppers. Tighten the screws securely.
9. Electrical connection:
When used with e-Box: Complete the electrical
connection and assembly of the transmitter in accordance
with the e-Box Polytron 5000/8000 Assembly Instructions.
When used without e-Box: Complete the electrical
connection and assembly of the transmitter in accordance
with the Polytron 5000/8000 Instructions for Use. Move
the transmitter into the maintenance position (see chapter
3 on page 5).
10. Pull the mounting bracket (16, fig. 6) over the transmitter.
11. Position the flat gasket (17, fig. 6) and ring (18, fig. 6) with the
screwed-on nozzles onto the transmitter and fasten the
components using 4 screws M5 x 12 (19, fig. 6) and
washers. Tighten the screws evenly.
12. Position the mounting bracket onto the transmitter and
fasten it using 6 screws M5 x 10 (20, fig. 6) and washers.
13. Place the transmitter onto the duct and fasten the mounting
bracket loosely onto the duct bracket by using 2 screws
M6 x 16 (21, fig. 7), washers and nuts.
14. Press the transmitter into the gasket as far as it will go.
15. Tighten the 2 screws.
16. On the opposite side fasten the transmitter onto the duct
bracket using 2 screws M6 x 16.
17. Check that the system is gas-tight.
enUS
CAUTION
Any installation of the Duct Mount Kit (PIR 7000)
requires full understanding and strict observance of
the Dräger Polytron 5000/8000 Instructions for Use.
CAUTION
The duct provided for the measurement must not be in
operation during assembly!
NOTICE
All the components listed (harness, gaskets, screws,
washers) are included in the duct mount kit, apart from
the clamps required for fastening the duct and
2 gaskets for sealing the duct/duct harness.
The transmitter display can be aligned by unscrewing
the enclosure lid.
!
!
i
i
NOTICE
If the nozzles (gas inlet and gas outlet) are not required
these must be sealed gas-tight, e. g. by connecting
a short hose, dampen slightly if necessary.
NOTICE
To make assembly easier, lightly moisten the gasket in
the duct with water.
NOTICE
For perfect measurements, the PIR 7000 sensor must
be located crosswise to the direction of the flow.
i
i
i
i
i
i
 Loading...