WARNING: A noise floor significantly higher than -110dBm indicates a
potential issue that may result in reduced range and loss of control over
your aircraft, so should be investigated and resolved prior to flying.
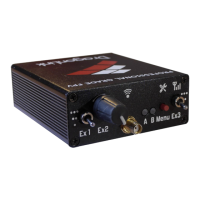
3.3 DragonLink Transmitter – Using Menu Button
The DragonLink transmitter allows for certain functions to be performed using the Menu
button on top of the unit.
3.3.1 Range Test
Conducting a range test before each flight is an important step in ensuring that there
are no faults, interference, or misconfigurations that could result in the loss of your
model aircraft. In range test mode, the RF transmit power is greatly reduced to
simulate the effects of extreme range. Range tests should be conducted on-location,
with a clear line-of-sight and with environmental conditions matching those of the
planned flight.
To conduct a range test:
1. Hold down the Menu button on the DragonLink transmitter and turn on the
power.
2. After the power-on sound is played, the LED(s) will turn green accompanied by 1
beep.
3. Release the Menu button.
4. The transmitter will continue to play 1 beep (if the range test mode alarm is
enabled) and the LED(s) will flash green to indicate it is in range test mode.
5. Position the transmitter with the antenna vertical.
6. Carry the model aircraft away from the transmitter, ensuring that the receiving
antenna is also kept in its flight orientation, and monitor the blue LED on the
receiver.
7. The receiver’s blue LED turning off indicates a temporary loss of signal from the
transmitter. Brief flickers are normal during operation even at close range. Once
the LED is in an off state approximately 50% of the time, measure the distance
from the transmitter to the model aircraft.
8. To exit range test mode, press the menu button.