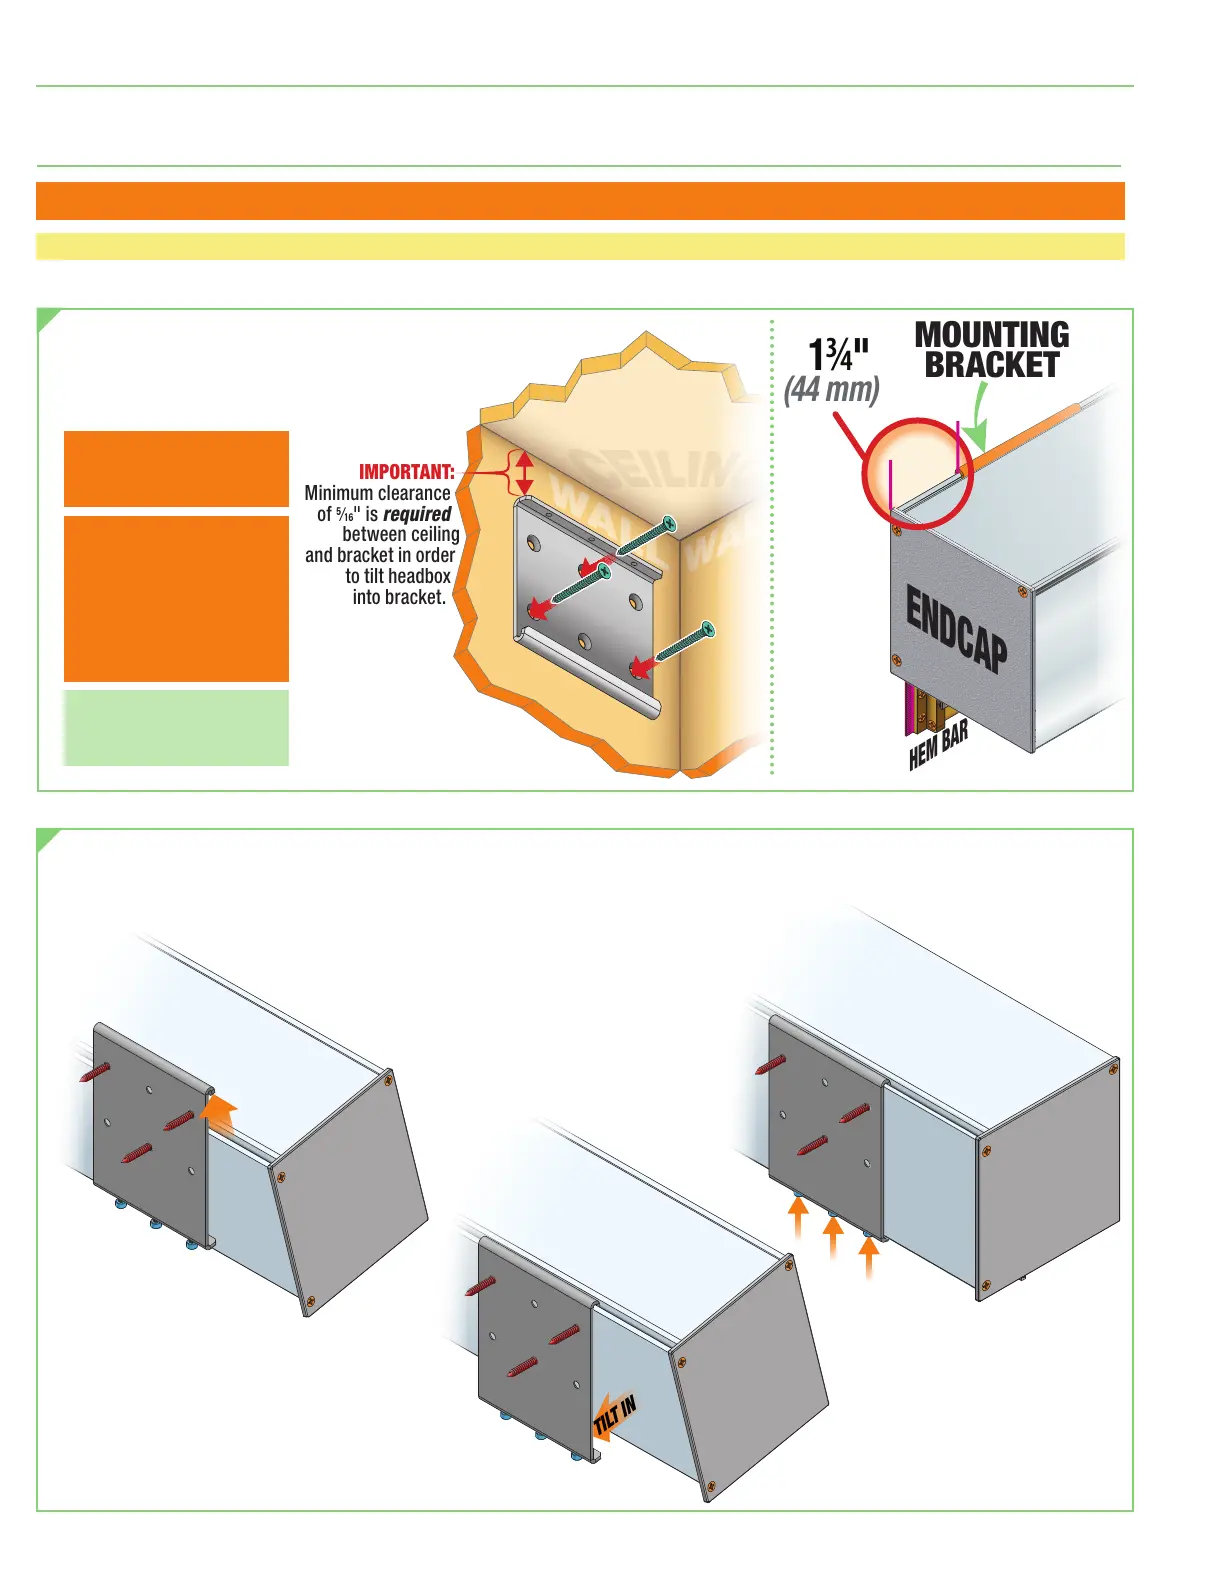
IMPORTANT:
Minimum clearance
of
" is required
between ceiling
and bracket in order
to tilt headbox
into bracket.
Section 2 - Mounting Headbox with Brackets
(Standard Installation Method)
Note: Mounting Bracket positioning as directed in Section 1. Ensure brackets are level.
Please Note:
Installation requires use of
AT LEAST TWO
(2)
of the top mounting holes.
1.
Attach Mounting Brackets
to mounting surface using
#10 flat head screws.
Install flush with bracket.
2.
Attach Headbox
to brackets.
Note:
Mounting height
of product =
Product OM height
Please Note:
Ensure top of bracket is at
least
⁄
" below ceiling.
(See Drawing A at right.)
A. Lift Headbox into Bracket,
ensuring return of Bracket
fits into Headbox channel.
B. Tilt Headbox into
bottom lip of Bracket.
C. Tighten
Set Screws.
Please Note:
Mounting Brackets
MUST be installed with a
minimum gap of 1
¾
"
(44mm)
between the Endcap and
the Mounting Bracket
edge to allow for Side
Channels. Mark wall.
(See Drawing B at right.)
A
B
FlexShade
®
Crank-Operated ZIP
page 4 of 16