WALL
MOUNTING
HOLES
CEILING
MOUNTING
HOLES
1
1
1
1
1
1
1
1
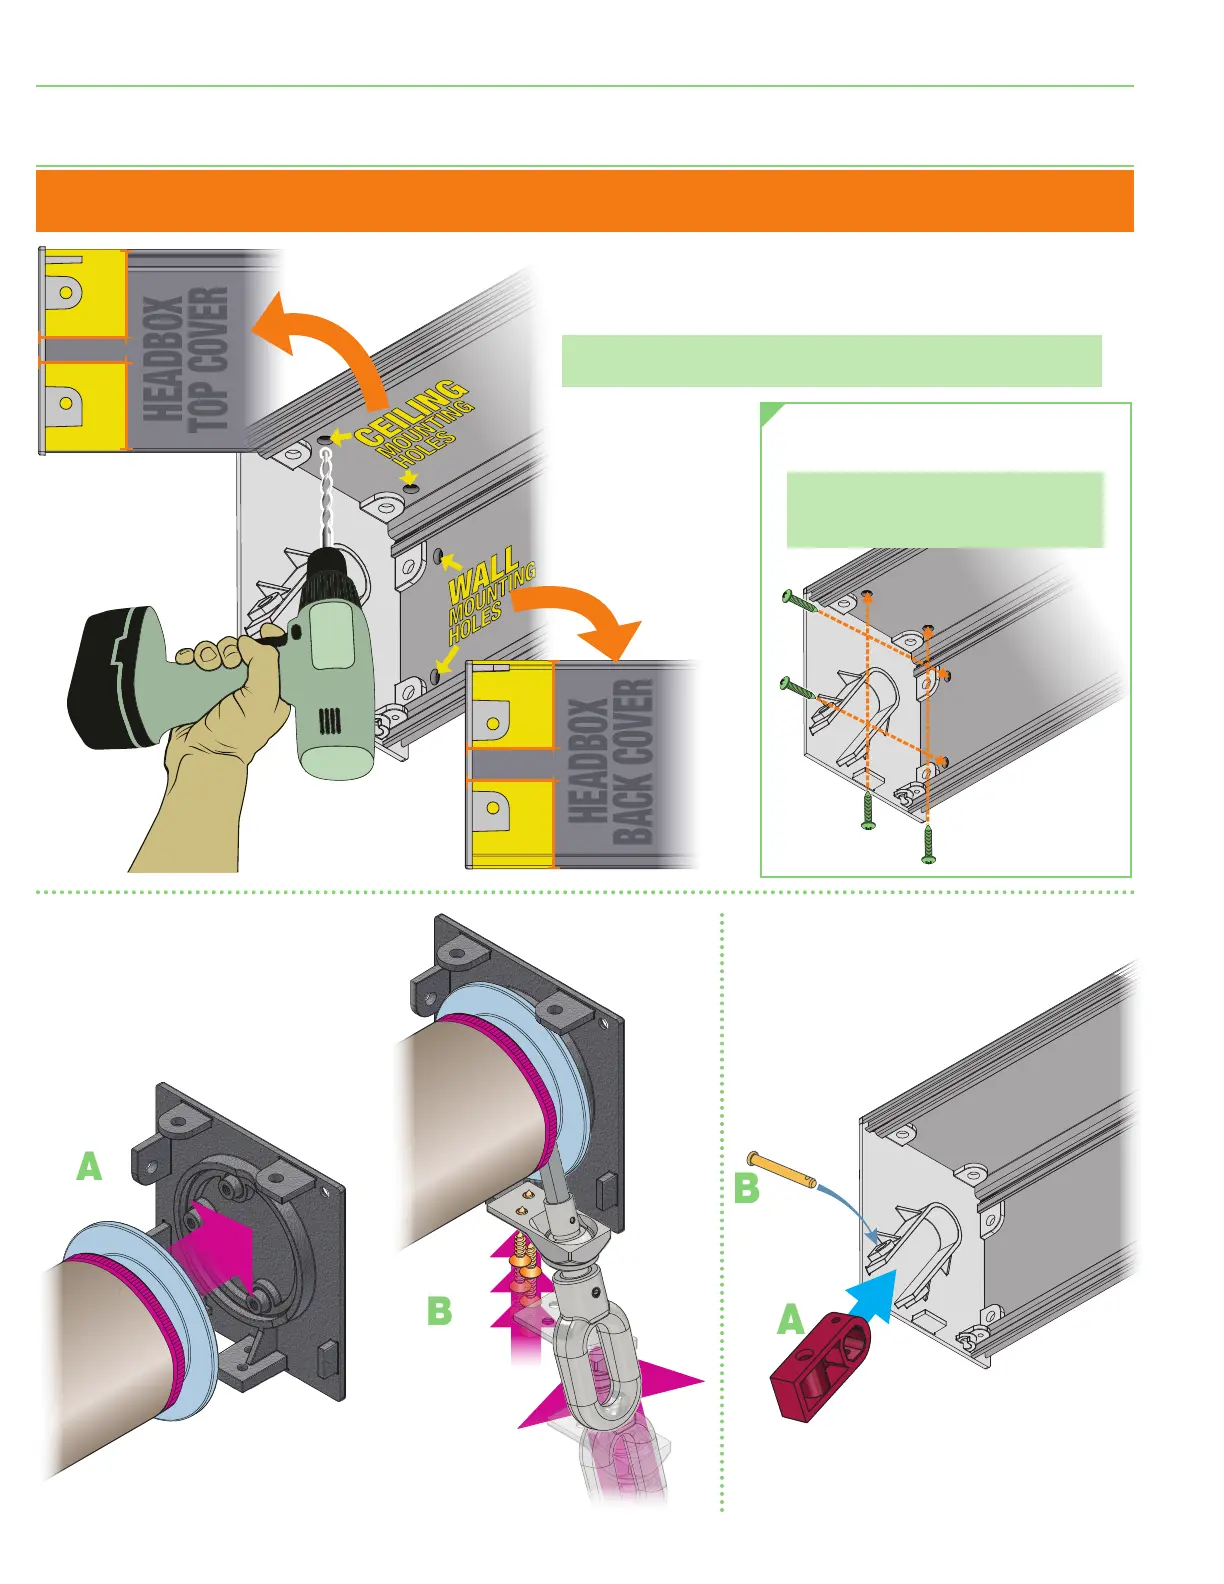
Section 5 - Direct Mounting to Ceiling or Wall
(Alternate Installation Method)
NOTE:
This step requires removing Fascia and Roller Assembly.
See
Section 3 - Removing Roller Assembly
and
Section 4 - Removing Fascia
(Page 5)
.
2.
Attach to mounting surface
using appropriate fasteners.
Please Note:
Installer is responsible
for selecting mounting hardware
appropriate for site conditions.
5.
Proceed to
Section 6 -
Installing Side Channels:
Wall or Ceiling
Mounted Shade.
1.
Using the tabs on the endcap as a spacing guide, drill
pilot holes through both ends of the Headbox as
applicable for ceiling or wall mounting.
Please Note:
Do not drill pilot holes further than 1.5 inches
from ends of the headbox.
3.
A. Replace Operator End
of Roller Assembly.
B. Replace Crank
4.
A. Replace Idler Mounting Gudgeon
on Idler End of Roller Assembly.
B. Replace Quick
Release Pin.
FlexShade
®
Crank-Operated ZIP
page 6 of 16