BA
CUT into
SQUARES
Foam
Padding
C054. 218
1.5"
(38mm)
UP
SIDE CHANNEL
(Left hand, outside view)
FOAM PADDING
FOAM PADDING
‘C’ Channel
Mounting Hardware
(by Others)
Specific Fasterner locations
determined by installer
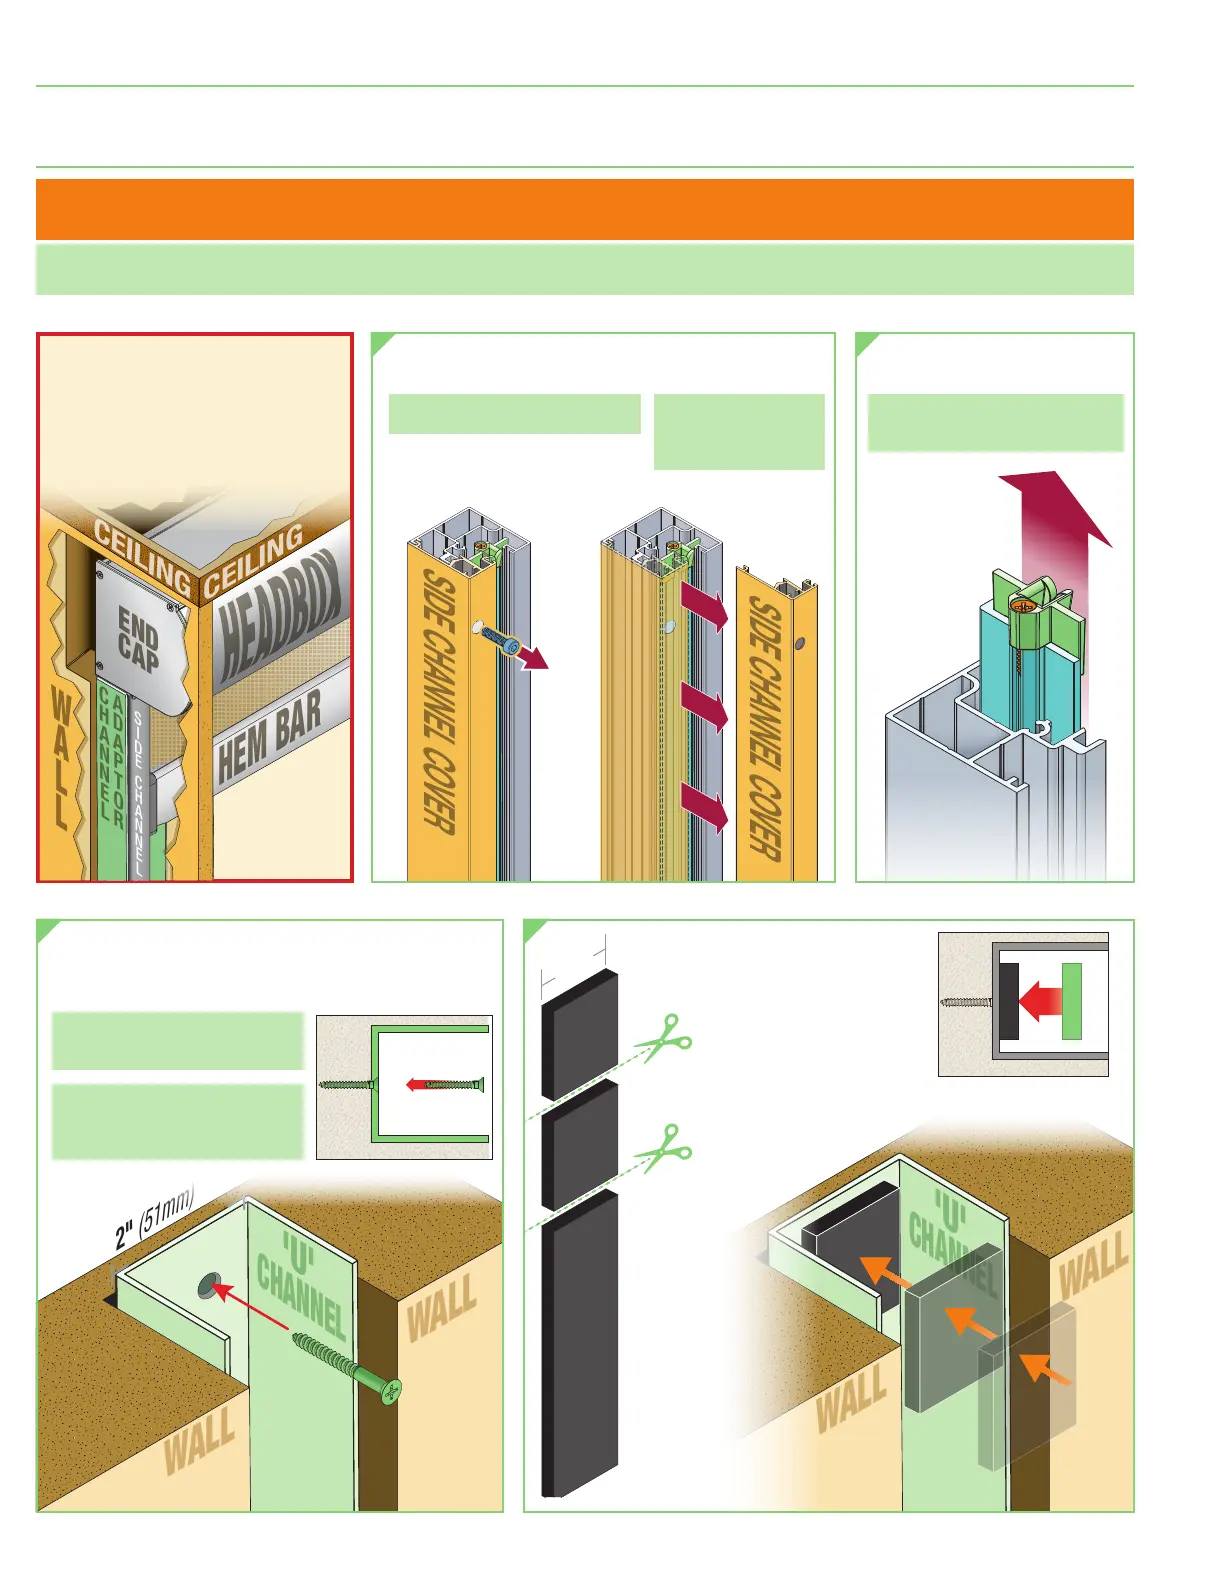
3.
Insert provided 'U' Channel into recessed cavity
in building structure. Drill mounting holes and
secure, using appropriate hardware
(by others)
.
4.
Cut foam strips
(provided)
into 1.5"
(38mm)
squares and
attach them to the 'U'
Channel at all desired
mounting points of the
Side Channel.
NOTE:
Installer MUST provide a recessed pocket
at the top of the channel large enough
to allow for headbox installation and
accommodate hem bar and fascia install/
removal.
(Section ??)
1.
Use a 3 mm Hex Wrench to remove Screws
from Side Channels and Side Channel Covers.
2.
Remove Fabric Retainer
Strips from Side Channels.
Please Note:
Do NOT remove the
Bottom Caps from Side Channels.
Section 8 - Mounting Headbox and Side Channels in Recessed Pockets
(Alternate Hardware & Installation Method)
Please Note:
Make note
of left & right covers,
to match up correctly
when re-attaching.
Please Note:
2" U Channel Adaptor option MUST be ordered for the channel to be included with unit —
it is not provided standard. Shade MUST be ordered
⁄
" narrower as well.
Please Note:
Be sure to provide adequate clearance for removal of Roller Assembly during installation and maintenance.
Minimum depth of ceiling pocket is 7
⁄
(159mm)
or sufficient to conceal hem bar.
Please Note:
Installer is responsible
for selecting mounting hardware
appropriate for site conditions.
Please Note:
Specific Fastener
locations determined by installer.
Max. spacing between fasteners:
24"
(610mm)
Please Note:
Make note of left & right
Fabric Retainer Strips, to match up
correctly when re-attaching.
FlexShade
®
Crank-Operated ZIP
page 10 of 16