10
ATTACHING WINDSHIELD MOUNT
1. Remove these two items from packaging:
a. Display Unit
b. Windshield Mount
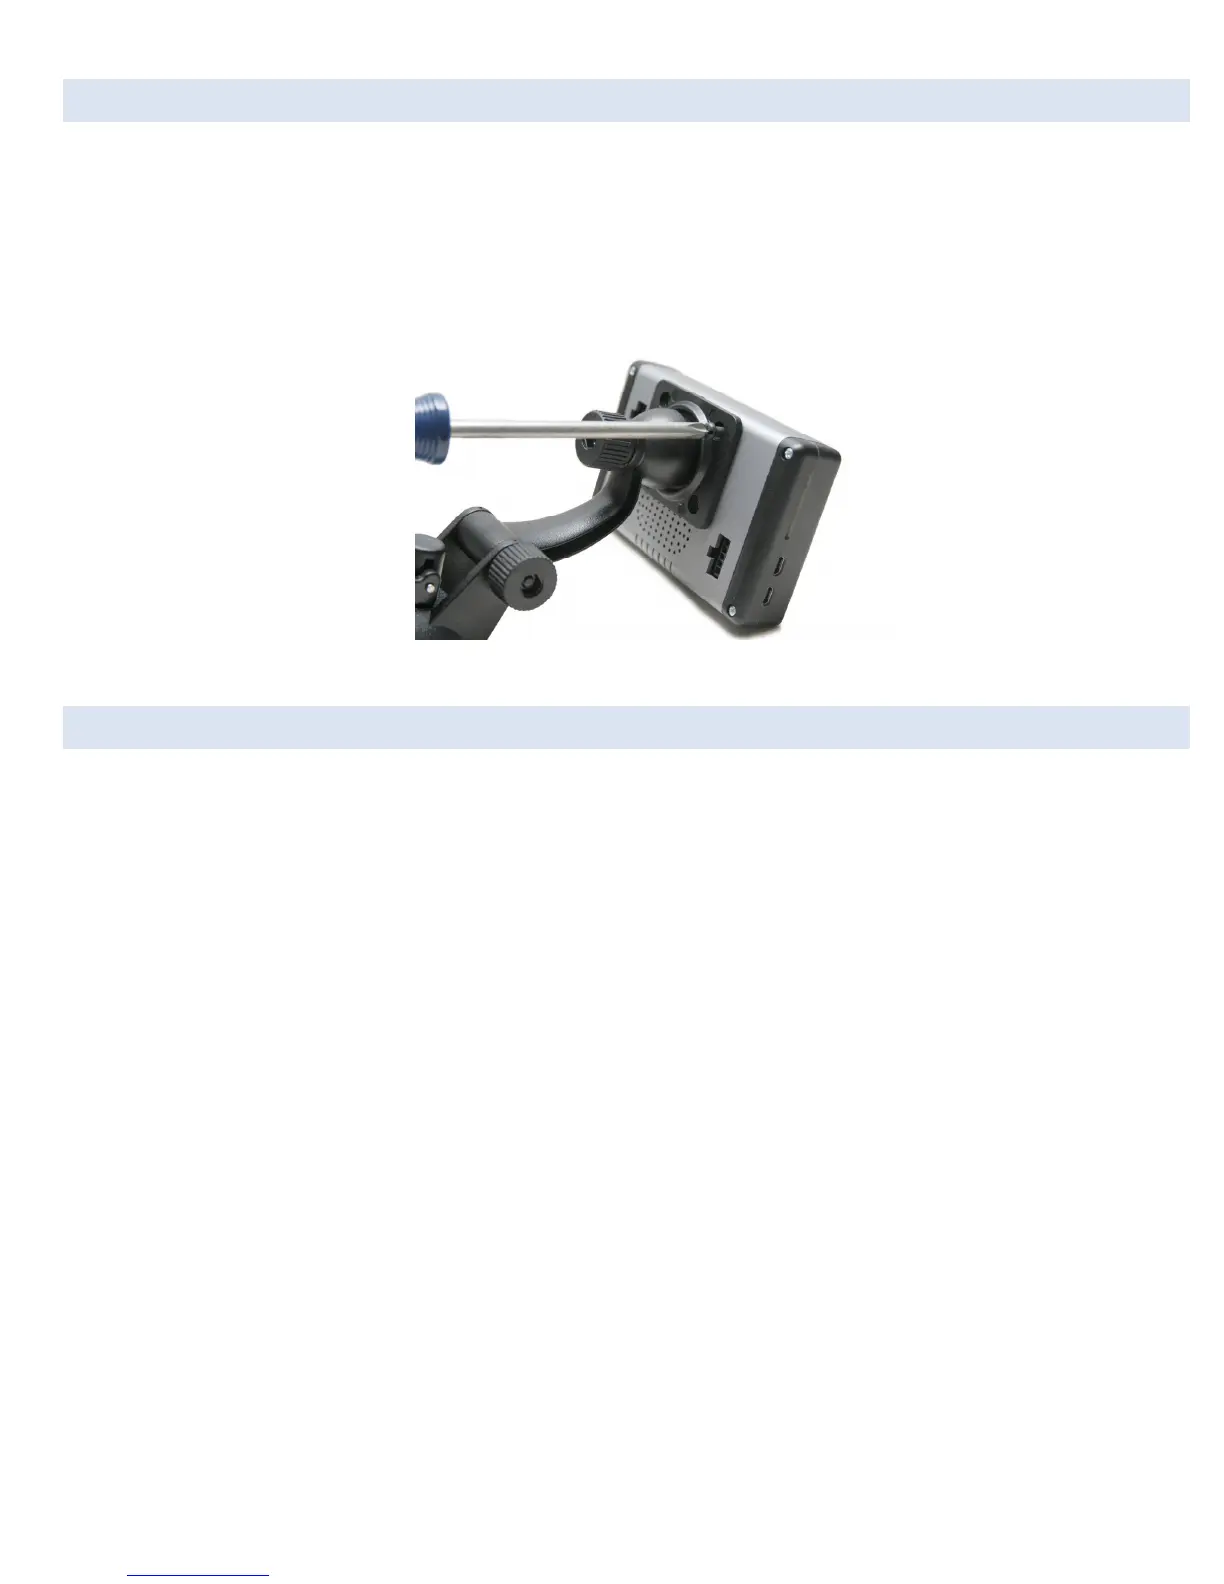
2. Line up the four holes on the windshield mount and thread each of the four screws into the display unit.
3. Using a Phillips head screwdriver, lightly tighten each of the four screws. Note: Over-tightening can possibly damage DashDAQ.
Tighten the screws so they are snug, no more.
Figure 1: Attaching the windshield mount to DashDAQ
WINDSHIELD MOUNTING
Mount DashDAQ on the windshield in a spot that does not obstruct the view of the road or in any way that interferes with the safe
operation of the vehicle.
Mounting Suggestions:
Find the vehicle’s OBDII port. Plug in the DashDAQ OBDII connector. Route the cable safely, (see “Cable Routing” Page 9) and note
where it reaches. Mount the DashDAQ in a spot that does not obstruct view based on where the cable ends.
• Mount the DashDAQ as low to the dashboard as possible.
• Mounting to left or in the middle works well.