- 18 -
4. Basic operation
Performing test operation to check the cutting dimensions
3
3.
Press the SET button. "#" will be displayed, and then the
RUN mode display will appear. The machine is now ready
to run using the cutting dimensions registered under the
number selected in 2. above.
1.
Press the SET button.
A single sheet of paper will be test-cut. Check that it is
cut correctly.
a
Press the START button. Operation will start.
Press the STOP button.
* To stop operation:
See the instructions in "Using the offset adjust mode"
below.
* To temporarily offset the cutting position:
* When the trash box becomes full:
Press the STOP button.
Pull out the trash box, and empty the accumulated paper
scraps from it.
Push the emptied trash box back into the machine, then
press the START button. Operation will restart.
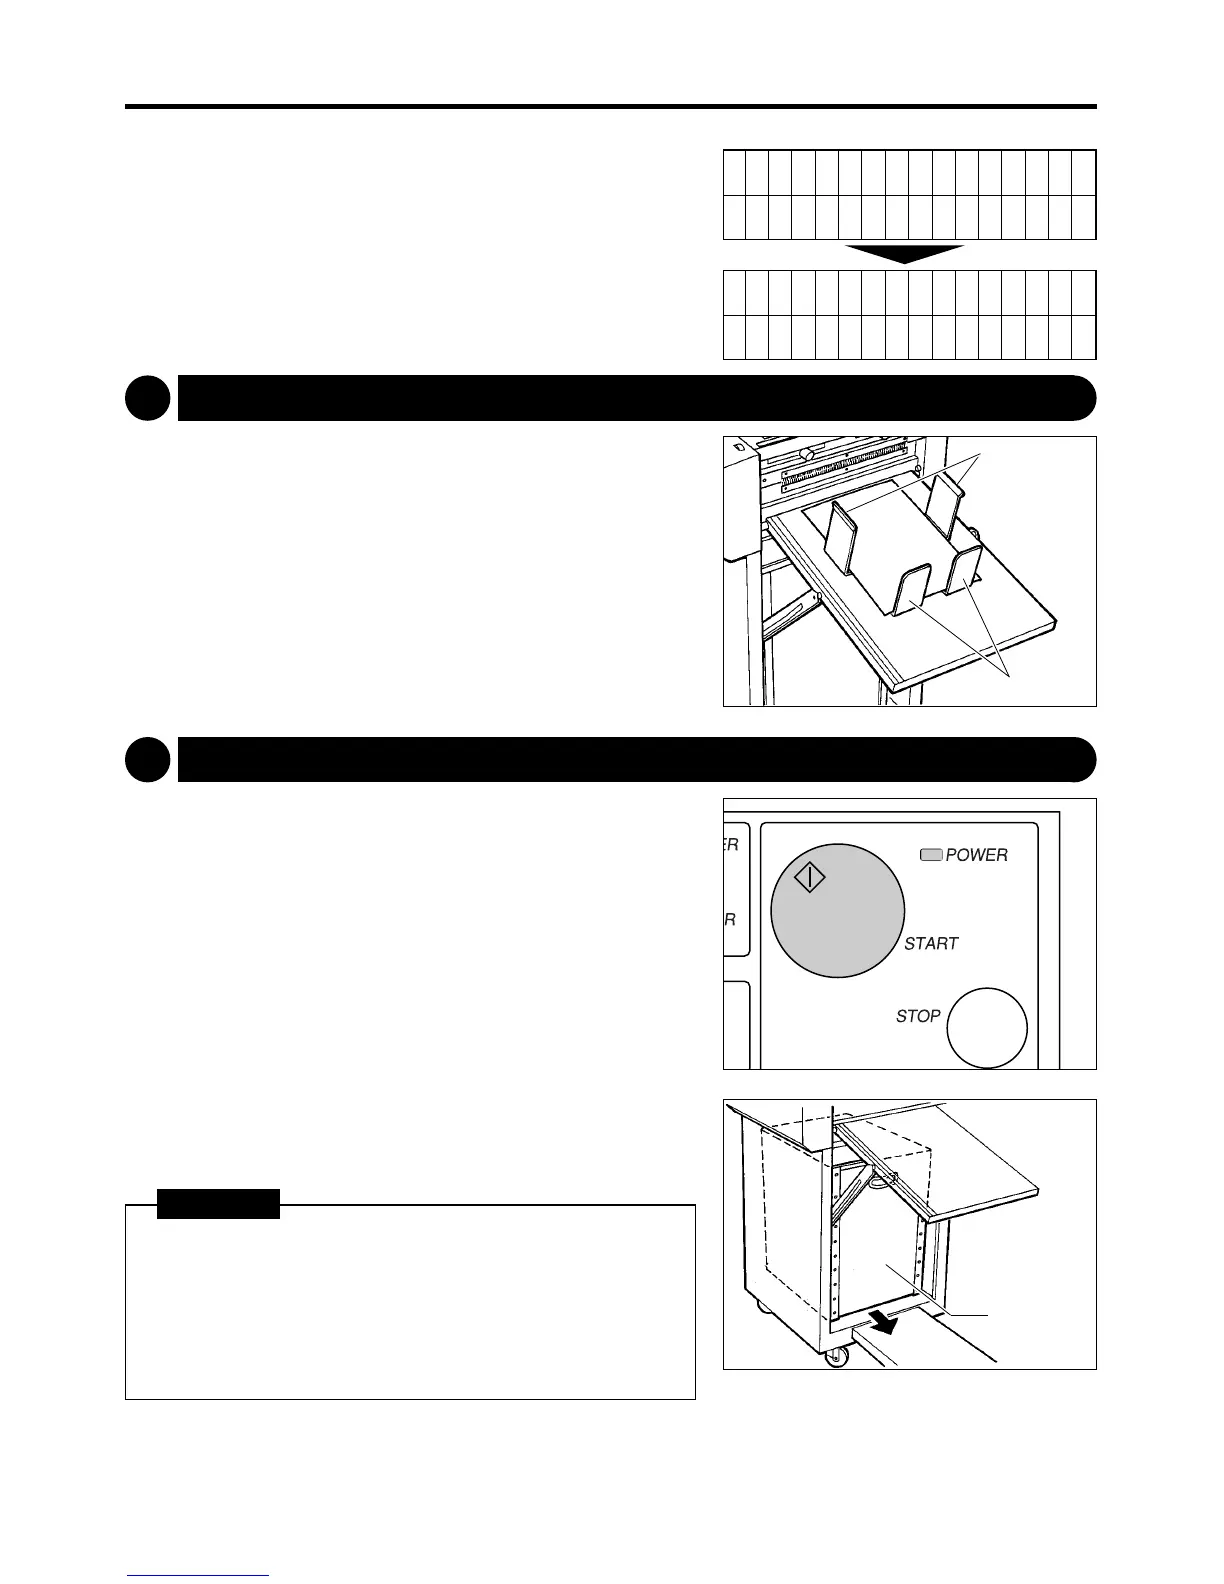
2.
Position the ejection stopper and ejection guides so that
they are 3mm away from the edges of the cut paper.
Starting operation4
¥ Paper jams will occur if the trash box fills up
completely. Empty the trash box before it fills up
completely.
¥ When cutting long paper, do not use the trash box, or
paper jams will result.
IMPORTANT
[Run]
No.01: 3:T 307.0
[Select ] #
No.01: 3:T 307.0
Ejection guides
Ejection stopper
Trash box