18 19
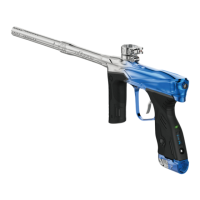
AIR SOURCE ADAPTER
AIR SUPPLY
The MXR should be operated using
air / nitrogen gas only. DO NOT USE
CO2. Tank output pressure should not
exceed 850psi. The recommended
tank output pressure is 450-650psi.
1. GASSING UP THE MXR
Screw your air system into the Slap2
ASA and slide the sled rearward until
it locks in the rear engaged position.
2. DEGASSING THE MXR
Pull down the sled to disengage the
air and until you hear air escape the
Marker.
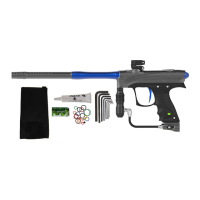
SLAP 2 ASA
PARTS LIST
32 - M2*3mm Flat Head Screw
65 - #008 N70 O-ring
72 - SLAP 2 ASA Body
73 - SLAP 2 ASA Slide Cover
74 - SLAP 2 ASA Push Pin
75 - SLAP 2 ASA Pin Guide
76 - SLAP 2 ASA Cross Pin
SLAP 2 ASA COMPONENTS
88
65
89
72
93
75
74
87
90
91
76
32
73
92
87 - SLAP 2 ASA Locking Clip
88 - SLAP 2 ASA Filter Cap
89 - Copper Air Filter
90 - #003 N70 O-ring
91 - #004 N70 O-ring
92 - #005 N70 O-ring, yellow
93 - #007 N70 O-ring, blue
1
2
All seals in the SLAP2 ASA are accessed through the rear of the where the tank threads in.
DISASSEMBLY
1. Use small pliers or tweezers to pull the airport push pin out of the pin guide.
2. Use a 1/8” allen wrench and unscrew the pin housing form the ASA body.
3. The pin housing contains the primary 005 yellow o-ring. Inspect the o-ring and replace as
needed.
ASSEMBLY
4. After applying lube to the seals, screw the pin housing back into the ASA body
5. Press the push pin back into the pin housing. Make sure the fl at end of the push pin goes
into the housing, and the concave end is visable after installation.
The SLAP2 slide cover only needs to be removed for general cleaning.
TO REMOVE THE SLIDE COVER
1. Move the slide cover to the off position
2. Using a small allen key or pick, reach in slightly off center from the top front area of the ASA
slide cover the slide ASA clip down.
3. With the ASA clip in the down position the slide cover will slide straight off the front of the
Airport body.
4. When you are ready to reattach the Slide cover align the slide bars inside the cover with the
guide grooves and push the cover back and into the ON position. This will automatically move
the ASA clip into the locked position.
WARNING!
EVEN WITH THE AIR SUPPLY REMOVED FROM THE MARKER, GAS MAY STILL BE INSIDE. BE
SURE TO VENT THIS GAS. MAKE SURE THERE ARE NO PAINTBALLS IN THE BREECH AND DRY
FIRE THE MARKER IN A SAFE DIRECTION.
DISASSEMBLE SLAP 2 ASA
AIR SOURCE ADAPTER
DYEPAINTBALL.COMDYEPAINTBALL.COM
NOTE: If the SLAP 2 ASA is diffi cult to activate, please verify your tank output pressure.
 Loading...