Using a Print Server
55
4 Select the printer and then click Add.
The shared printer is added to the Printer List dialog box.
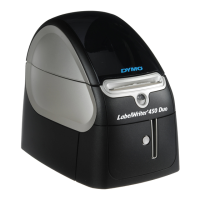
NOTE The LabelWriter Duo printer is actually two printers (Label and Tape), so you must add
both printers separately.
5 Close the Printer List dialog box.
Using a Print Server
You can print over a network to a DYMO label printer connected to a wired or wireless USB print
server.
A DYMO label printer works the same as any other printer connected to a print server and requires
no special configuration. The steps for installing and printing with print servers vary by print server
type and manufacturer. See the documentation provided with the print server for detailed
installation and printing instructions.
DYMO label printers support printing from Windows XP (Service Pack 2), Windows 2000
(Service Pack 2), and Mac OS X.
The following are notes and tips for the print server installation:
• Make sure that your print server supports the type of operating system installed on your
computer (Windows or Mac OS).
• The DYMO LabelWriter DUO printer does not currently support print servers. Contact
DYMO technical support DYMO technical support for more information.
• DYMO label printers with older firmware versions do not support print servers. See Printer
Firmware Versions that Support Print Servers.
In general, during print server installation, if you are prompted for the printer or printer driver,
select the option for installing a printer driver from a disk and insert the DYMO Label Software CD
in the computer’s CD-ROM drive. If the installer doesn’t automatically locate the printer drivers,
navigate to the printer drivers on the CD. If prompted to select your printer, select the printer
physically connected to the print server.
To connect your label printer to a print server
1 Connect one end of a USB cable to the USB connector on your label printer and the other end
to the USB connector on the print server.
2 Connect the print server to your network.
3 Connect power to the label printer and print server.
4 Install and configure the print server on your network.
5 Confirm that you can print to the label printer from the computer you are using to install and
configure the print server.
6 Add the printer connected to the print server to other computers in the workgroup.