6
Inserting the Label Cassette
Your label maker comes with a starter label cassette. The
label maker uses DYMO D1 label cassettes in widths of
6 mm (1/4”), 9 mm (3/8”), or 12 mm (1/2”). Visit
www.dymo.com for information about purchasing
additional label cassettes.
To insert the label cassette
1 Lift the label cassette cover to open the label
compartment. See Figure 4
.
2 Make sure the tape and ribbon are taut across the
mouth of the cassette and that the tape passes
between the label guides. See Figure 5.
If necessary, turn the ribbon rewind spool clockwise
to tighten the ribbon.
3 Insert the cassette and press firmly until cassette
clicks into place. See Figure 6.
4 Close the label cassette cover.
Using the Label Maker for the First Time
The first time you turn on the power, you are asked to
select the language, units of measure, and label width.
These selections remain set until you change them.
You can change these selections by pressing and
then selecting .
To set up the label maker
1 Press to turn on the power.
2 Select the language and press .
3 Select inches or mm and press .
4 Select the width of the label cassette currently in the
label maker and press .
Each time you insert a label cassette into the label
maker, you are prompted to set the label width so the
label maker knows what size label you are currently using.
You are now ready to print your first label.
To print a label
1 Using the keyboard, enter text to create a simple
label.
2 Press . The label prints.
3 Press the cutter button to cut the
label.
4 Remove the backing from the
label to expose the adhesive, and
then attach the label.
Congratulations! You have printed your first label.
Continue reading to learn more about the features
available for creating labels.
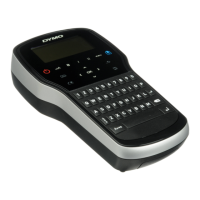
Getting to Know the Label Maker
Become familiar with the location of the feature and
function keys on your label maker. Refer to Figure 1 on
page 4. The following sections describe each feature in
detail.
Power
The button turns the power on and off. After two
minutes of inactivity, the power is switched off
automatically.
When the power is switched off either manually or
automatically, the label text and style settings for the last
label are remembered and displayed when the power is
turned back on.
Label
guides
Figure 5
Ribbon
rewind spool

 Loading...