9
Creating Fixed-Length Labels
Normally, the length of the label is automatically
determined by the length of the text. However, you can
choose to set the length of the label for a specific
application.
When you choose a fixed label length, the size of the label
text is automatically adjusted to fit the label. If the text
cannot be adjusted to fit within the fixed label length, a
message is displayed and you are prompted to print a
variable length label. You can choose a fixed length label
between 40 mm (1.5”) and 400 mm (15”) long.
To set a fixed length
1 Press , select , and then press .
2 Select , and then press .
3 Press or to select Fixed.
4 Press or to select the label length, or use the
numeric keys to enter the label length.
5 Press .
The fixed-length setting remains on until you change back
to variable length.
Aligning the Text
You can align the text to print left or right justified on the
label. The default alignment is centered.
Text alignment settings are only valid for fixed-length
labels. Variable-length labels are always center aligned.
To change the text alignment
1 Press , select , and then press .
2 Select , and then press .
3 Press or to select the text alignment, and then
press .
Creating Two-Line Labels
You can print a maximum of two lines on a label. Only one
line of text can be printed on 6 mm (1/4") labels.
When printing a two-line vertical label, the second line of
text will print to the right side of the first line.
To create a two-line label
1 Type the text for the first line and press .
2 Type the text for the second line.
3 Press to print.
Using Clip Art, Symbols, and Special
Characters
Clip art, symbols, punctuation, and other special
characters can be added to your labels.
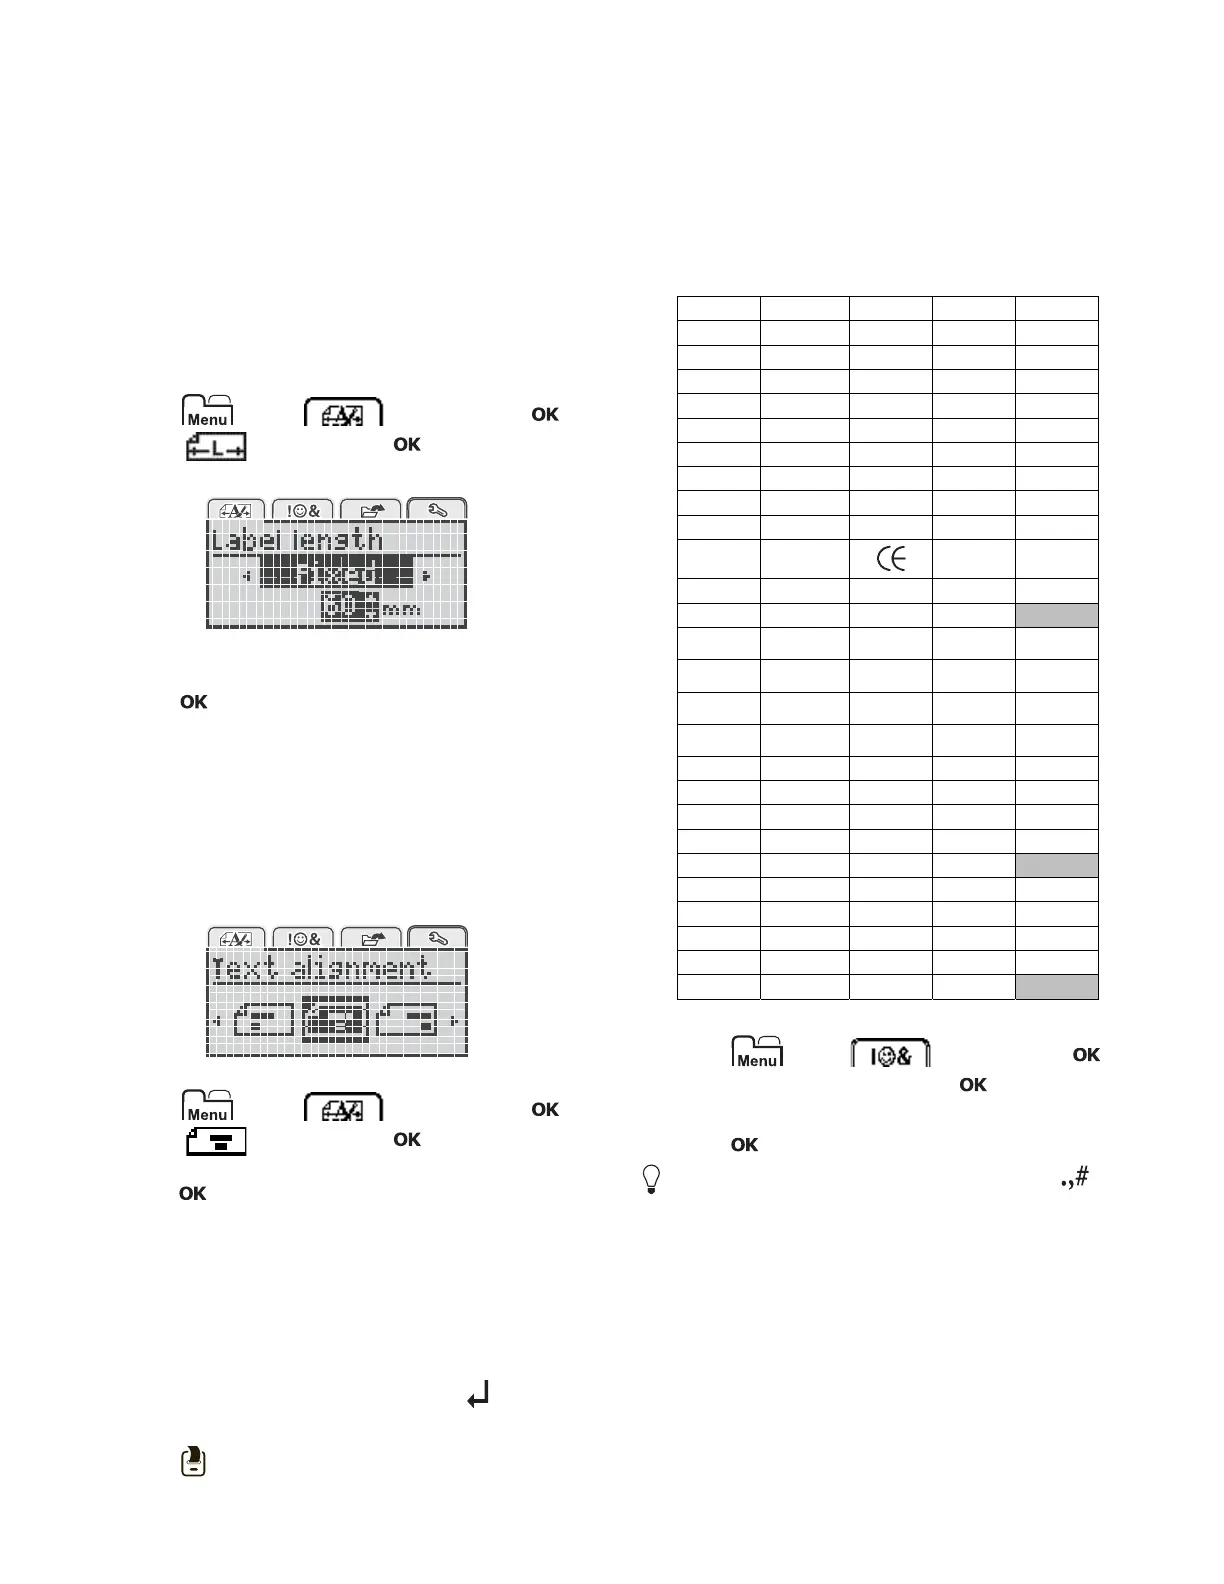
Adding Symbols
The label maker supports the extended symbol set
shown below.
To insert a symbol
1
Press , select , and then press .
2 Select
Symbols
, and then press .
3 Press the navigation keys to select a symbol.
4 Press to add the symbol to your label.
You can quickly add a symbol by pressing the key.
? ! _ - :
' " , . ;
’ ¡ ¿ / \
& @ # % ‰
| ( ) { }
[ ] ° • *
+ - x ÷ √
^ ~ ≈ = ≠
± < > ≤ ≥
€ £ $ ¢ ¥
© ®
™
§
⅓ ⅔ ⅛ ⅝ ⅞
¼ ½ ¾ ⅜
₀ ₁ ₂ ₃ ₄
₅ ₆ ₇ ₈ ₉
⁰
¹² ³
⁴
⁵
⁶
⁷
⁸
⁹
α β γ δ ε
ζ η θ ι κ
λ μ ν ξ ο
π ρ σ τ υ
φ χ ψ ω
Α Β Γ Δ Ε
Ζ Η Θ Ι Κ
Λ Μ Ν Ξ Ο
Π Ρ Σ Τ Υ
Φ Χ Ψ Ω

 Loading...