/3*DV*ULOO
$66(0%/<,16758&7,216
10
Hardware/Parts Used
G M5x10 Screw Qty: 4 pcs
12 Handle Sleeve Qty: 4 pcs
11 Handle Bezel Qty: 4 pcs
10 Door Handle Qty: 2 pcs
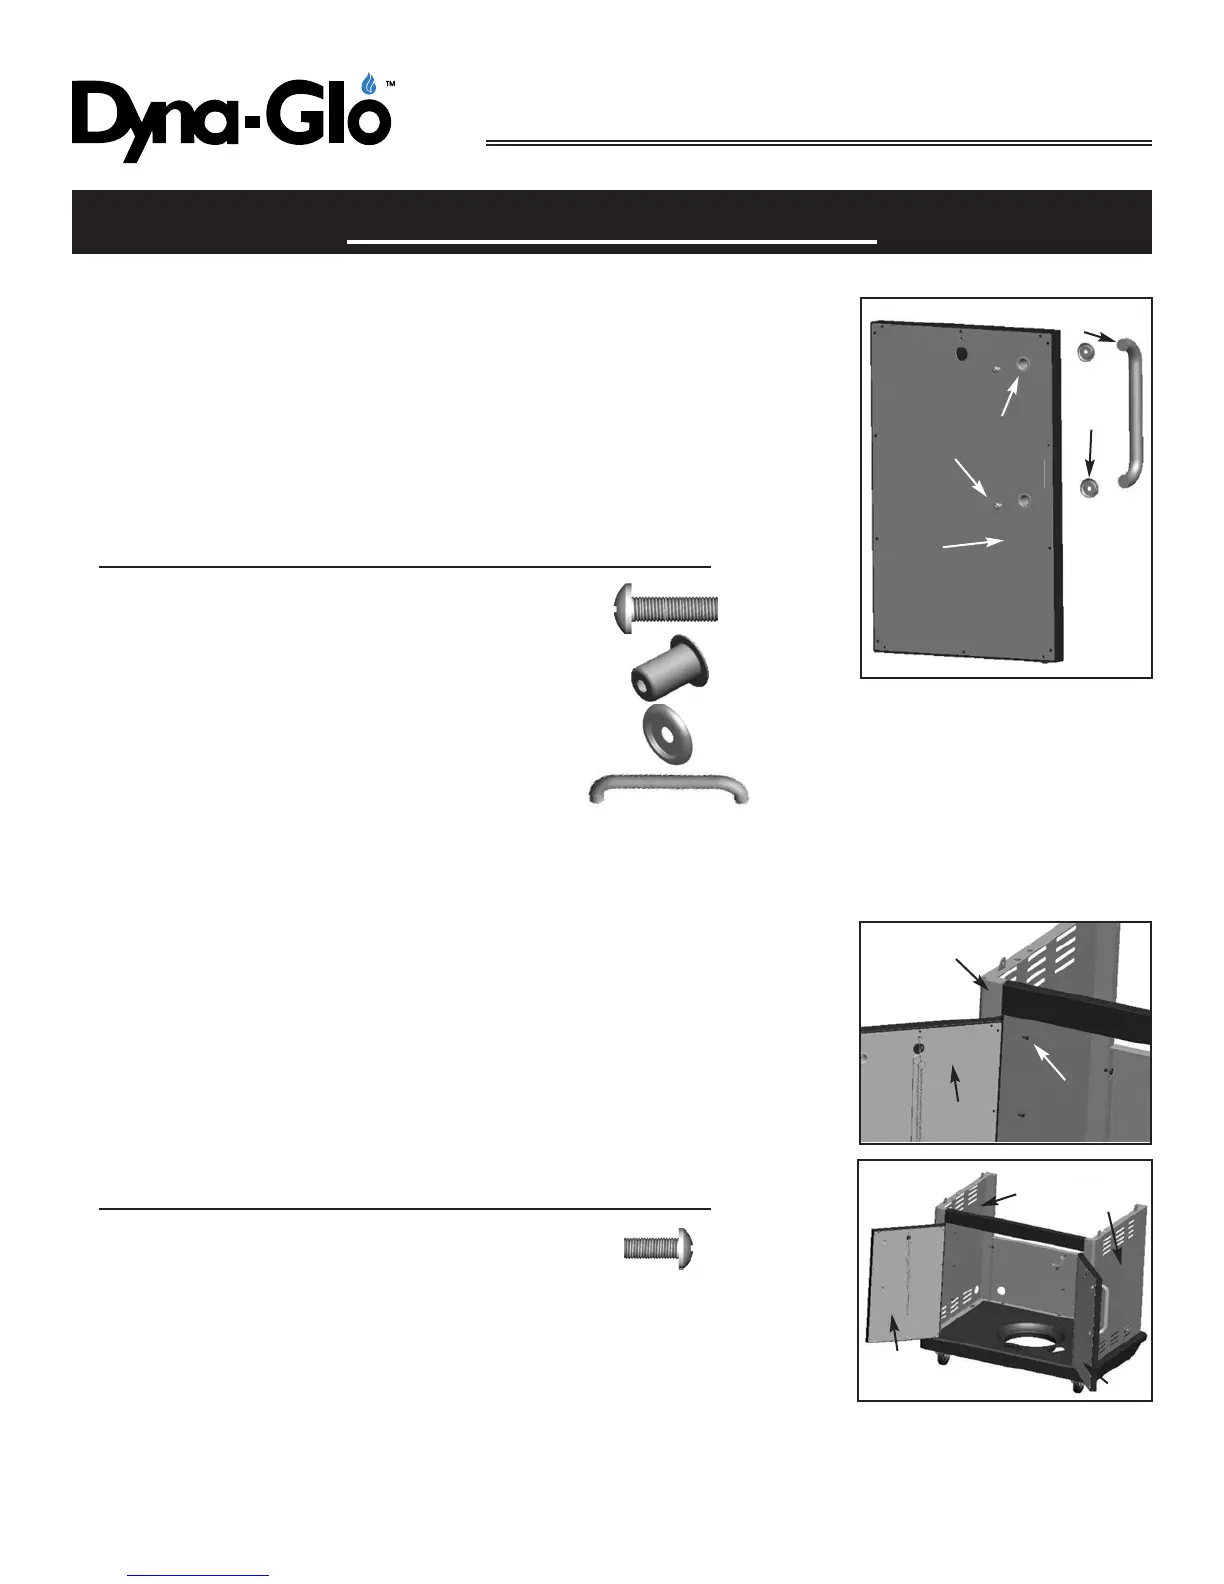
Step 5: Attach the cabinet door handles (10) to the doors.
Remove the cabinet door handle screws (G) and bezels (11)
from cabinet door assemblies. Using 2 of the cabinet door
handle sleeves (12), slip each sleeve into the predrilled holes in
back of right door assembly (9). Align a cabinet door handle (10)
and bezel (11) on the front of the right door assembly (9) and
tighten with 2 screws (G) inserted from the back through the
sleeves. Repeat for left cabinet door assembly (8).
Step 6: Attach the doors.
Align the holes in the hinge of the left door assembly (8) and the
cart left side panel (4), insert 4 screws (D), and tighten. Attach
the right door assembly (9) in the same way. If interference
occurs between the cart left and right doors (8 and 9) when
closing the doors, loosen the 2 screws (A) that secure the cart
left/right side panels (4 and 5) and bottom shelf (1) and adjust
the distance between the left and right door assemblies (8 and 9),
until they clear. Tighten all the screws in the cart.
Hardware Used
D M4x10 Screw Qty: 8 pcs
D
8
11
10
9
G
4
12
8
9
4
5