10 Dynaudio
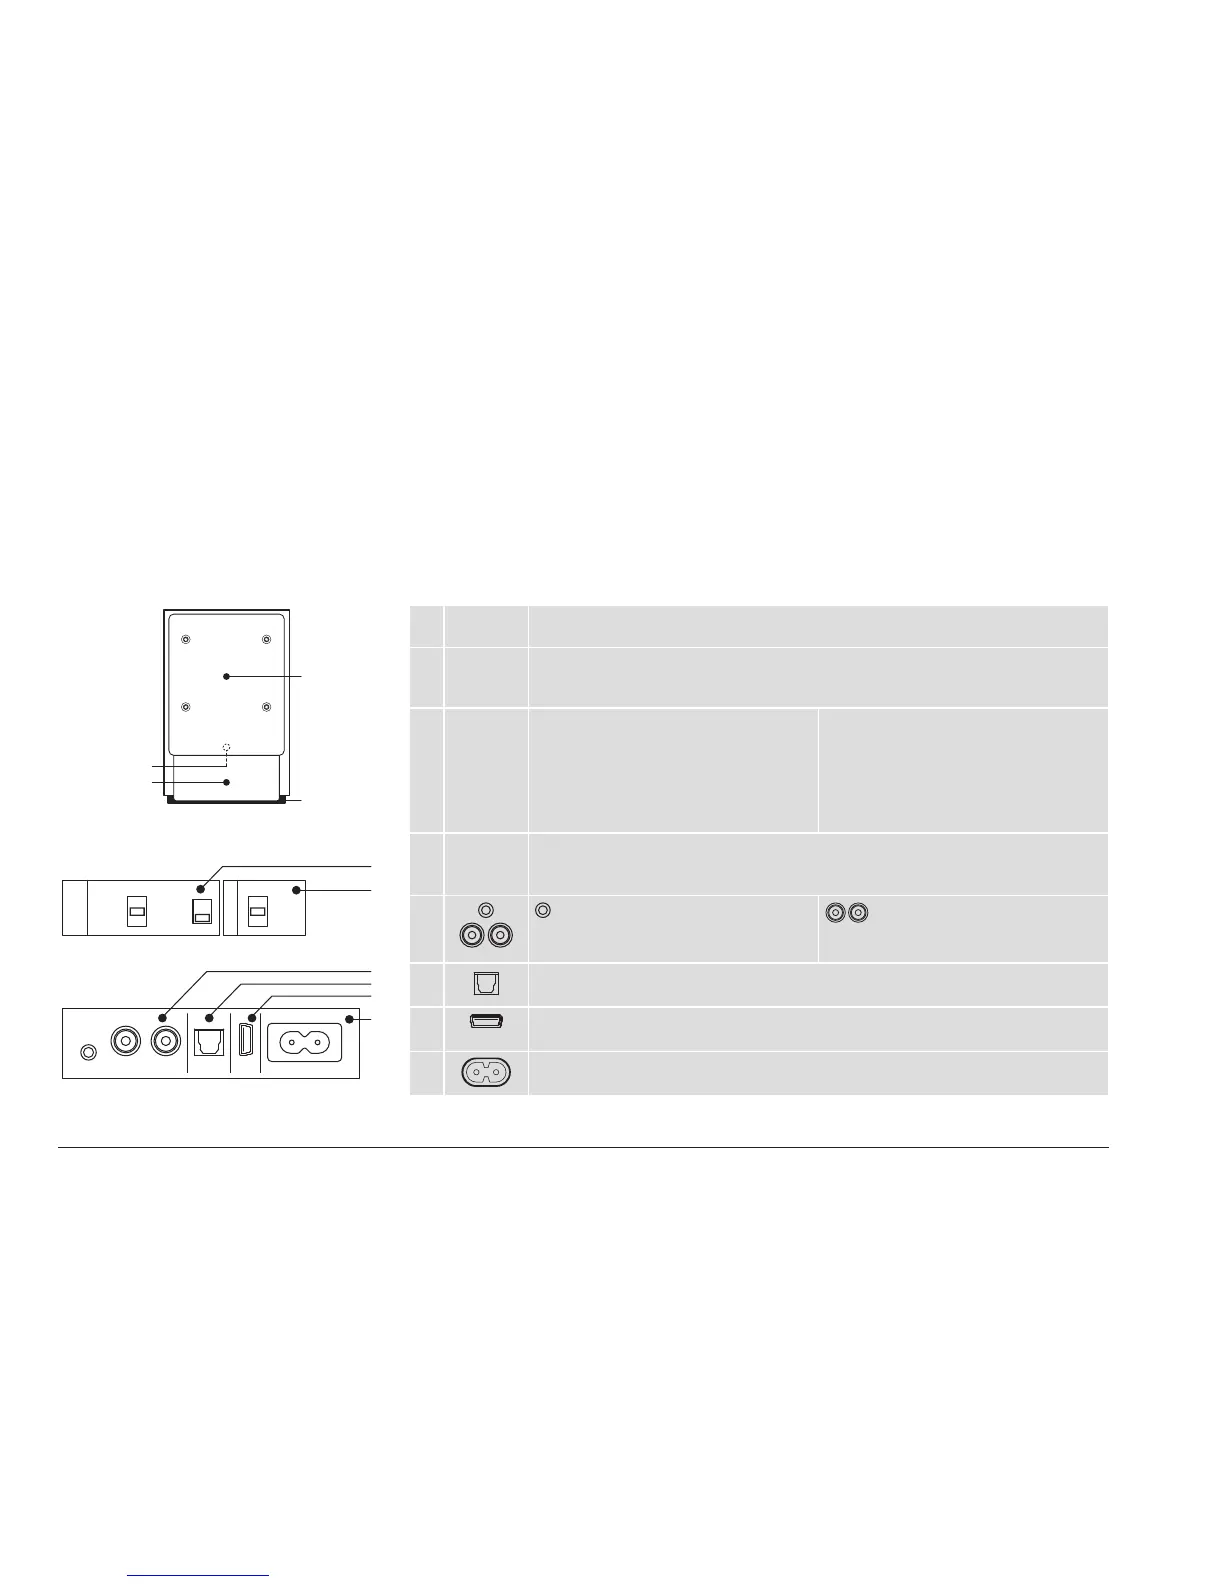
Connections and control elements
This section describes the connections and control elements. Please contact your Dynaudio Xeo
distributor if you have any problems with connection and start-up. Distributor addresses can be found
in the Internet at www.dynaudio.com.
Elements on the rear panel
The Xeo 2 set consists of a master and a slave unit. The master unit carries the audio input interfaces.
A Back
plate
The plate on the back only needs to be unscrewed when mounting a Vesa 100
bracket (see „Accessories“ on page 25).
B Bottom
plate
The plate at the bottom only needs to be unscrewed when mounting a desk stand
or wall bracket (see „Accessories“ on page 25). It can be unscrewed for easier
access to the connections and control elements.
C Speaker
Position
Sound adjustment (depending on the
position of the speakers)
• Neutral = with free-standing
placement
• Wall = if placed near a wall
• Corner = if placed in a corner
Speaker placement
• Left = left speaker for stereo mode
• Right = right speaker for stereo mode
D Speaker
ID / Zone
Selection of audio zones
Speakers assigned to different zones can be controlled separately via the remote
control. The zones are identied as Red, Green, and Blue.
E
Aux In
To connect an analog audio source to
the speaker via mini jack.
Line In
To connect an analog audio source to
the speaker via RCA.
F
Optical In (Toslink)
To connect a digital audio source to the speaker.
G
USB In
For rmware update only.
H
Mains socket
To connect the speaker to the mains voltage.
USB In Mains socket
Aux In Line In
R L
1
Optical In
2 3 4
Neutral
Zone
Red
Green
Blue
Wall
Speaker
Position
Speaker ID
Corner
Left
Right
C
D
E
H
F
G
II (master unit only)
I
II
I
A
B