Home
Dyson
Vacuum Cleaner
DC 23
Service Manual
Page 32
Dyson DC 23 - Page 32
69 pages
Manual
To Next Page
To Next Page
To Previous Page
To Previous Page
Loading...
Servic
e manual
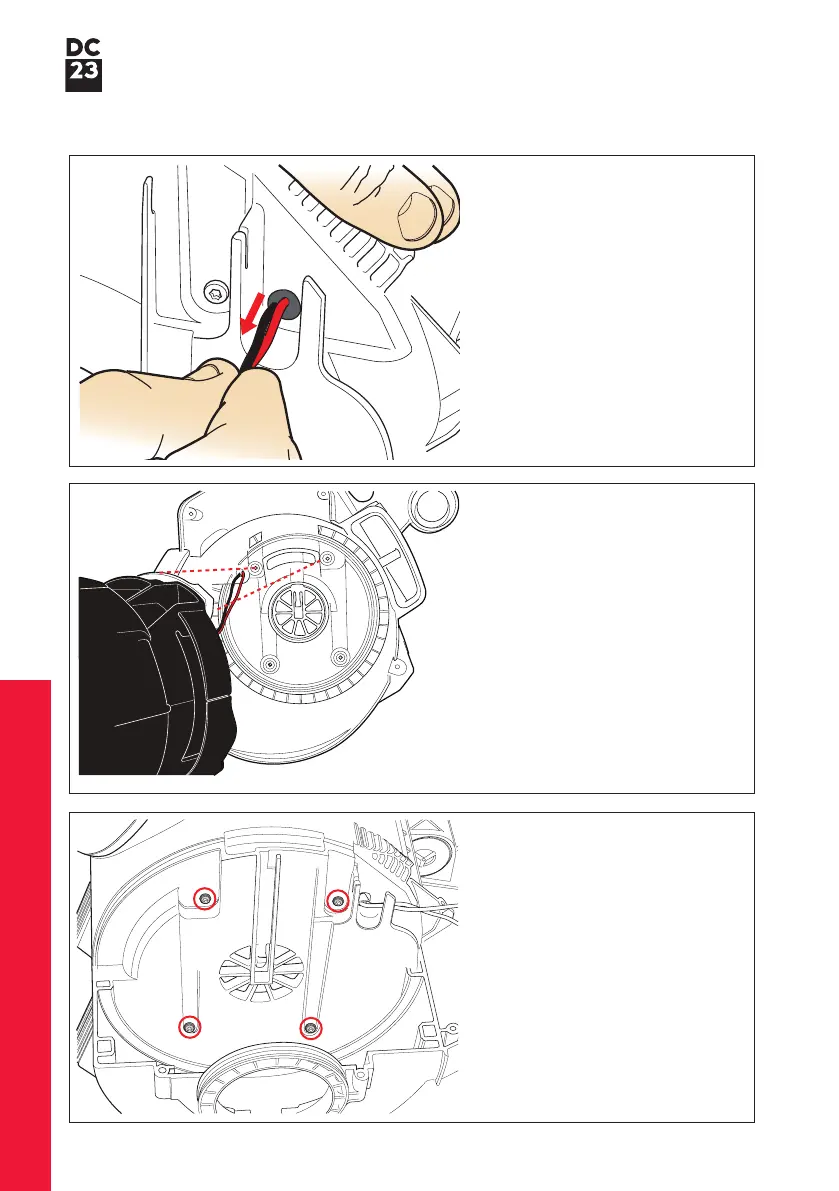
Fitting notes
70
F
it the four T
orx T
-10 screws.
69
Locate the exhaust of the motor
onto the detail in the main
chassis.
68
P
ull the motor wires through the
hole in the main body
. Ensure the
grommet is adequately seated in
the hole.
29
31
33
Table of Contents
Main Page
Table of Contents
3
Electrical Safety Testing
5
Electrical Overview
6
Wiring Schematic Motorhead Variant
7
Electrical Fault Diagnostic - Motorhead Variant
8
Cable Rewind Replacement - Removal
9
Cable Rewind Replacement - Fitting
17
Motor Bucket Assembly Replacement - Removal
25
Motor Bucket Assembly Replacement - Fitting
30
Main Chassis Replacement - Dismantle
35
Main Chassis Replacement - Assemble
40
Sub-Assemblies - bin Assembly
43
Sub-Assemblies - Power Wand Hose Assembly
45
Sub-Assemblies - Power Floor Tool - Dismantle
48
Sub-Assemblies - Power Floor Tool - Assemble
59
Main Body
66
Cyclone and bin Assemblies
67
Wand and Hose Assemblies
68
Power Floor Tool Assembly
69
Other manuals for Dyson DC 23
User Manual
24 pages
Manual
9 pages
Related product manuals
Dyson DC 29
19 pages
Dyson DC 50
12 pages
Dyson DC 40
12 pages
Dyson DC 59
20 pages
Dyson DC 52
44 pages
Dyson DC 58
16 pages
Dyson DC 05
10 pages
Dyson DC 62
52 pages
Dyson DC 35
8 pages
Dyson DC 14
7 pages
 Loading...