43
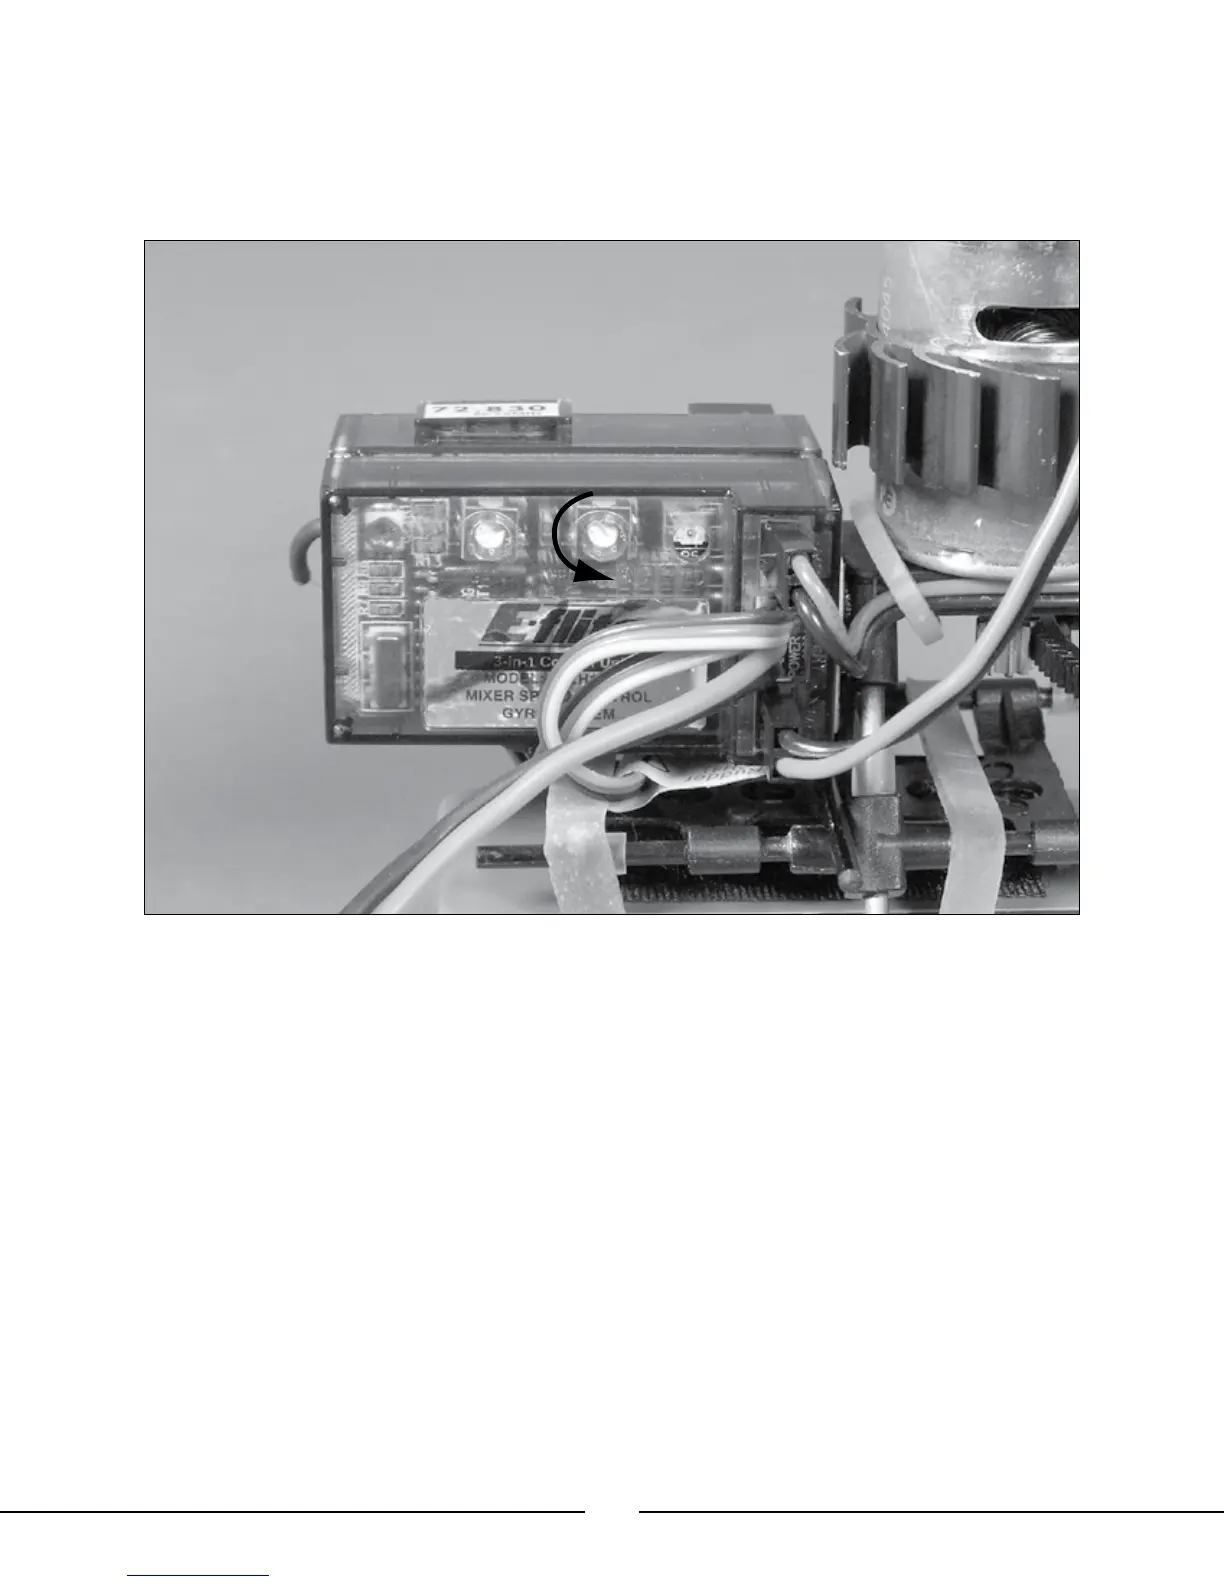
• In order to ensure proper operation and the best possible performance of the heading lock gyro,
it will be necessary to disable the standard rate gyro and mixer in the 3-in-1 control unit. This
is accomplished by turning the proportional mix trimmer pot on the 3-in-1 to the lowest, most
counterclockwise position (-). No adjustment of the gyro gain trimmer pot on the 3-in-1 control unit
is necessary.
• Now that you have completed installation of the heading lock gyro, it will be necessary to set and adjust the
gyro and transmitter for proper response.
• If you are using the G90 gyro, please set it to the following:
Reverse – REV (Reversed)
Servo Mode – STD (Standard)
Note: You must be certain that the G90 gyro is set to “Standard” servo mode to ensure proper
response and performance of the gyro. If it is set to “Digital” servo mode, the electronic speed control
and tail motor will not respond properly to inputs from the gyro or transmitter.
• If you are using a gyro other than the G90, be sure to follow the instructions included with the gyro to ensure
that it has been set properly.
Once you have set the reversing and servo mode for the gyro, it will be necessary to confirm that the settings
are correct before proceeding with test flights and adjustment of the gyro mode and gain settings. To check for
proper response of the tail motor/rotor to gyro and transmitter inputs, please refer to the following:
• First, for added safety during the test, disconnect the main motor power lead from the 3-in-1 control unit, noting
the polarity so that you can reinstall it properly following the test.
 Loading...