12 multiclock - user manual
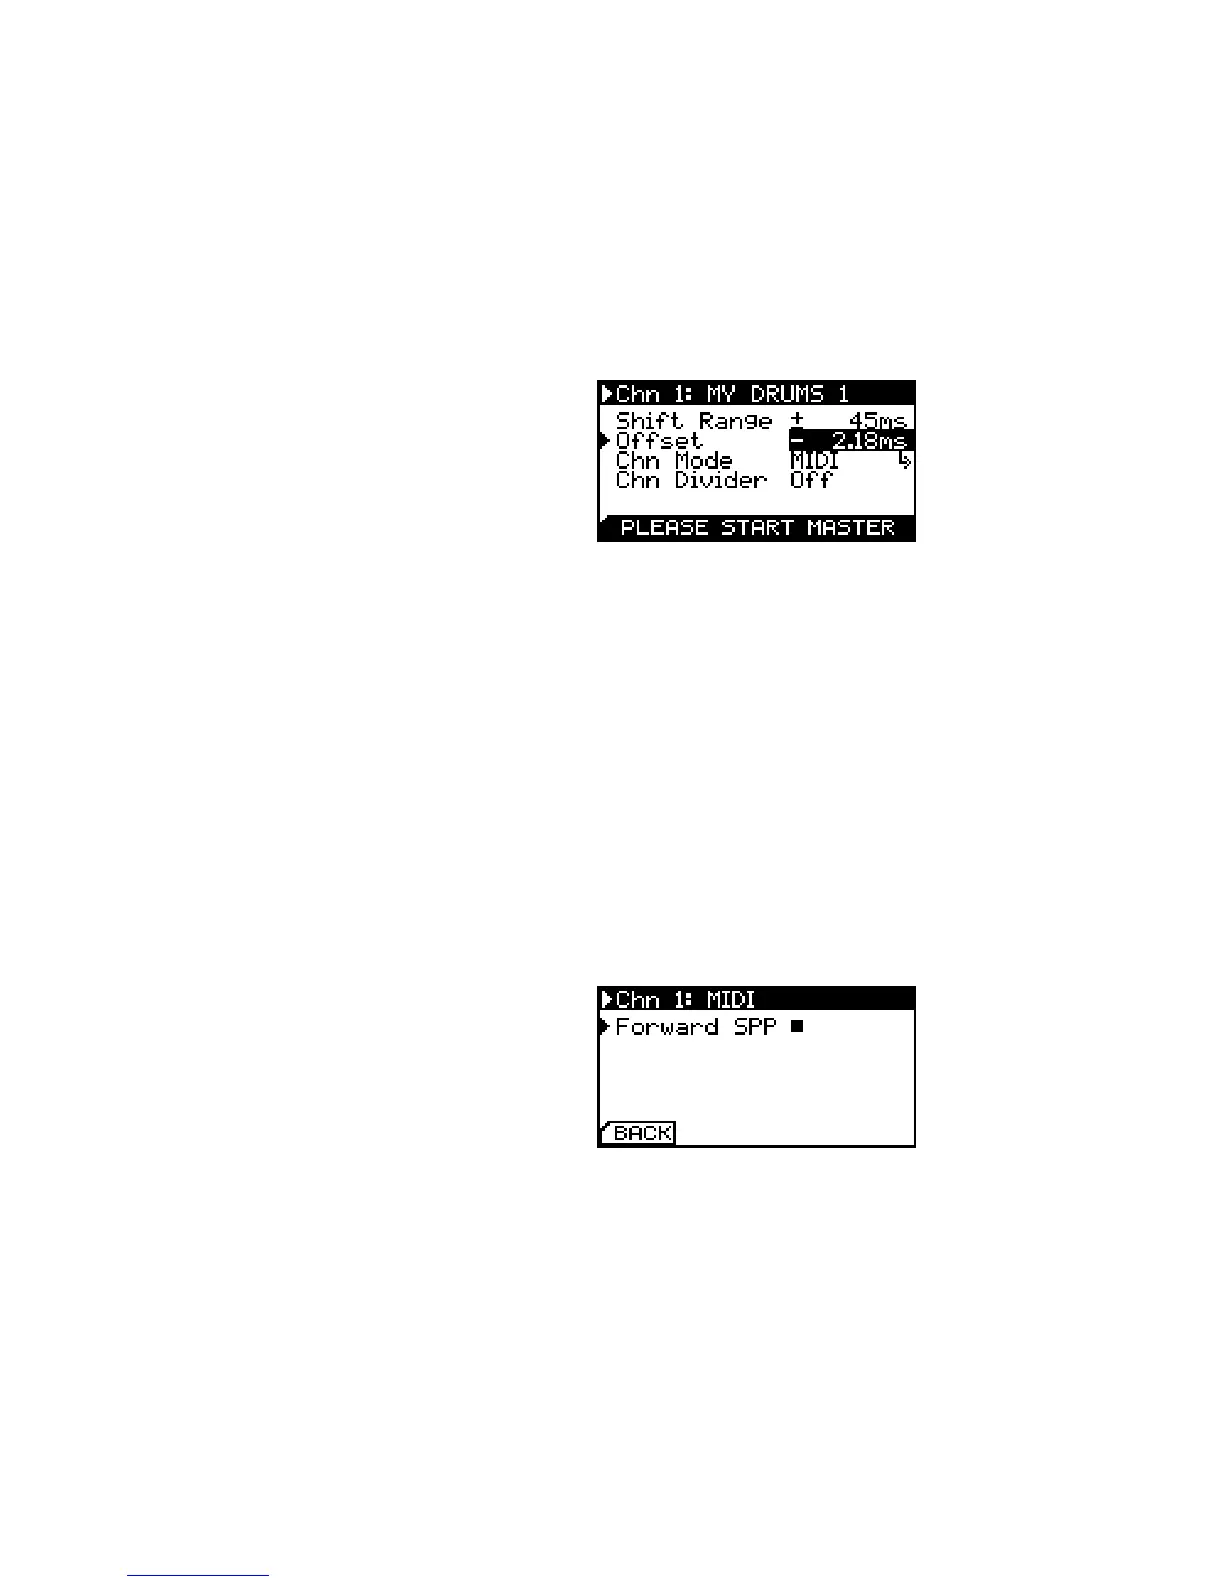
Oset calibration process is initiated by selecting Offset inIt is recommended to program a
simple percussive sound on every full
note of the machines involved in the
calibration process.
the menu. You are asked to start the clock source rst. If you are
using the internal generator, please press the global play button,
otherwise start the master clock.
First, adjust the oset roughly until both sounds play at the
same instant. Afterwards you can get into microtiming by holding
the set channel button and adjust in steps of 20 μs.
Oset Calibration. Used to set the zero
position in time for each channel.
Change the value until you are happy with the result. Stop the
master clock and submit your value by clicking the encoder.
Channel Mode
Each channel can be congured under Chn Mode to emit either
MIDI Clock (MIDI), DIN Sync/sync24 (DIN) or analog modular clock
(Analog).
If MIDI is selected, a sub-menu is available to enable Song Posi-
tion Pointer forwarding. In this mode, song position data received
on either the physical MIDI In or via USB MIDI is forwarded to the
selected channel. Make sure to send SPP information only to one
of the four USB MIDI ports or DIN MIDI In.
Enable MIDI Song Position Pointer
Forwarding for a MIDI output channel.
Correct osets are added to compen-
sate the 1 bar count in for POS/NEG
mode.
Unused channels can further be used as a MIDI controller (Ctrl).
A special function is available on Channel 1 which features an ana-
log LFO on it’s TRS output jack (LFO).