16 multiclock - user manual
The former allows you to shift sync signals back and forth with re-
spect to the masterclock. This implies one bar forerun before all
slaves start when you initiate the master clock. The latter mode
skips this one bar and starts everything as you hit play on the mas-
ter in exchange to allow only positive delays. There is a nice trick
for some cases to circumvent this behaviour, check section 7 (p. 23)
for more information.
The Free Wheel option is implemented for stage. If you set it
to On, the multiclock will automatically turn on it’s internal mas-
terclock generator when the external master clock source is in-
terrupted. This prevents headache when DAWs crash or cables
break during performance. All slaves continue to run and there is
plenty of time to set everything up again. To be able to stop the
multiclock on purpose when Free Wheel is activated and clock
source is set to Audio In, you can send MIDI Stop commands
over any MIDI or USB MIDI input. This way it is ensured that the
multiclock can distinguish between a missing sync signal and an
intended stop.
Remote and MIDI Mapper are treated in sections 6.2 and 5.1
respectively.
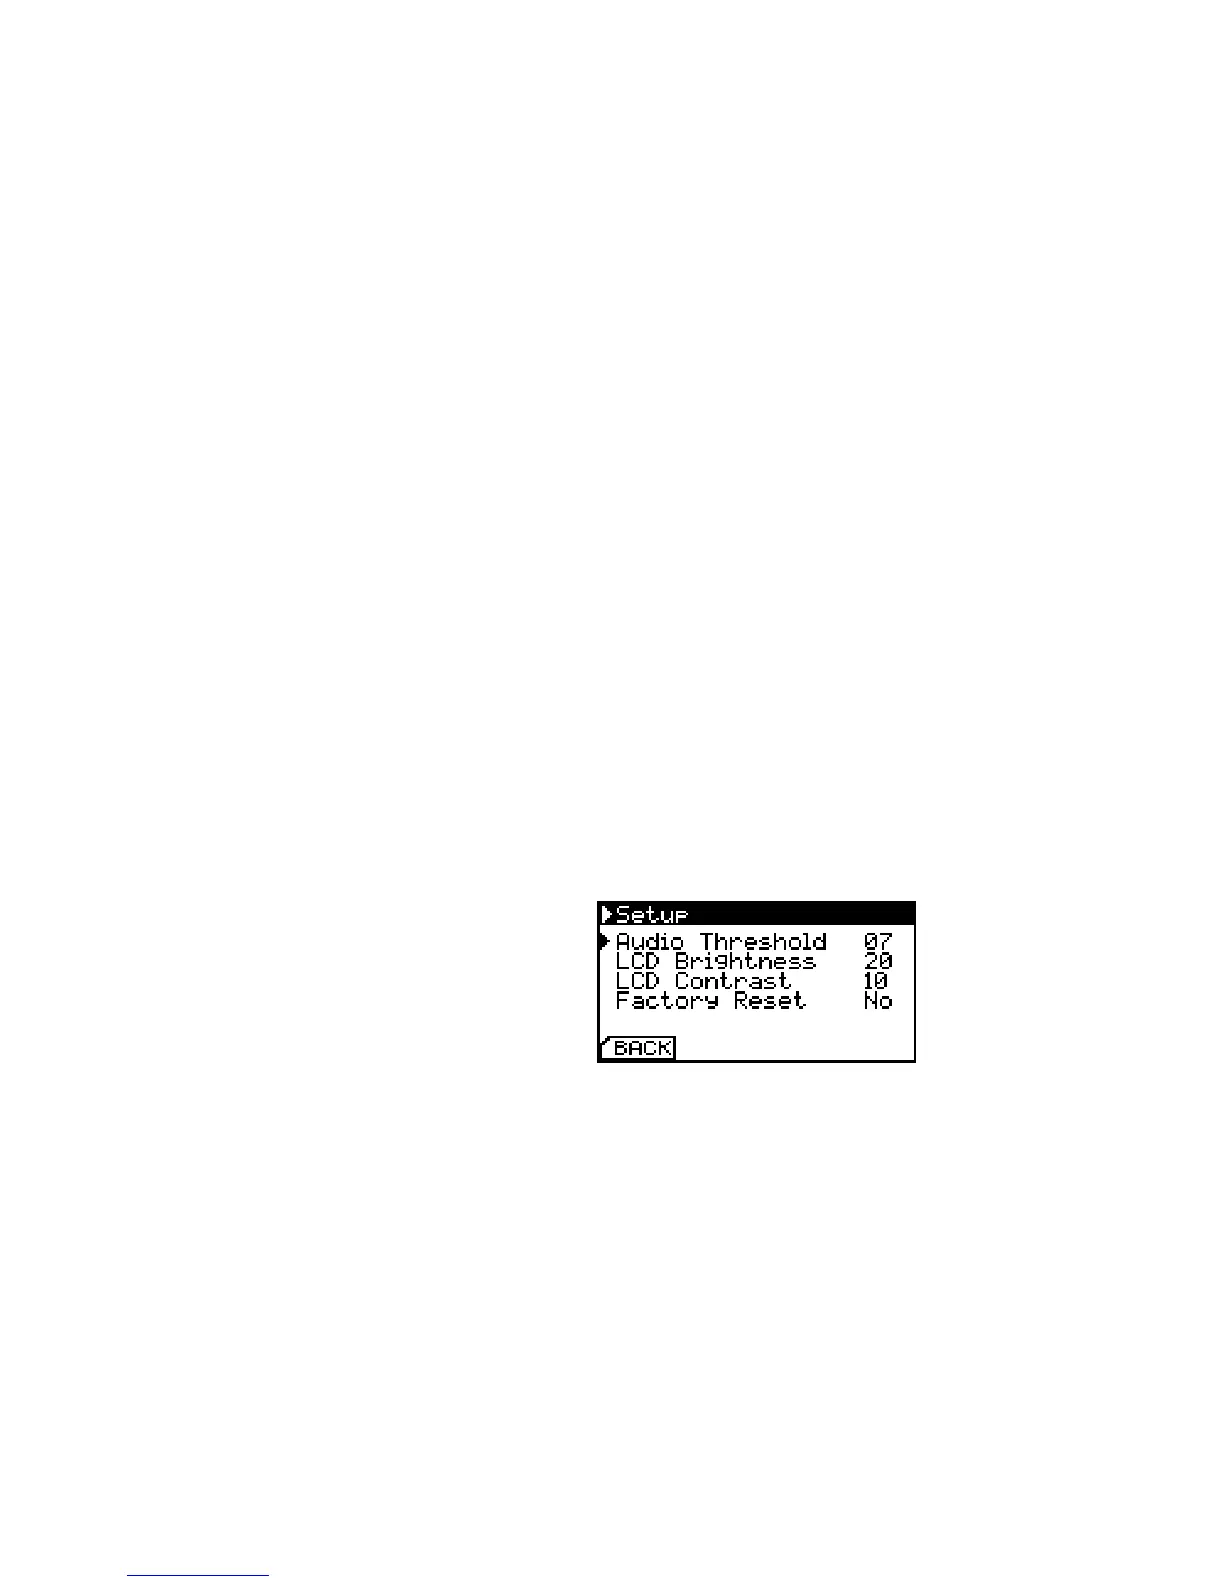
System Setup
Some fundamental system settings can be changed by entering the
sub-menu Setup. LCD brightness and contrast are self explaining.
Factory Reset restores the default conguration and purges all
presets.
Setup Screen. Be careful with ’LCD
Contrast’. The pixels may vanish on the
parameter’s limits!
Audio Threshold can be used to adjust the multiclock’s input
stage to the level of your Audio Sync signal. Under normal circum-
stances, no changes are required here - the default value is 7. See
section 4 (p. 17) for further information.