11. Selecting the Spray Setting
(Perfect Spray 800 spray attachment)
WARNING! Danger of injury! Never pull the trigger guard while adjusting
the air cap.
With the union nut (Fig. 6, 1) slightly unscrewed, turn the air cap (2) to the desired spray
setting position (arrow). Then tighten the union nut.
Fig. 7 A = horizontal at jet for horizontal surfaces
Fig. 7 B = vertical at jet for vertical surfaces
Fig. 7 C = circular jet for corners, edges and hard-to-reach surfaces
12. Selecting the Spray Setting
(I-Spray 1300 spray attachment)
WARNING! DANGER OF INJURY! Never pull the trigger guard while adjusting
the air cap.
2 dierent spray jet shapes can be set by turning the adjustment ring (Fig. 8, 1)
Fig. 9 A = vertical at jet
for horizontal surfaces
Fig. 9 B = horizontal at jet
for vertical surfaces
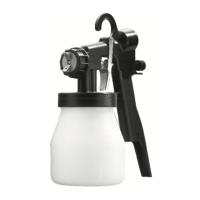
13. Adjusting the Material Volume (Fig. 10)
Set the material volume by turning the regulator on the trigger guard of the spray gun.
- turn to the left lower material volume
+ turn to the right higher material volume
14. Spray Technique
i
The spray result depends heavily on the smoothness and cleanliness of the
surface to be sprayed. Therefore the surface should be carefully prepared and
kept free of dust.
•
Cover all surfaces not to be sprayed.
•
Cover screw threads or similar parts of the target object.
 Loading...