52 Eaton 9395XC UPS 1200kW/1200kVA, 1350kW/1350kVA or 1500kW/1500kVA 164001079—Rev 01
When connecting the battery cables, verify the cables are connected to the correct terminals.
6. Using hardware from the inter-I/O cabinet wiring terminal hardware kit (see Table 7), connect the positive
and negative cable lug connections to the DC Input to I/O terminals. Follow the callout details in Figure 23
to connect the correct cable lug to the proper terminals. See paragraph for wiring and termination
requirements.
7. Using hardware from the inter-cabinet wiring terminal hardware kit (see Table 7), connect phase A, B, and
C cable lug connections to the I/O AC output terminals. Follow the callout details in Figure 23 to connect
the correct cable lug to the proper terminals. See paragraph for wiring and termination requirements.
8. Install the remaining hardware (three washers, conical washers, and nuts) onto the I/O AC Input terminals
designated for the I/O and secure the hardware (see
9. When all wiring is complete, reinstall the safety shield panels removed in previous steps.
44..33..33 MMeecchhaanniiccaallllyy JJooiinniinngg tthhee UUPPSS SSeeccttiioonnss
NOTE Clearance between the I/O and the ISBM/PM sections must be less than 1/2” so that
joining brackets can be installed.
1. Using a forklift with the forks in the front forklift slots, position the I/O section right side against the ISBM/
PM section left side and the front of the cabinet bases are flush with each other. Make sure to align the
connecting bolt holes in the I/O base and the joining strap on the upper ISBM section (see Figure 24 ).
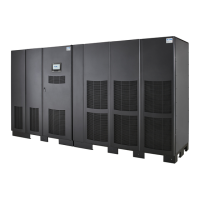
UPS System Installation
 Loading...