Page
34
6.
Blown Limiter Indicator (Refer to Paragraph 3-2 and
Figure
4-16)
4-5
MECHANICAL
INTERLOCKING SYSTEM
DESCRIPTION
A WARNING
DO
NOT
TAMPER WITH THE INTERLOCKING SYS-
TEM.
IF
ANY
PART
OF THE SYSTEM IS
NOT
FUNC-
TIONING CORRECTLY,
HAVE
IT
CORRECTED
IMMEDIATELY. INTERLOCKING
THAT
IS NOT
FUNCTIONING PROPERLY
COULD
RESULT IN
MECHANICAL
AND
ELECTRICAL
EQUIPMENT
DAM-
AGE, SERIOUS
BODILY
INJURY
AND/OR DEATH.
To
increase safety to personnel and the circuits to which
the breaker is connected, the complete unit is equipped
with an automatic mechanical interlocking system. This
interlocking system is effective in various ways in the
four breaker positions: REMOVE, DISCONNECT, TEST
and CONNECT (Figure
4-10).
In
addition, there is an interference interlock described
in Paragraph
3-11.1 used to prevent the insertion of a
circuit breaker into a non-compatible compartment.
The mechanical interlock system serves basic and dis-
tinctive purposes
in
each of the four breaker positions.
The following information describes the interlocking con-
ditions which exist
in
each of the positions. The shutter
referred to in these detailed explanations is the device
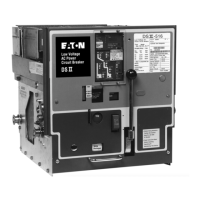
which covers access to the levering device worm shaft
on the front of the breaker (Figure 3-3).
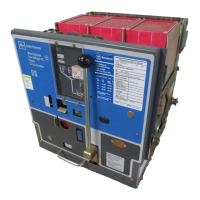
4-5.1 REMOVE POSITION
In
the REMOVE position, the breaker is nearest
to
the
front of the compartment. It is also where the breaker
must be placed when being installed, after having been
completely outside the compartment.
In
this position, the following conditions exist:
1. The breaker is open.
2. The closing springs are discharged. If an attempt is
made to charge the springs, a trip-free operation will
result.
3. The breaker cannot be closed electrically or manual-
ly.
l.B.
694C694-02
4. The breaker can be withdrawn from the compartment
by direct pull. The levering device is not engaged
with the cradle at this point.
5. The levering device arms are in a horizontal position
with their rollers pointing toward the rear (Figure 2-4).
4-5.2 DISCONNECT POSITION
In
the DISCONNECT position, the breaker has moved
only a fraction of an inch into its compartment. This
position is indicated by the position indicator on the front
of the breaker (Figure 3-3).
In
this position, the following conditions exist:
1. The breaker is held in its compartment, since the lev-
ering rollers lowered into the slots in the compart-
ment's cradle arms.
2. The shutter closes over the levering device hex shaft.
3. The shutter may be locked closed and the breaker
held trip-free with a padlock, thus locking it
in
its
compartment. Padlocking provisions are described
later in this section.
4. Both primary and secondary disconnect contacts are
separated.
5. The breaker is open.
4-5.3 TEST POSITION
In
the TEST position, the breaker is at a point that is in
between the DISCONNECT and CONNECT positions,
as indicated the drawout position indicator. The main
disconnecting contacts are sufficiently
separated to per-
mit safe operation of the breaker. The secondary con-
tacts are now made up.
In
this position, the following conditions exist:
1. The breaker arrives in this position, whether being
inserted
or
withdrawn, with its contacts open. Its clos-
ing springs can be either charged
or
discharged
when coming from the CONNECTED position.
2. After the levering crank is removed, it is possible to
close and trip the breaker both manually and electri-
cally.
3. Just before the breaker arrives in the TEST position
from the DISCONNECT position, the secondary con-
tacts make up and the spring-charge motor on power
Effective
07
/97
Courtesy of NationalSwitchgear.com
 Loading...