2.1.3
Connect a Protective Device to a PC via Ethernet (TCP/IP)
It is only possible to establish an Ethernet TCP/IP connection if the protective device features
an Ethernet connector.
• Connect the Ethernet interfaces of the protective device and the PC with a common•
Ethernet network.
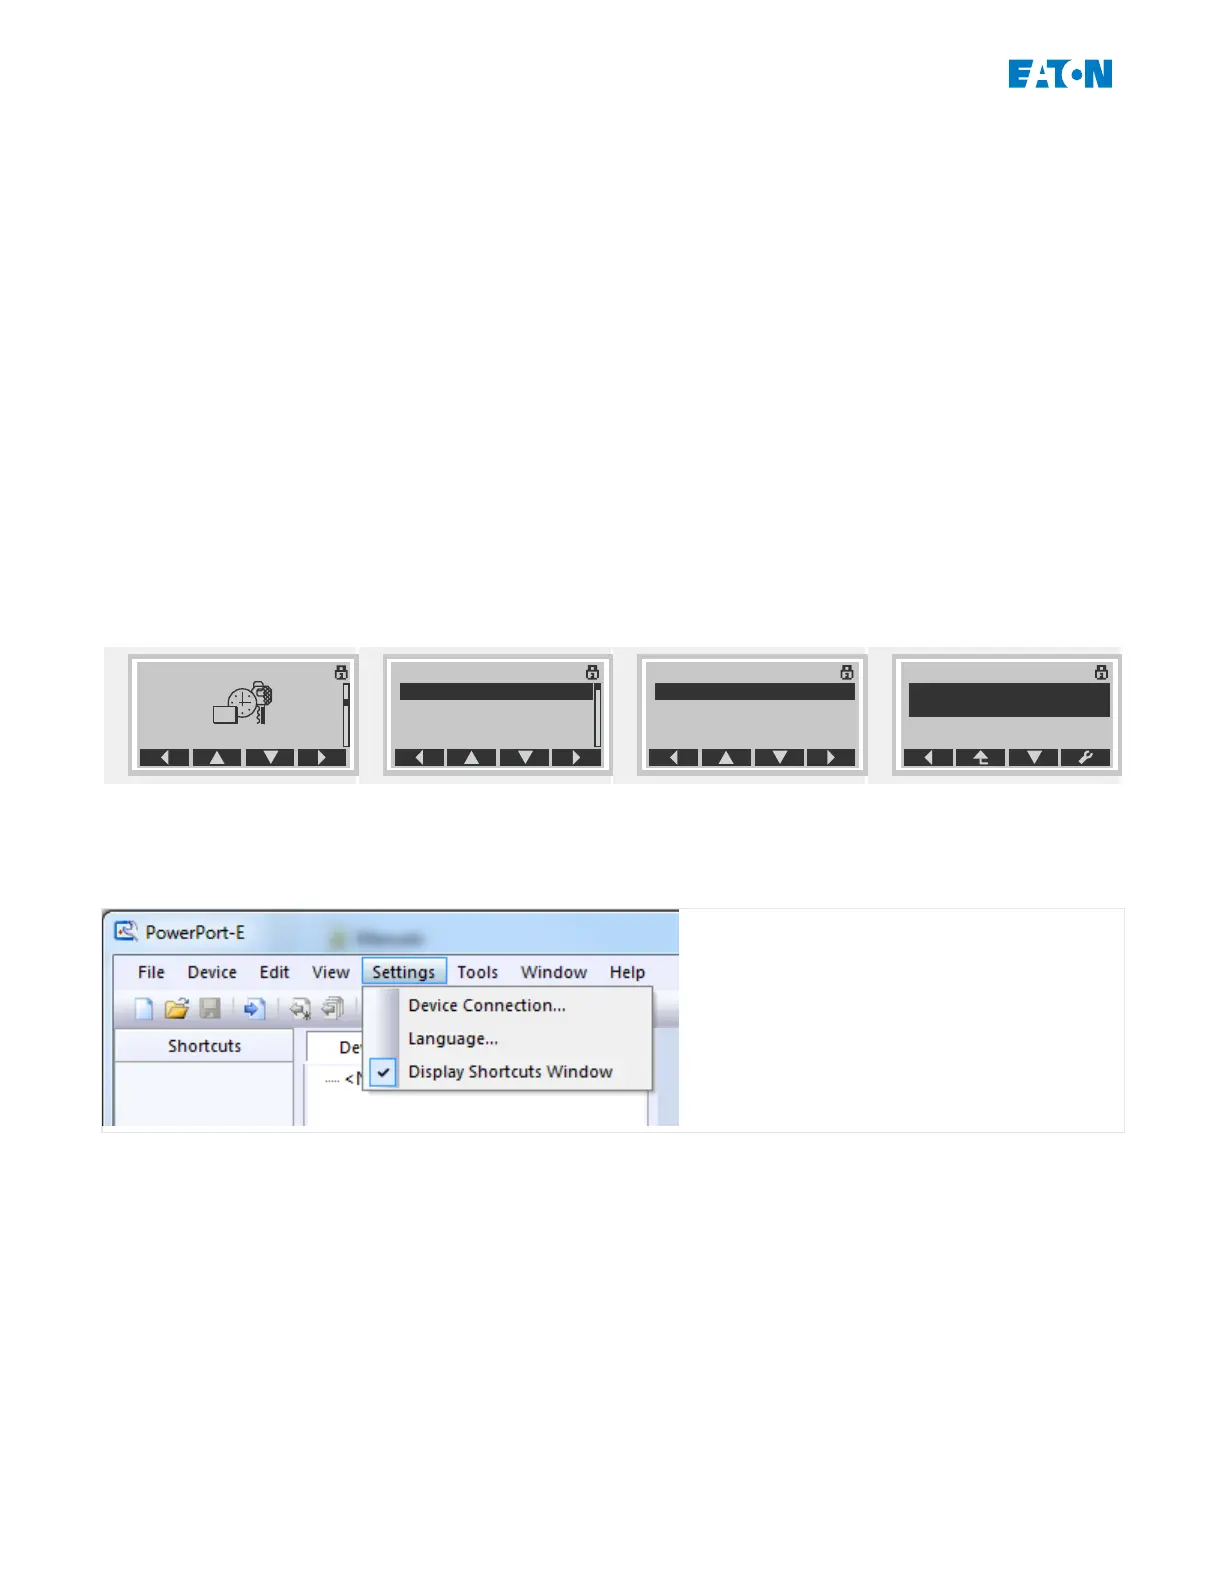
• Set (or check) the TCP/IP parameters on the HMI panel of the protective device.•
These are accessed via the following menu path:
[Device Para / TCP/IP / TCP/IP cong]
First, set »TCP/IP« = “Active”.
Then set the »IP address«, »Subnet mask« and the »Default gateway«. (The values
shown below are only an example.)
The values to be entered are dependent on the individual TCP/IP network where the
protective device is connected. If in doubt, ask your network administrator.
SmartV_Z11
Device Para
Time
Version
TCP/IP
SmartV_Z12
TCP/IP
Advanced Settings
TCP/IP config
SmartV_Z13
TCP/IP config
TCP/IP
Active
• Start PowerPort-E.•
•
In the “Settings” menu select the menu item “Device Connection…”
•
• Select “Ethernet Connection” in the dialog. Then enter the TCP/IP address of the•
protective device into the input eld.
16 www.eaton.com E-Series Family Quick Start Guide
2 Quick Start – Operating Software PowerPort-E
2.1.3 Connect a Protective Device to a PC via Ethernet (TCP/IP)

 Loading...