6
Before proceeding with installation, plan all wiring and cable routing. Select the mounting location for the lightbar on a at,
smooth surface and center the unit across the width of the vehicle. The mounting location for the lightbar should be chosen
such that the lightbar is level and visibility to approaching trafc is optimized. Mounting should be such that there is no less
than ½”/12.7mm clearance between the roof and the lightbar at any point. Both the height and angle of the mounting feet
can be adjusted slightly if necessary using the bolts indicated opposite.
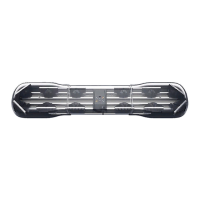
MOUNTING
Permanent Mounting
Determine the location of the lightbar, and the best
route for the wiring.
Determine the position of the mounting feet and drill the
5/16”/7.8mm - 11/32”/8.7mm diameter mounting holes
accordingly, if needed. The spacing of the mounting
feet from left to right is adjustable. It is suggested that
the positioning of the feet be symmetrical and near the
curved edges of the roof where the roof is strongest.
Ideally, the outermost holes on the feet should be used
for installation. The inner holes on the feet match the
hole locations for ECCO 10 and 15 Series lightbars and
can be used when one of these lightbars has been
CAUTION
When drilling into any vehicle surface, make sure that the area is free from any electrical wires, fuel lines, vehicle upholstery, vehicle
support members, etc. that could be damaged.
previously installed.
Mount the lightbar, with the bolts going through the
holes drilled in step 2 (refer to diagram), routing the
wire as planned in step 1. See the Wiring section (on
page 10) of this manual for further wiring instructions.
Install appropriate washers and nuts and secure the unit.
The use of sealing compound is recommended.
Note: The cable exits the lightbar from the center of the
chassis, and can be pressed into the channels on the underside
of the chassis to route it toward the left or right of the vehicle.
1
2
3