Getting Started
3
Watching TV
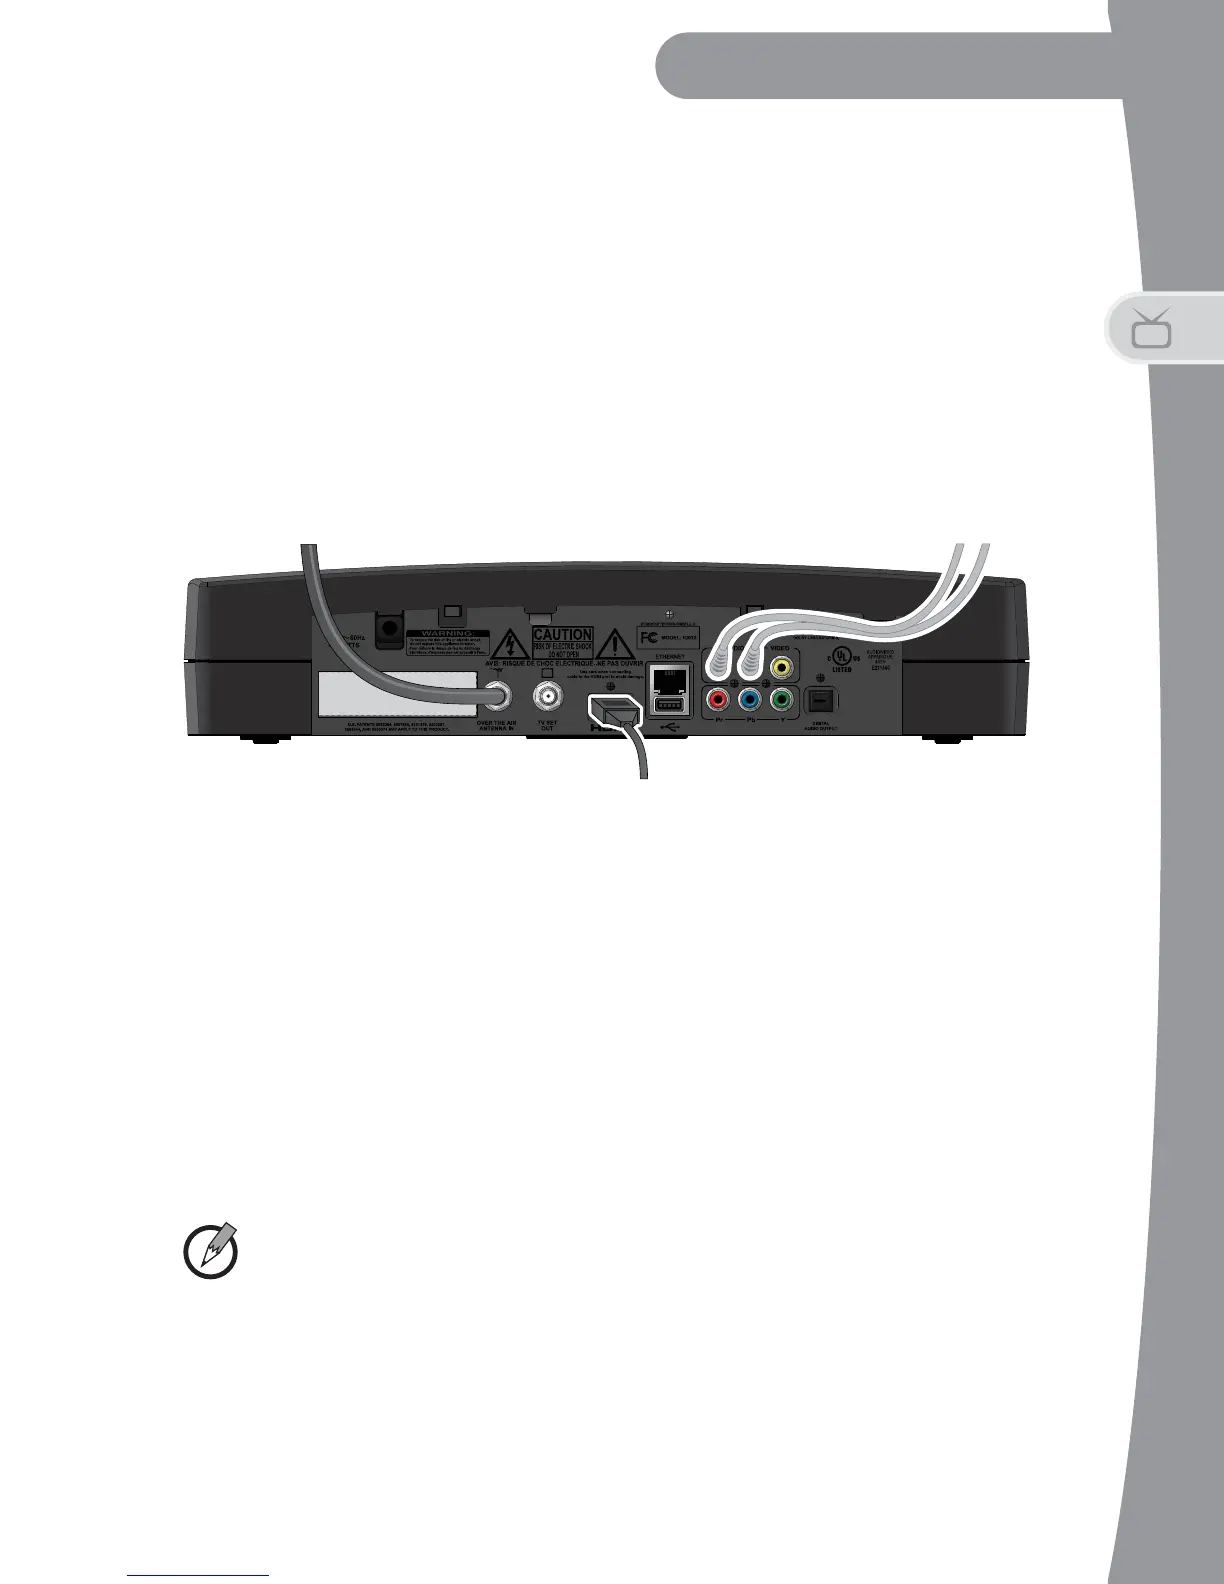
- RCA connectors for both stereo audio and video, you can use RCA
cables to connect from the R-A
UDIO-L--VIDEO connection (RCA-
type) on your DTVPal DVR to your TV’s video input (go to step 6).
-an A
NTENNA IN connection that uses a coaxial cable, you can
connect it to the TV S
ET OUT connection on the DTVPal DVR, and it
will provide both standard video and mono audio on RF channel 3
or channel 4 (go to step 7).
4. To connect your DTVPal DVR to your TV using a HDMI cable:
- Connect a HDMI cable between the HDMI connection on the
DTVPal DVR and the HDMI connection on your HDTV or monitor.
- Plug the power cord of the DTVPal DVR into an electrical outlet.
Make sure your TV is also plugged in to power and turned on.
- The DTVPal DVR first displays a startup screen.
- Confirm that you are getting a picture from the DTVPal DVR.
Consult your HDTV user’s guide if you need to change your
HDTV’s settings to display from the HDMI input.
Note: In most cases, connecting the HDMI cable provides plug-and-
play control of the monitor’s display resolution and other settings. How-
ever, your HDTV may require selecting a different format to display
video from the DTVPal DVR during system setup.
HDMI Connection
To Television
Connection
From Antenna
Optional RCA-type
Audio Connection