Getting Started
5
Watching TV
- Turn up the volume on your HDTV and confirm you have sound. If
you don’t have sound, verify the connections for both left and right
RCA-type audio cables on the back of your DTVPal DVR and TV.
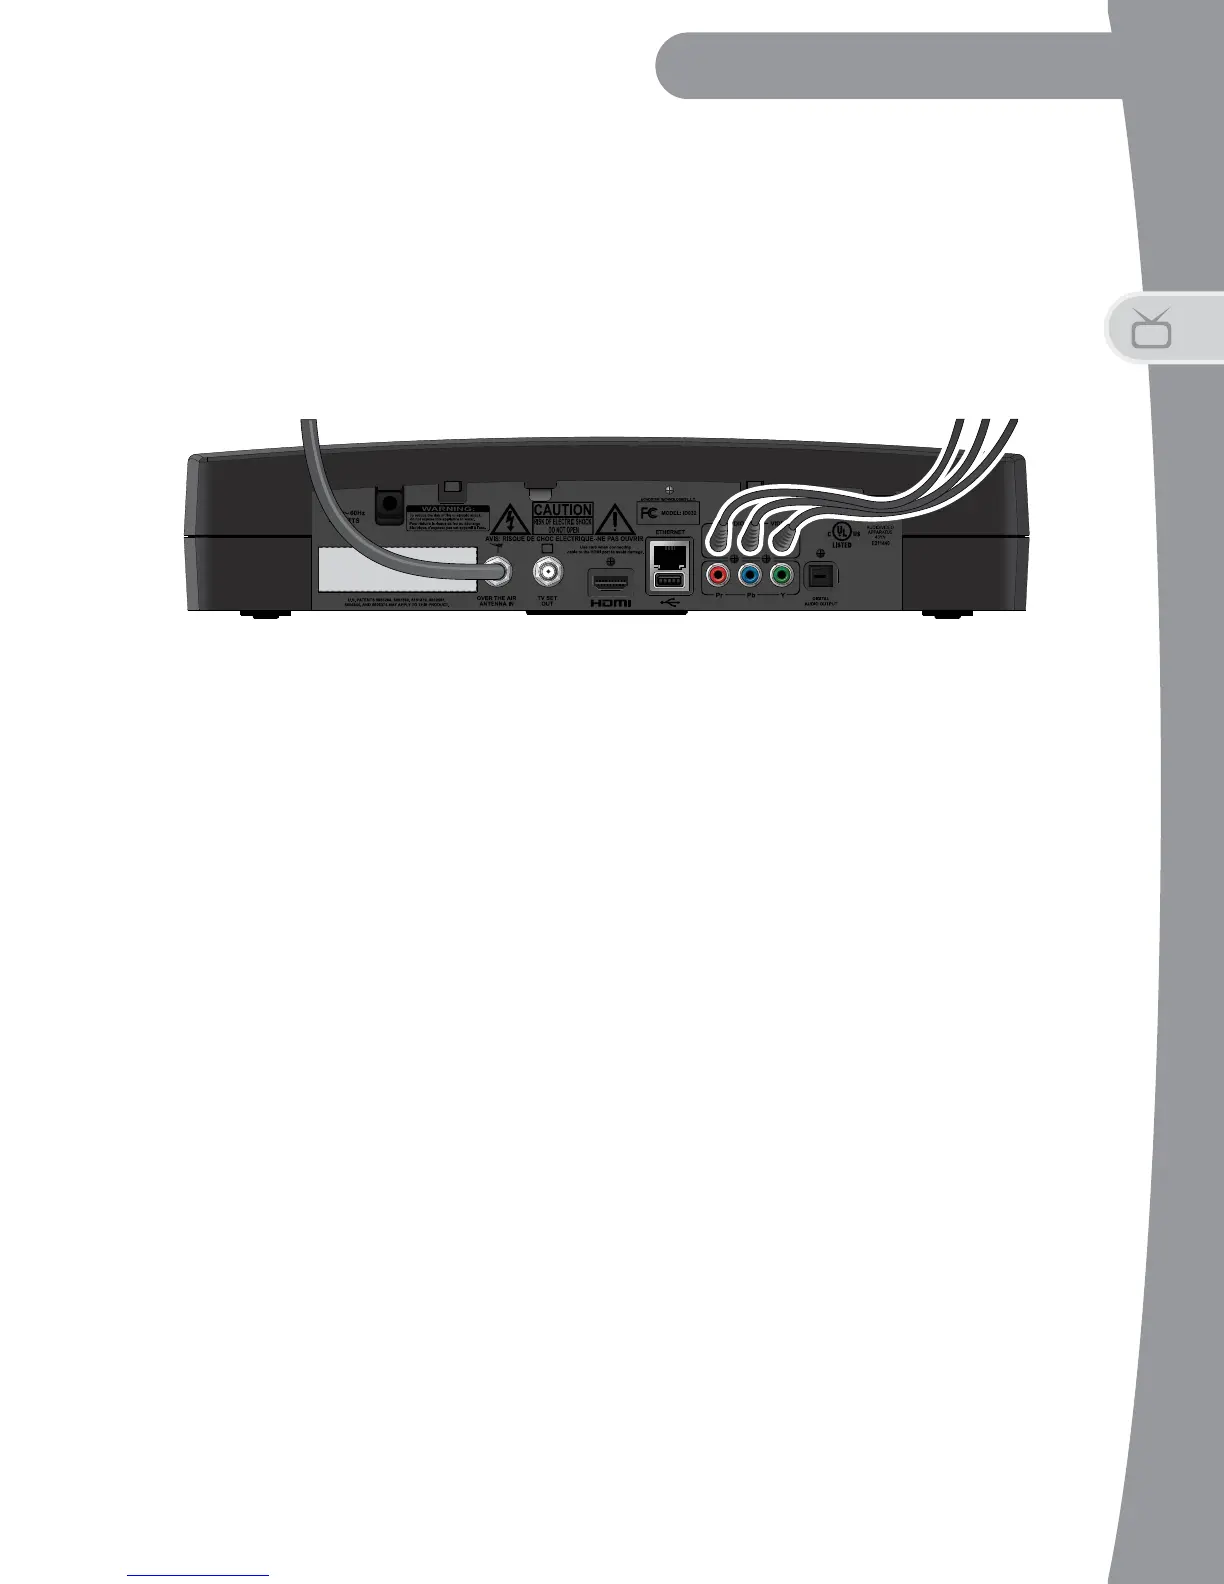
6. To connect your DTVPal DVR to your TV using composite A/V cables
(red, white, and yellow RCA-type):
- Connect a set of composite cables to your TV’s RCA-type
composite inputs.
- Connect the other ends of the cables to the R-A
UDIO-L--VIDEO
(RCA-type Audio/Video) connections on your DTVPal DVR.
- Plug the power cord of the DTVPal DVR into an electrical outlet.
Make sure your TV also is plugged in to power and turned on.
- The DTVPal DVR first displays a startup screen.
- Confirm that you are getting a picture from the DTVPal DVR.
Consult your TV user’s guide if you need to change your settings to
display from the correct video input.
- Follow the instructions for Using the Setup Wizard on page 6 to
complete the initial setup of your DTVPal DVR. Tune to live TV.
- Turn up the volume on your TV and confirm you have sound. If you
don’t have stereo sound, verify the connections for both left and
right RCA-type audio cables on the back of your DTVPal DVR and
TV.
Connection From
Antenna
RCA-type Audio/Video
Connection To Television