EasyManuals Logo
Home>ECS>Motherboard>MCP61M-M3

ECS MCP61M-M3 User Manual

ECS MCP61M-M3
76 pages
To Next Page IconTo Next Page
To Previous Page IconTo Previous Page
Page #15 background imageLoading...
Page #15 background image
11
Installing the Motherboard
CPU Installation Procedure
The following illustration shows CPU installation components.
To achieve better airflow rates and heat dissipation, we suggest that you
use a high quality fan with 4800 rpm at least. CPU fan and heatsink
installation procedures may vary with the type of CPU fan/heatsink sup-
plied. The form and size of fan/heatsink may also vary.
1 Unhook the locking lever of the CPU socket. Pull the
locking lever away from the socket and raising it to
the upright position.
2 Match the pin1 corner marked as the beveled edge
on the CPU with the pin1 corner on the socket.
Insert the CPU into the socket. Do not use force.
3 Push the locking lever down and hook it under the
latch on the edge of socket.
4 Apply thermal grease to the top of the CPU.
5 Install the cooling fan/heatsink unit onto the CPU,
and secure them all onto the socket base.
6 Plug the CPU fan power cable into the CPU fan
connector (CPU_FAN) on the motherboard.
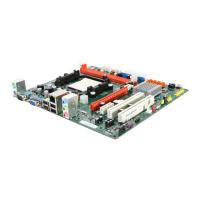
Table of Contents

Questions and Answers:

Question and Answer IconNeed help?

Do you have a question about the ECS MCP61M-M3 and is the answer not in the manual?

ECS MCP61M-M3 Specifications

General IconGeneral
Number of memory slots2
Maximum internal memory8 GB
Processor socketSocket AM3
Processor manufacturerAMD
USB 2.0 connectors3
Power fan connectorYes
Number of SATA connectors4
USB 2.0 ports quantityUSB 2.0 ports have a data transmission speed of 480 Mbps, and are backwards compatible with USB 1.1 ports. You can connect all kinds of peripheral devices to them.
Ethernet LAN (RJ-45) ports1
Audio chipVIA VT1705
Power source typeATX
Audio output channels6.1 channels
Motherboard form factormicro ATX
BIOS memory size64 Mbit

Related product manuals