EASZ-2 Manual v1.12 - 12.2.2018 Page 11 / 30
It is recommended that each unit is connected to its own local junction box and if possible that the junction
box is located outside the hazardous area. This will make calibration and the majority of servicing easier
without the need to open the unit.
The cables used to connect to the unit must be of a shielded type and adhere to the required standards.
For this reason each EASZ-2 unit should be installed with a standard 1.5m length of 5-core cable to the
required specification and should be used otherwise functionality cannot be guaranteed.
Pre-wired options are available (see Pre-Wired Options) and different cable lengths are available on
request. For more information and assistance with a project please contact an official EESIFLO sales or
service centre.
To connect the unit correctly follow the instructions:
1) Before starting any electrical connections ensure that the
specified unit is physically located and mounted correctly,
none of the hydraulic connections are leaking and that the
correct cable is run to the unit according to the project
documentation.
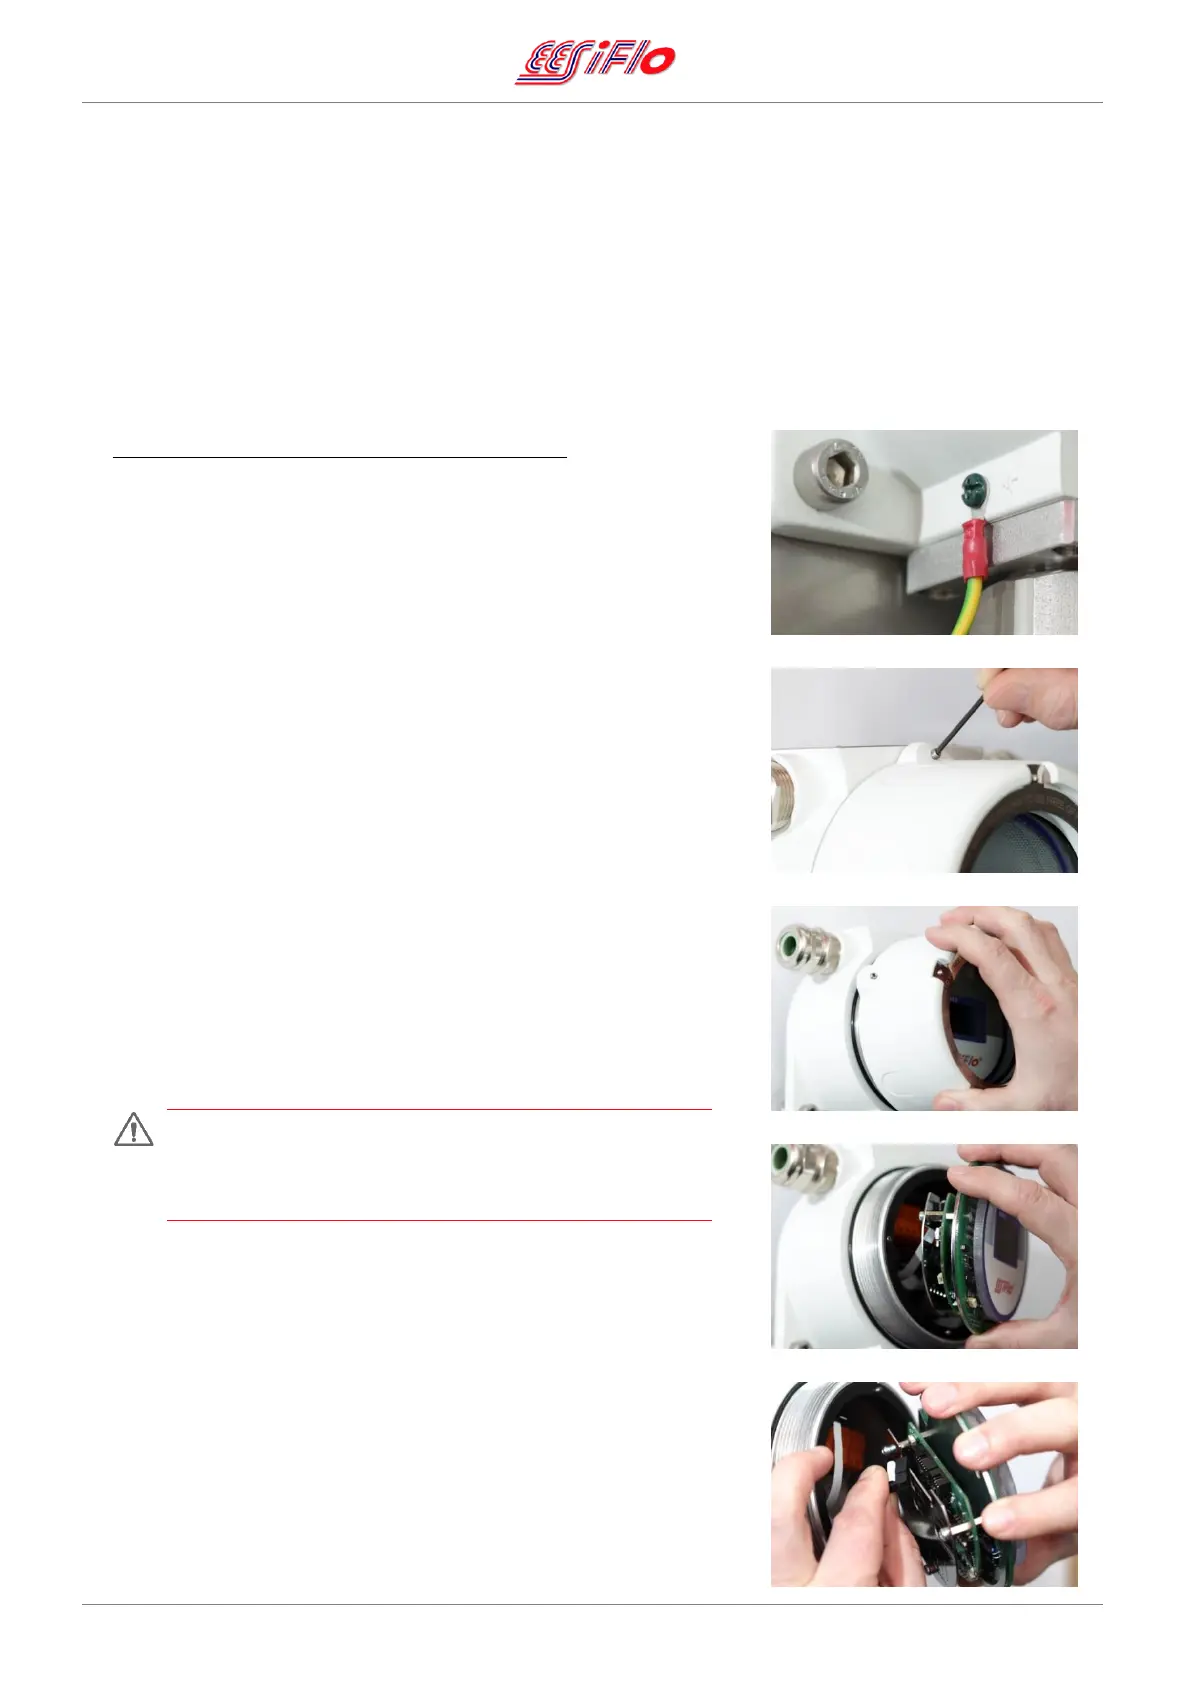
2) First connect the unit to ground using the screw provided
on the grounding point on the side of the body. Ideally the
grounding cable should be terminated with a crimped
eyelet.
3) Loosen the small grub screw at the top of the body cover
using the appropriate Allen/Hex Key so that the body cover
can freely turn. Take care not to completely unscrew it.
4) Remove the body cover by carefully unscrewing it from the
base. This will take a little time because the thread is fine
and long.
When handling circuit boards ensure that the unit is correctly
grounded, in order to prevent electrostatic discharge.
Incorrect manipulation or an electrostatic discharge can
cause a fault on the circuit boards or the whole product.
5) The display board is held in position by 4 magnets and the
orientation is fixed by 2 pins.
6) Carefully lift off the display board and disconnect it from the
connectors at the back.
 Loading...