User Guide
Product: Evolis
A_Evolis Solution GB elancity
Page
/
Date: 03/01/2018
Confidential document, property of ELANCITY. All copies and transfers are unauthorized without prior consent.
4 TEST YOUR DEVICE BEFORE INSTALLATION
We strongly recommend that you conduct an initial start-up & manipulation of your Evolis
device BEFORE installing it at the final desired location. In the unlikely event of a malfunction,
a telephone diagnosis (and also, in the worst case scenario, a factory return) is far simpler if
the unit is not already installed onto its post ‘in-situ’.
The very first step is to connect the battery.
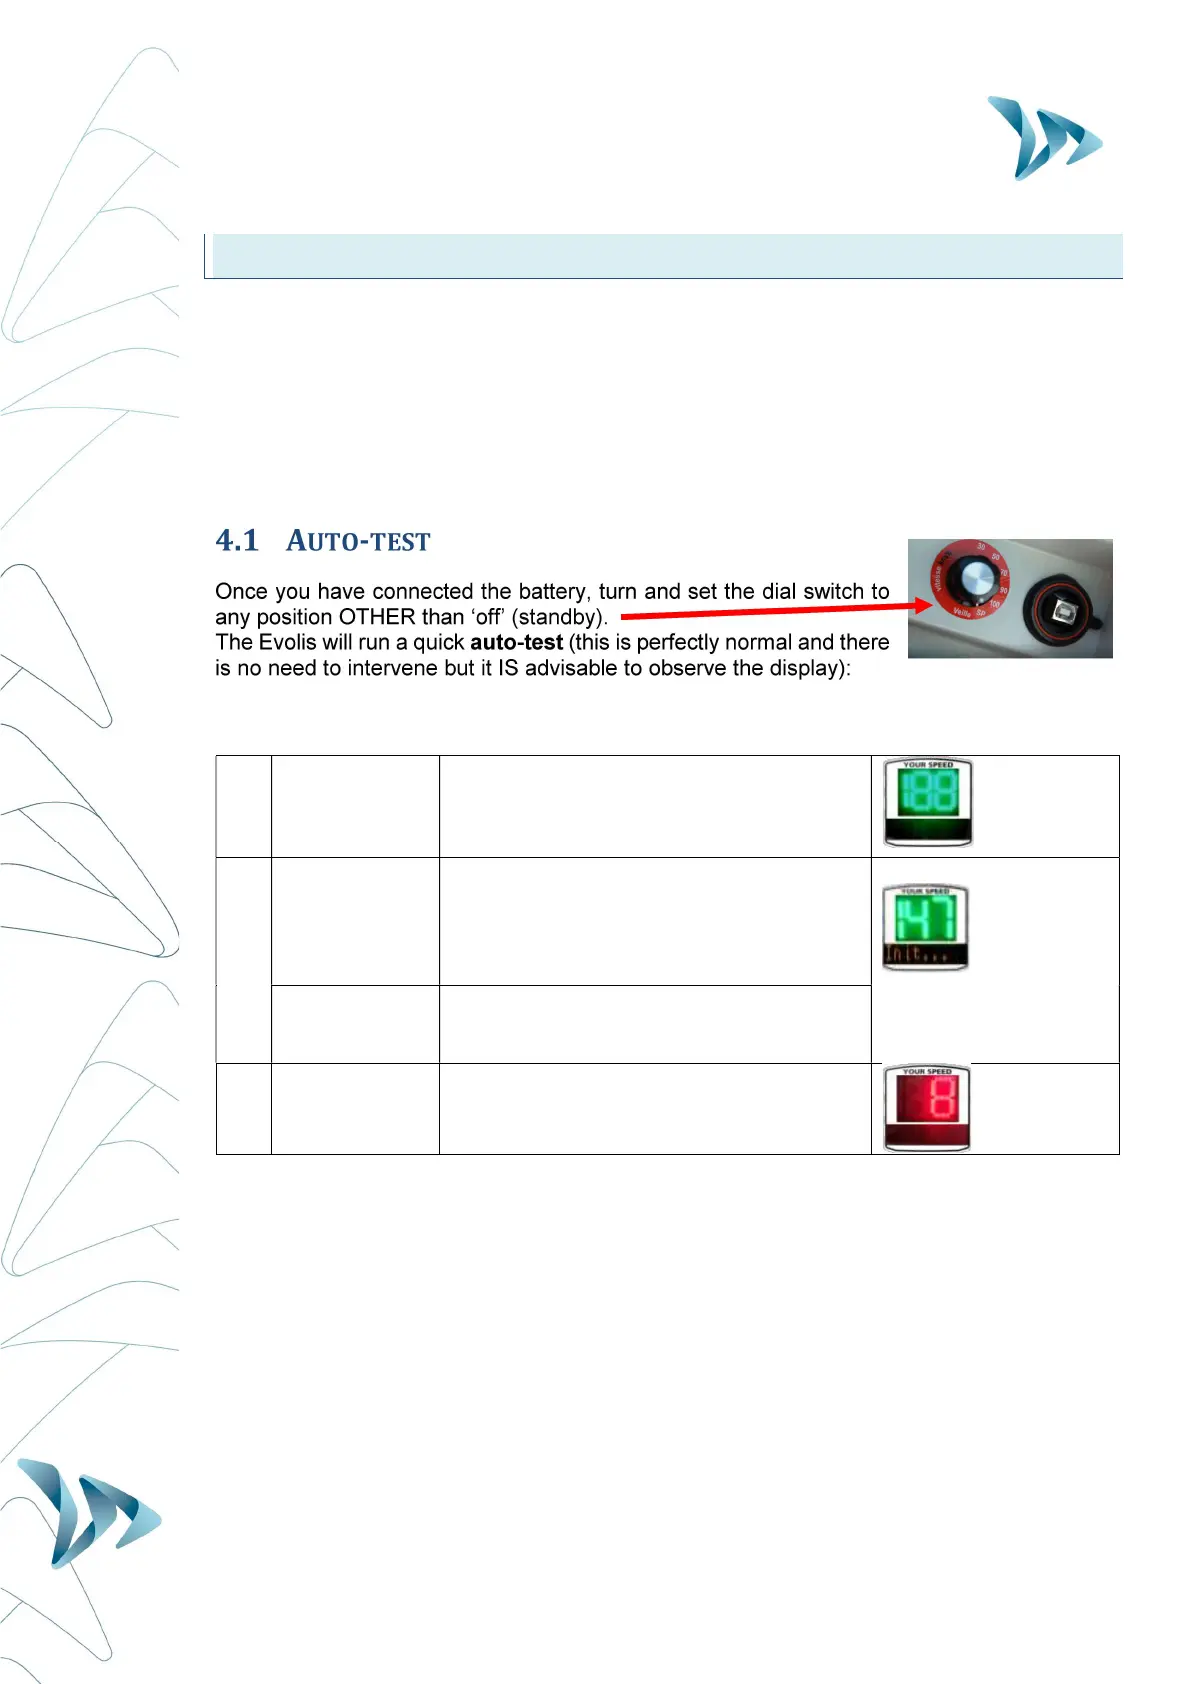
4.1 AUTO-TEST
Once you have connected the battery, turn and set the dial switch to
any position OTHER than ‘off’ (standby).
The Evolis will run a quick auto-test (this is perfectly normal and there
is no need to intervene but it IS advisable to observe the display):
1 Speed display
should be displayed in green and is
quite simply the device testing all the LEDs
in the display.
2 Speed display
Then,
will then be
displayed. These equate to the battery
voltage. (e.g. : ‘147’ = 14.7 Volts). A
normal reading will be situated between 11
and 13
Text display
will then be displayed in the lower
part of the device
3 Speed display
in red : signifies Bluetooth
‘1’ in green : signifies a GPRS connection