Installation and Assembly
What’s in the box?
Radiator with moulded plug x 1, Wall Bracket x 1, Instruction Manual x 1, Screws & Fixings x 4
Wall Mounting
Where possible, always install the radiator on an outside/external (cold) wall, under a window.
Don’t install in a ventilated area (draught) or in direct sunlight.
Follow the minimum safety distances for installation.
Minimum distance from the ground or wall is 15cm.
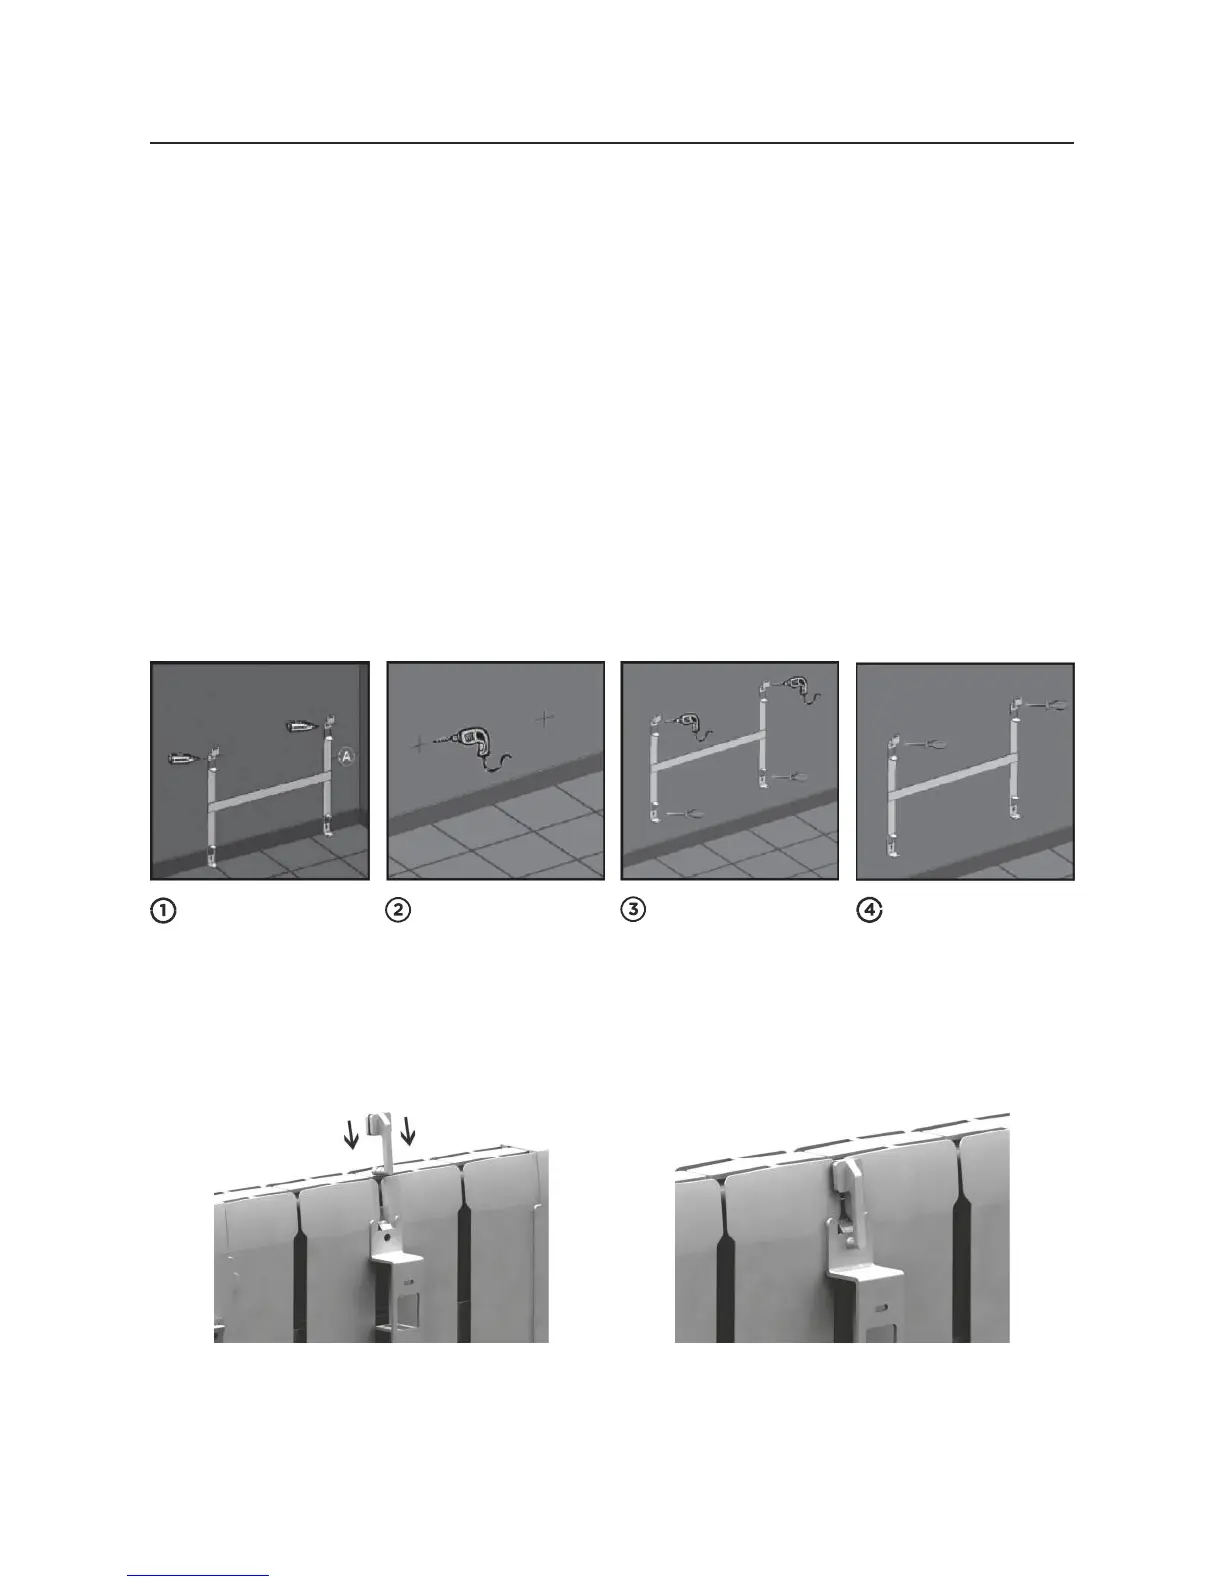
1. Present the wall bracket on the floor in the position in which the radiator is to be
fitted, mark the wall through the upper drill hole of the bracket on both sides (Fig 1)
2. Drill in the markings and insert the rawlplugs (Fig 2)
3. Move the bracket up and position with the bracket lower holes covering the
rawlplugs, mark the upper holes again, drill and insert rawlplugs (Fig 3)
4. Screw the bracket into position (Fig 4)
5. Slide the radiator onto the bracket
PLEASE NOTE: The screws provided are for use on a solid wall only. For plasterboard walls,
please use specialist plasterboard screws such as REDIDRIVER or similar.
Once the radiator is on the wall, you can fit the safety clips as below: