4-2
Section 4 Component Teardown
Electronic Oven Control (EOC)
To remove the Electronic Oven Control (EOC):
1. Access the Control Console (see “To access the
Control Console” on page 4-1).
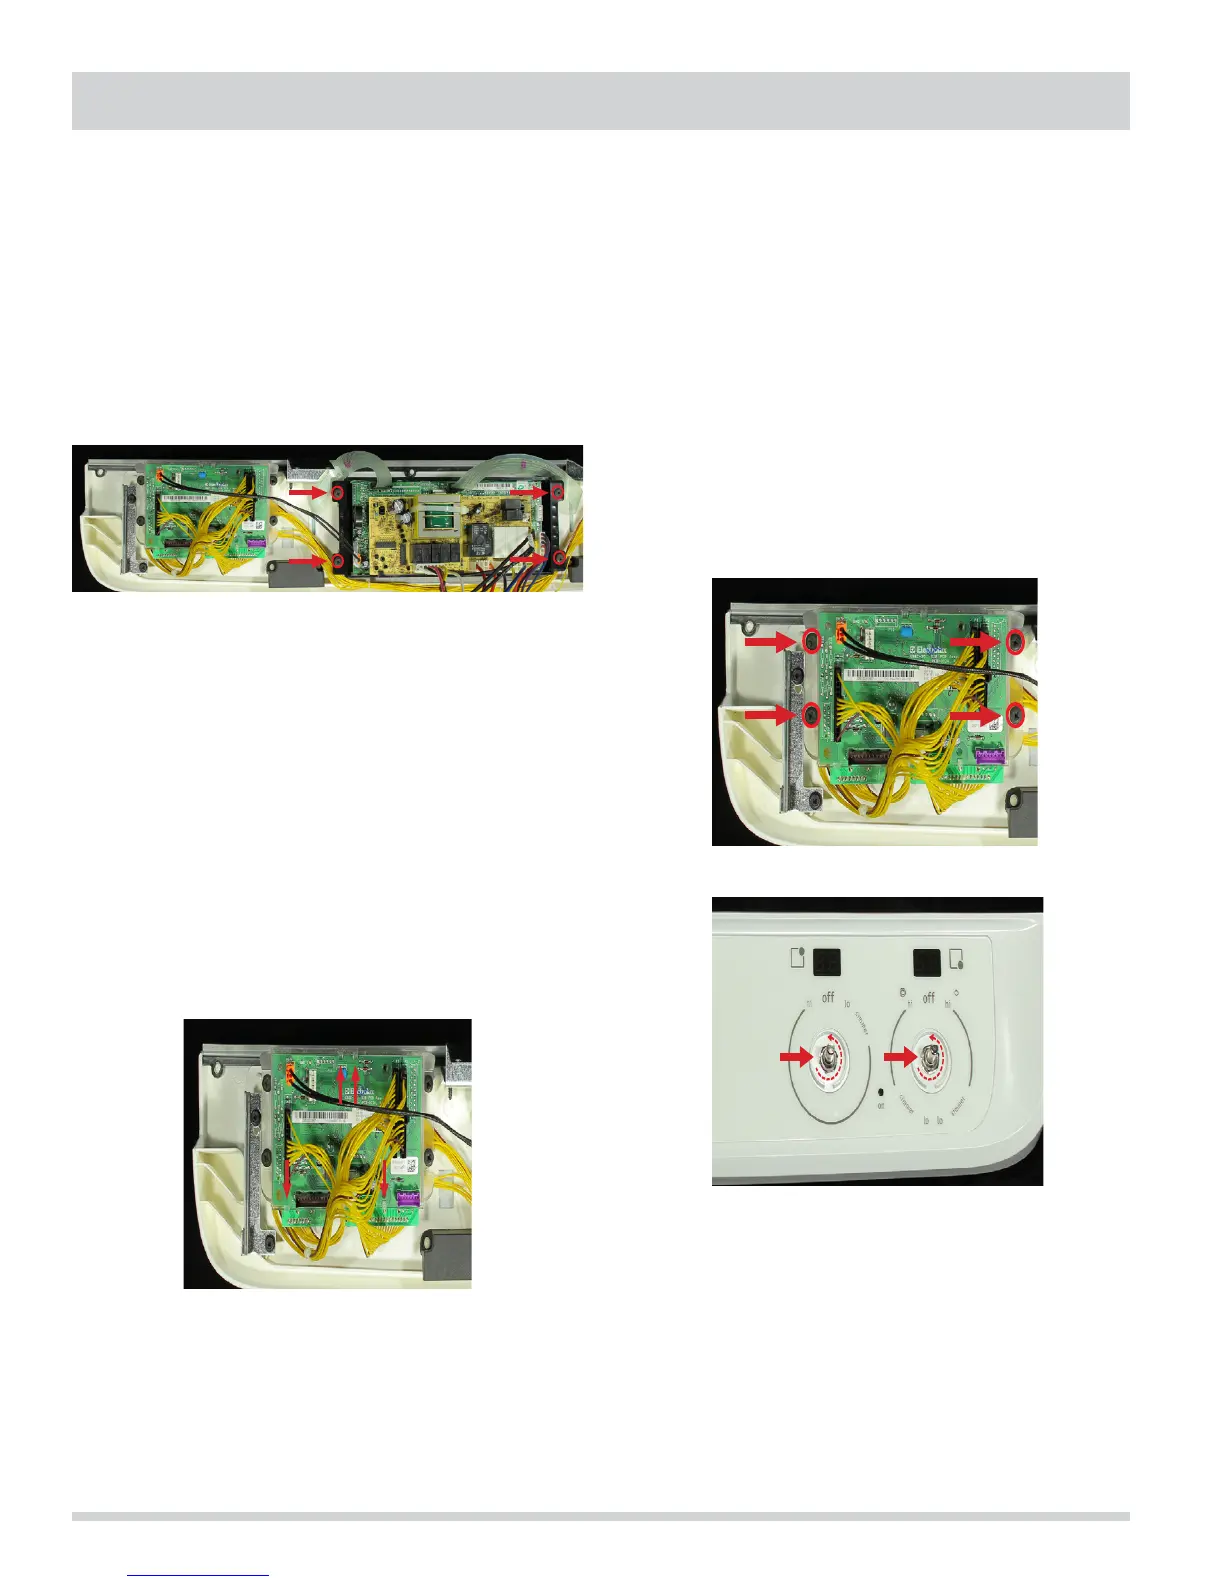
2. Remove all wiring harnesses from EOC.
3. Remove four (4) screws securing EOC to Control
Console. See Figure 47.
4. Reinstall in reverse order.
Electronic Surface Element Control - User
Interface Board (ESEC-UIB)
To remove the Electronic Surface Element Control-
User Interface Board (ESEC-UIB):
1. Access the Control Console (see “To access the
Control Console“ on page 4-1).
2. Remove all wiring harnesses from ESEC-UIB.
3. Depress four tabs securing the ESEC-UIB to plastic
housing (see Figure 48). Remove the ESEC-UIB.
4. Reinstall in reverse order.
Figure 47
Figure 48
Electronic Surface Element Control Rotary
Switches
To remove the Electronic Surface Element Control
Rotary Switches:
1. Access the Control Console (See “To access the
Control Console“ on page 4-1).
2. Remove all wiring harnesses from ESEC-UIB.
3. Remove the four (4) screws securing the ESEC-UIB
housing to the Control Console and remove ESEC-
UIB. See Figure 49.
4. Remove Rotary Switch Knobs and nut securing
Rotary Switch to Control Console. See Figure 50.
5. Reinstall in reverse order.
Cooktop and Surface Element Assembly
To remove the Cooktop and Surface Element
Assembly:
1. Remove the Control Console (see “To access the
Control Console“ on page 4-1).
2. Remove the four (4) screws securing the cooktop
frame to the oven’s upper trim. See Figure 51.
Figure 50
Figure 49
 Loading...