SOI 04.05 FV 32/57 599 36 62-62
6. ADAPTING THE HOB TO DIFFERENT TYPES OF GAS
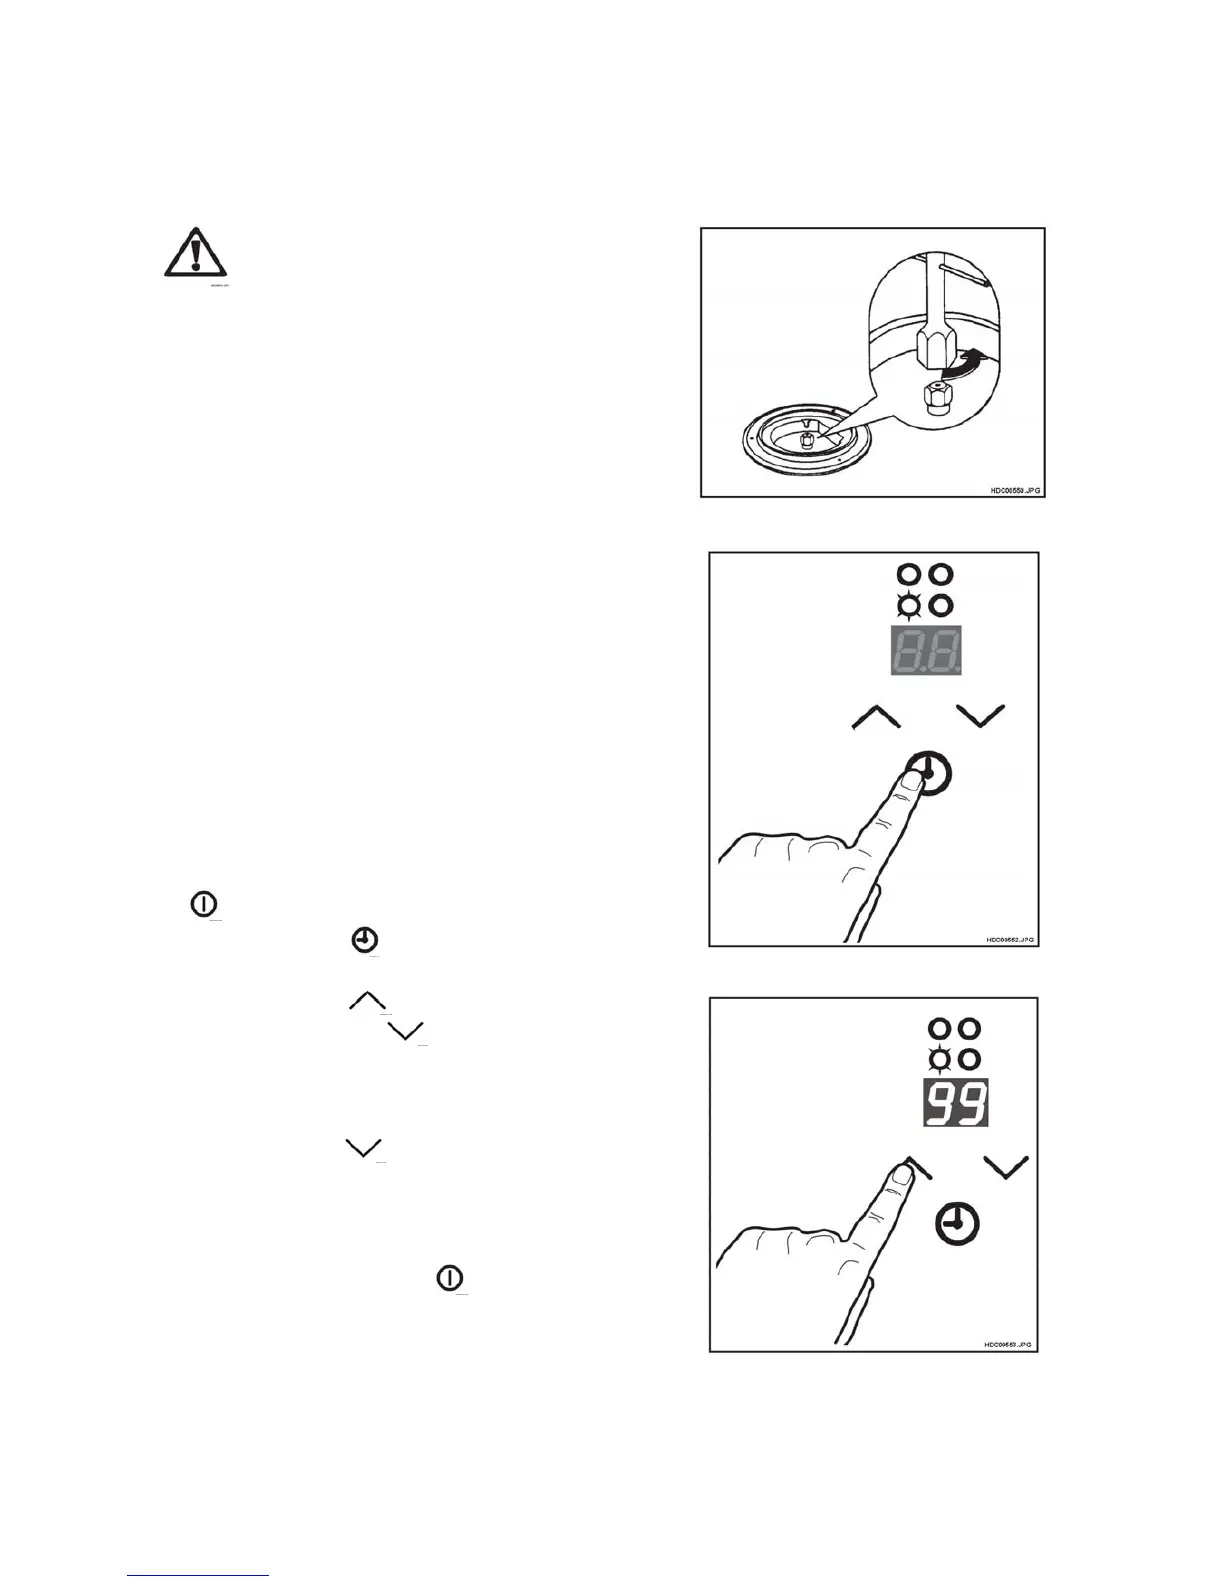
6.1 REPLACING THE NOZZLES
IMPORTANT: Category "II2H3+" hobs (see
"Technical Characteristics") are not designed
for conversion to operation with town gas.
1. Remove the grilles.
2. Remove the caps and the flame rings from the burners.
3. Use a 7mm hex wrench to unscrew and remove the
nozzles.
Replace the nozzles with those corresponding to the type
of gas to be used (see "Technical Characteristics").
4. Re-assemble the burner, performing the same procedure
in reverse sequence.
5. Replace the gas calibration label (positioned near the
gas inlet coupling) with the label showing the new type of
gas. The new label is included in the plastic bag
containing the injectors.
If the gas pressure is not as specified for the appliance (or if
the pressure is variable), it is necessary to install a pressure
regulator suitable for ducted gas (NOT LPG), and compliant
with UNI-CIG standard 7430, on the inlet hose.
The use of pressure regulators designed for liquid gas (LPG)
is permitted, on condition that these are compliant with UNI-
CIG standard 7432.
6.2 ADJUSTING THE HOB FOR THE TYPE OF
GAS
1. If necessary, switch on the hob by touching the ON / OFF
touch key for about three seconds.
2. Touch sensor key
to select the auxiliary burner on
the burner display window.
3. Touch sensor key
until the display shows "99".
Then touch sensor key
until the display shows "80".
Then touch the sensor key again until the display shows
"83".
This procedure places the hob in "change gas" mode; the
display will show the type of gas currently selected.
4. Touch sensor key
to select the type of gas.
The display shows some codes (from "n0" to "n2") which
indicate the type of gas relative to the appliance. (See
User manual).
5. After selecting the type of gas, switch off the hob by
touching the ON/OFF sensor .
6. Switch the appliance on again. The hob will automatically
switch on in "user mode".
Fig. 28
Fig. 29
Fig. 30