SOI 04.05 FV 47/57 599 36 62-62
9.4.1 DISMOUNTING THE BURNER CONTROL ELECTRICA VALVES
To dismount the burner control electric valve it is necessary:
- Remove the gas output fixing nut from the electric valves (see Fig. 49 Pos. 1).
- Remove the two screws of the electric valve fixing brackets loosen previously the lower screws.
- Detach the power supply connector.
NOTE: The upper screws can be accessed after dismounting the left interface board and the power board. The
lower screws can be accessed from the left lower side part of the hob (see Fig. 50).
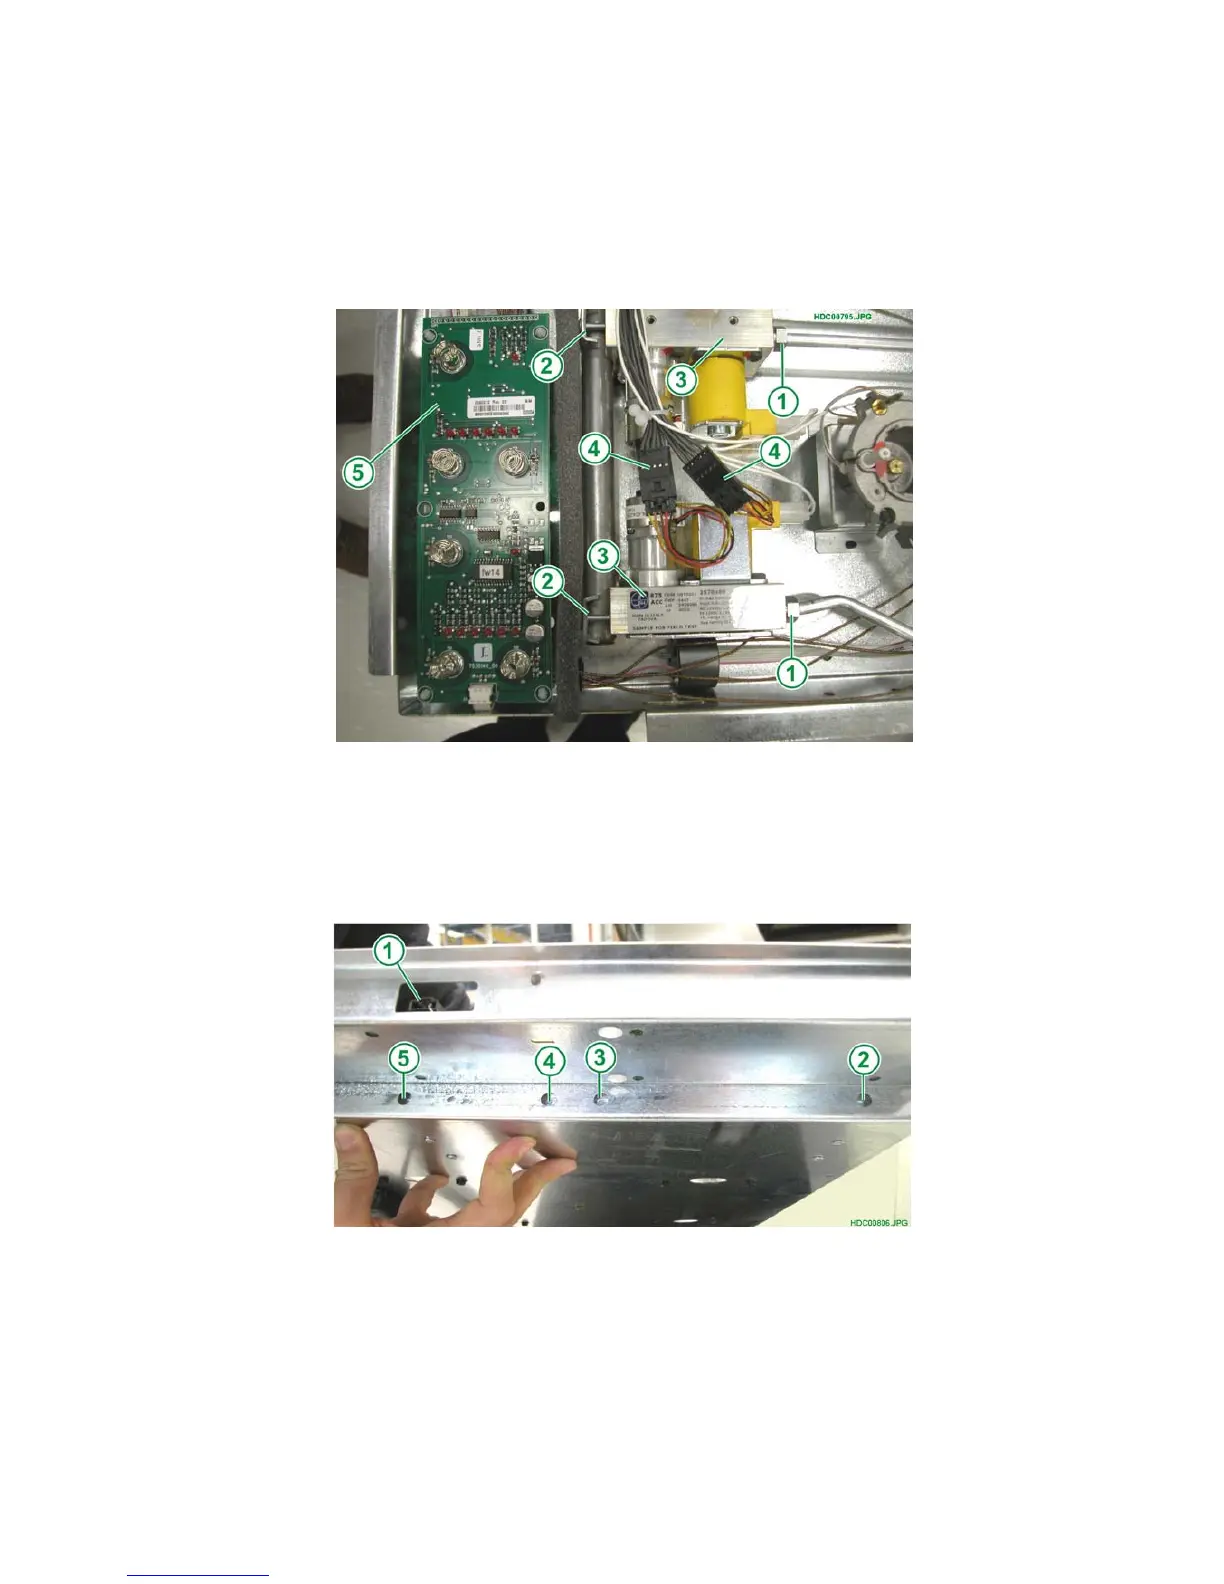
Fig. 49
1 - GAS OUTPUT FIXING NUT
2 - GAS INPUT FIXING BRACKET
3 - BURNER CONTROL ELECTRIC VALVE
4 - LEFT INTERFACE BOARD
5 - ELECTRIC VALVE POWER SUPPLY CONNECTOR
Fig. 50
1 - SERVICE SOCKET FOR THE PROGRAMMATION
2 - LOWER SCREW OF FIXING BRACKET OF LEFT FRONT BURNER VALVE
3 - LOWER SCREW OF FIXING BRACKET OF RIGHT FRONT BURNER VALVE
4 - LOWER SCREW OF FIXING BRACKET OF RIGHT REAR BURNER VALVE
5 - LOWER SCREW OF FIXING BRACKET OF LEFT REAR BURNER VALVE
NOTE : After remounting the electric valves, pay attention to fix the screws of the fixing brackets carefully and
check the gas seal.