7
Electronic(SM, SV, SP) from Rev. UCP 0419
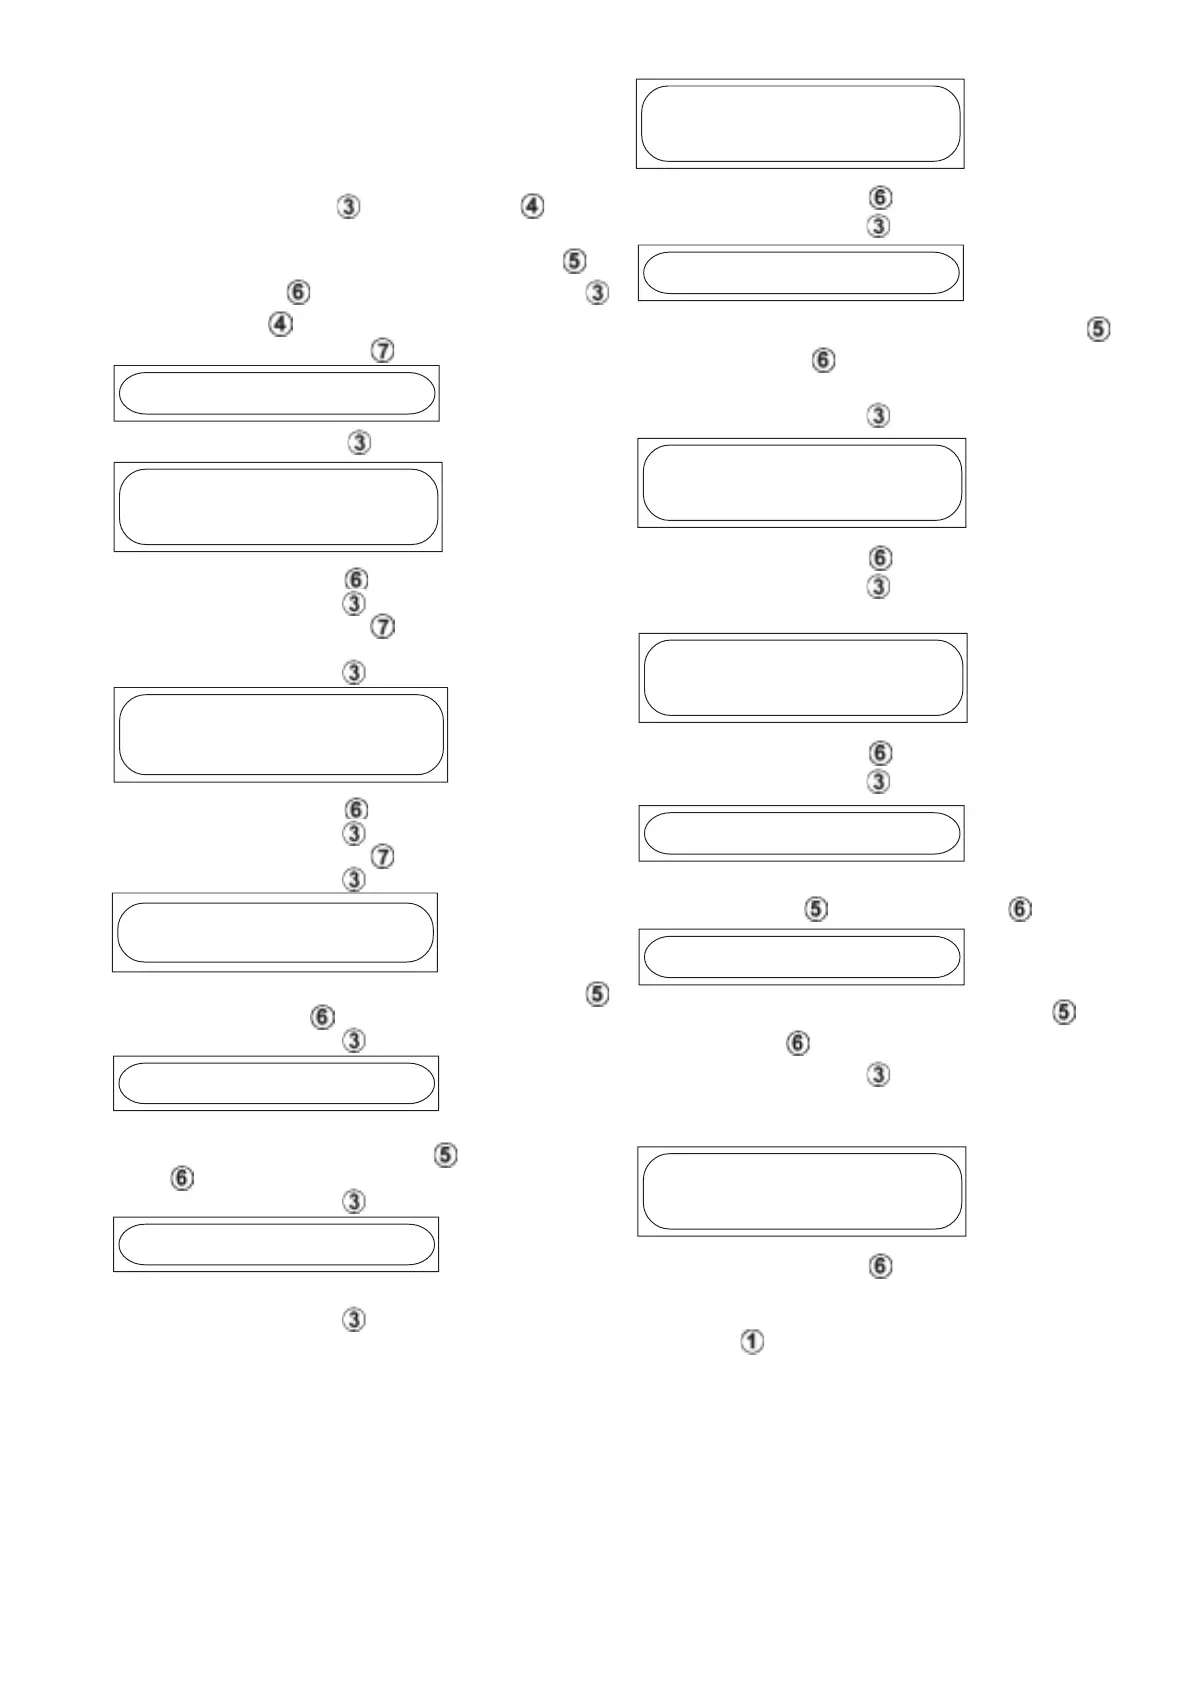
Replacement of effect PCB (se fig.1)
When replacing the effect PCB, the electronic shall be
adjusted for the correct size boiling pan as below:
· Press Menu forwards and Menu back simul-
taneously for 5 seconds.
· Digit the code 1991 by pressing Increase value or
Decrease value for digits, and Menu forwards
or Menu back for the position.
· Confirm by pressing Start .
PARAMETER SET-UP
· Press Menu forwards
INITIATE PROGRAM
NO
YES
· Press Decrease value for ”YES”
· Press Menu forwards
· Confirm by pressing Start
The process will take a few minutes.
· Press Menu forwards
INITIATE DEFAULT
NO
YES
· Press Decrease value for ”YES”
· Press Menu forwards
· Confirm by pressing Start
· Press Menu forwards
SIZE
50
· Select boiling pan SIZE pressing Increase value
or Decrease value
· Press Menu forwards
AGITATOR
· Select VARIOMIX/PROMIX or WITHOUT AGITATOR
(Smart) pressing Increase value or Decrease va-
lue
· Press Menu forwards
FOOD TEMP
· Select between YES or NO
· Press Menu forwards
INITIATE DEFAULT
NO
YES
· Press Decrease value for ”YES”
· Press Menu forwards
PULSE/ LITRE
· Select PULSE/ LITRE pressing Increase value or
Decrease value
(Original flow sensor has 428 pulse/ litre)
· Press Menu forwards
AUTOMATIC COOLING
NO
YES
· Press Decrease value for ”YES”
· Press Menu forwards
If "YES" is chosen:
ICE WATER COOLING
NO
YES
· Press Decrease value for ”YES”
· Press Menu forwards
OPTION
· Select WITHOUT HACCP or WITH HACCP pressing
Increase value or Decrease value
LANGUAGE
· Select LANGUAGE pressing Increase value or De-
crease value
· Press Menu forwards
o change the language, se even the section for Choice
of language at page 5.
PROGRAMMING
NO
YES
· Press Decrease value for ”YES”
· End the process by switching off the power, pressing
ON/OFF .
Fuses: there are 2 fuses on the effect PCB as follows:
F1= 400 mA Delay action fuse (5X20mm)
F2= 315 mA Delay action fuse (5X20mm)