9
Control testing of safety valve
During inspection of pressure vessels, a check is per-
formed to ensure the safety valve opens at the correct
pressure 150 kPa (1.5 bar). In order to check this, the
pan´s safety functions must be disabled.
SM, SV, SP, V, V-C, P, P-C, T, T-C(see Fig. 1)
To bring the pressure in the pan to above 110 kPa
(1.1 bar), you have to go into a hidden menu in the elec-
tronics:
• Press Menu forwards and Menu back simul-
taneously for 5 seconds.
• Enter code 1122 by pressing Increase value or
Decrease value for number, and Menu forwards
or Menu back for location.
• Confirm the code by pressing Start .
• Select
SAFETY TESTING with Decrease value
and press Menu forwards .
• Confirm by pressing Start .
• When the safety valve has been opened (blown ),
switch off the current with Control switch On/Off .
Standard Line, Medium Line
To bring the pressure in the pan to above 110 kPa
(1.1 bar), button S6 must be held down. Button S6 is po-
sitioned inside the right column under the panel. See Fig.1
(pos. 18).
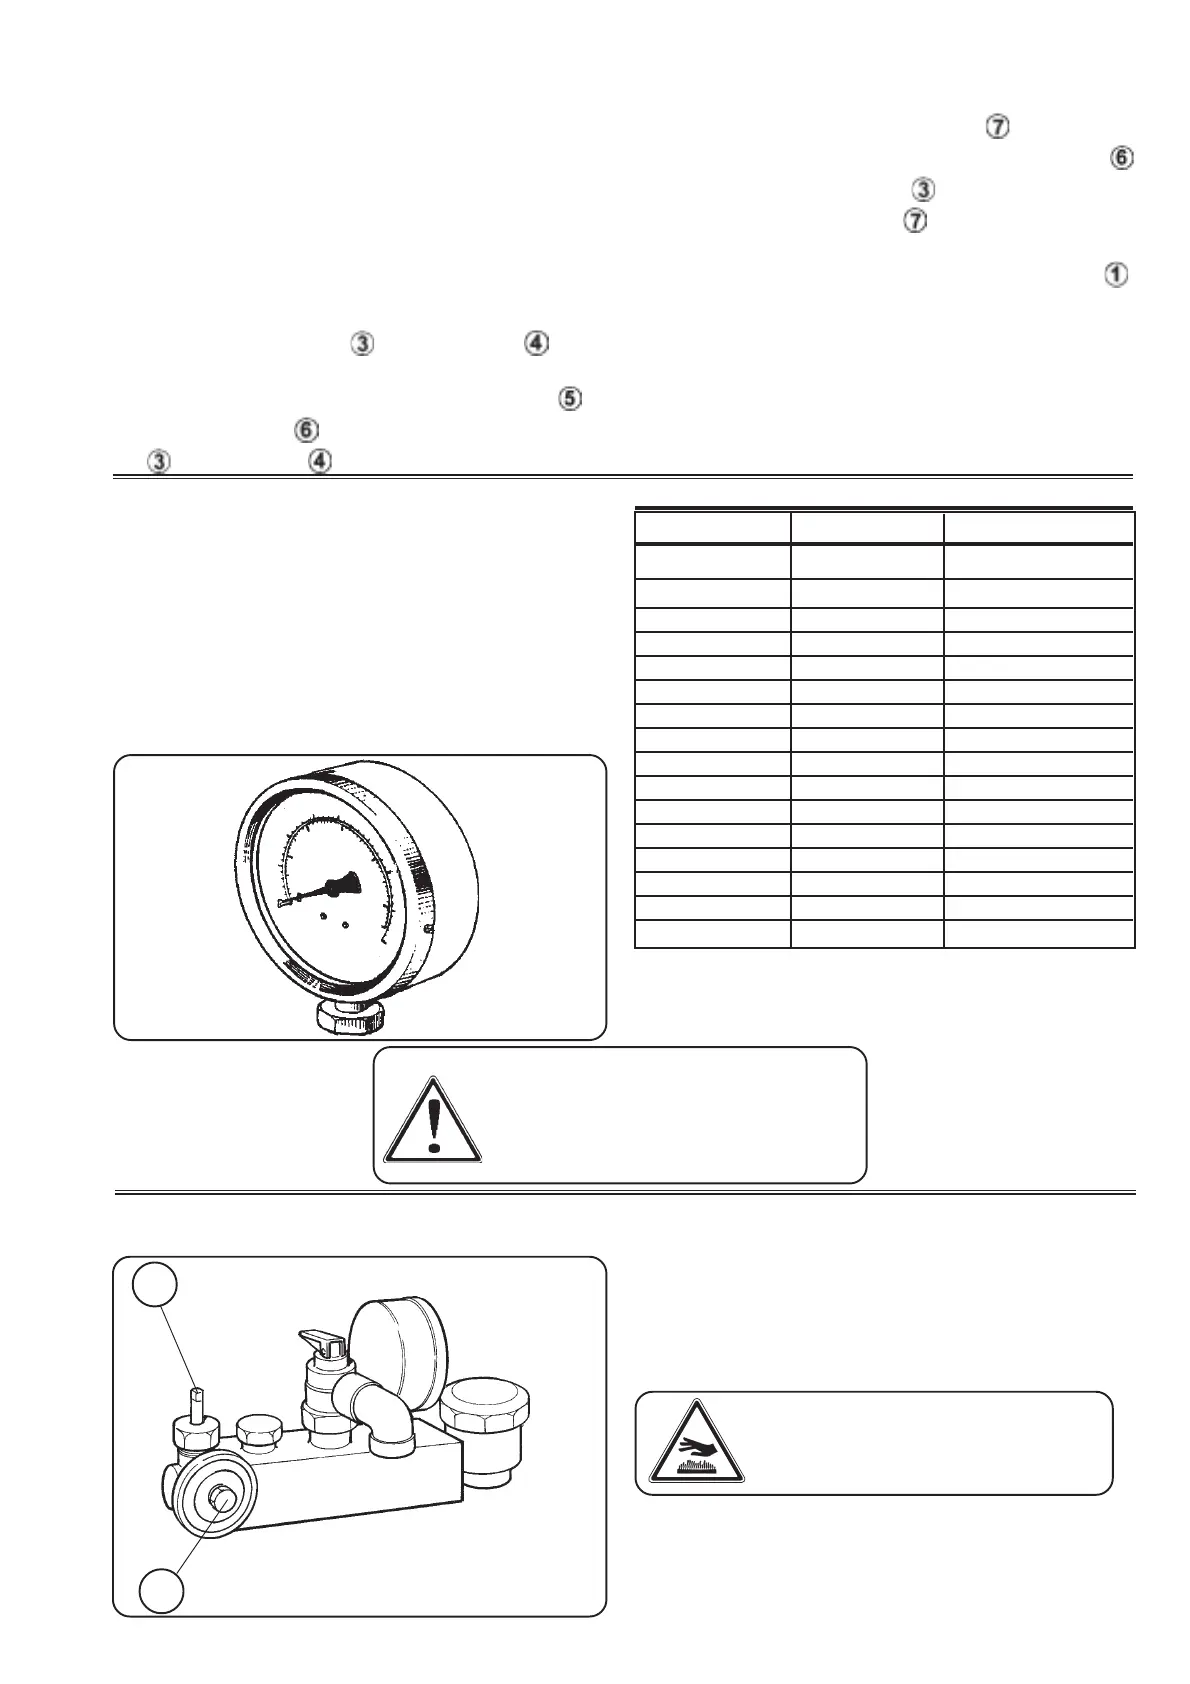
Manometer
It measures the steam pressure. Must not exceed 150
kPa (1.5 bar)
If the indicator goes into the red field:
• Switch off the pan immediately and call in a trained engi-
neer.
* For a correct pressure reading, lift up the green cap
on the manometer.
NOTE! The green cap must normally be pressed down
as the pan will be tipped.
fig. 2
Warning! The steam pressure whitch
may not exeed 150 kPa/1,5 bar. If the indi-
cator enters the Red field:
Stopp the operation.
Pressure (kPa) Pressure (bar) Temperature (°C)
0 0 100
+10 +0,1 103
+20 +0,2 105
+30 +0,3 107
+40 +0,4 110
+50 +0,5 112
+60 +0,6 113
+70 +0,7 114
+80 +0,8 115
+90 +0,9 117
+100 +1,0 120
+110 +1,1 122
+120 +1,2 123
+130 +1,3 125
+140 +1,4 126
+150 +1,5 127
Translation table
Control manometer tap
A
B
fig. 3
Control manometer tap
Tap with flange for control manometer.
Application: screw (A) removes and control manometer
connects to the flange.
The tap (B) opens completly by using tool.
Warning!
Do Not remove the screw (A) when the
tap (B) is open, warning for hot steamt.
When changing details in above mentioned parts use Loc-
tite type 542 (red) for installation in the fittings .
The fitttings fits to the vessel by using loctite type 275
(green) .
 Loading...