99
Page
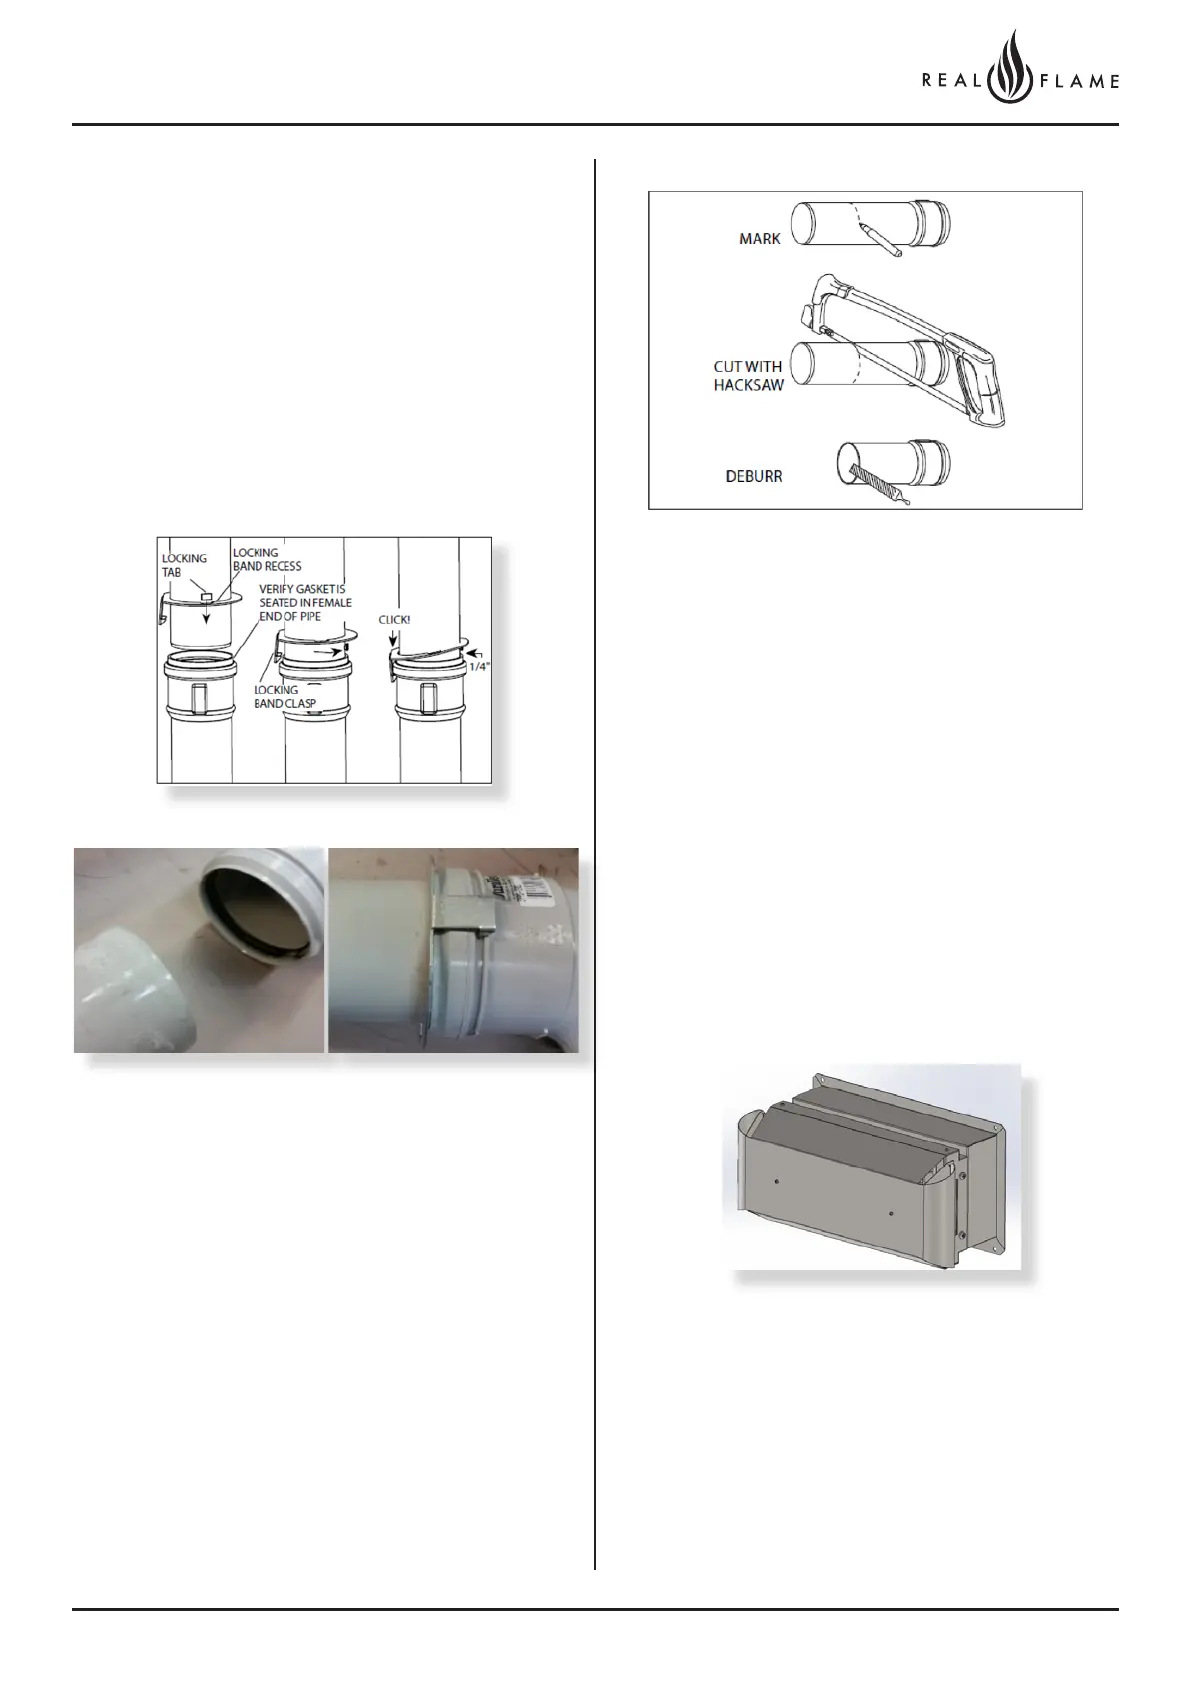
Poly Pro to Poly Pro flue connection
Verify gasket is sitting correctly.
Apply a light soapy water film to the gasket and tube end.
Insert pipe fully into end fitting, Pipe will push in smoothly
and evenly, should this not occur remove pipe and reset
gasket. Reapply light soapy film to ensure easy fit.
Rotate clip so catch is opposite the location tab
Clip catch into place to prevent flue pipes from separating.
Ensure pipes are clipped adequately.
Ensure a minimum of 3deg fall occurs towards the drain
end.
Installation
1. Pipe lengths may be cut to length. Use an alternative
clamp (PPS-PAC/PPS-LBC) for the connection if a locking
tab is removed.
• Cut square (not an angle) to the end of the pipe.
• Remove burrs before assembly.
2. Check with appliance manufacturer for any restrictions
or limits on vent length, number of elbows, etc.
3. The slope of the vent pipe must be at least
3° (50mm per meter) back to the appliance.
4. Every horizontal section must be supported.
Poly Pro to Wall mounted terminal
Ensure terminal is affixed to the wall.
Verify gasket is sitting correctly in condensate drain
connection.
Apply a light soapy water film to the gasket and the tube
end.
Insert pipe fully into end fitting, Pipe will push in smoothly
and evenly, should this not occur remove pipe and reset
gasket. Reapply light soapy film to ensure easy fit.
Tighten hose clamp to restrain flue in place.
Locate terminal on wall and pre-drill mounting holes
where required.
Mark out the required penetration area. Cutout the area
in wall for the flue pipes and condensate drain.
(NOTE - Access to rear of terminal may be required to
assemble flue) Where access is not available a single
large cutout is required for the flues and the condensate
drain.