The provided document is a user manual for the Element RW973 MkⅡ Desktop POS Printer.
Function Description
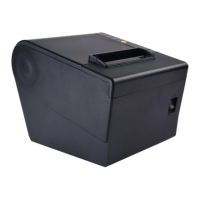
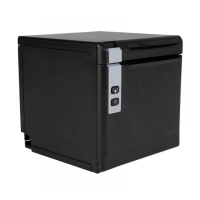
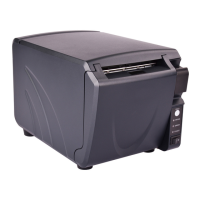
The Element RW973 MkⅡ is a thermal receipt printer designed for commercial POS systems, the food industry, and other applications requiring real-time receipt printing. It offers high print quality, high print speed, and high stability. The printer supports various communication interfaces, including serial, USB, cash drawer, and Ethernet, making it versatile for integration with different equipment. Drivers are available for Windows XP, 7, 8, 10, and Linux operating systems. A unique feature is its patent-designed vertical double auto cutter.
Important Technical Specifications
Printing Parameters
- Printing Method: Direct thermal line printing
- Resolution: Default 203 DPI (8 dots/mm), Emulated 180 DPI (7 dots/mm)
- Printing Width: 48mm/72mm
- Print Speed: Max. 300mm/s
- Print Density: Adjustable from level 1 to level 4
- Page Mode: Supported
Memory
Fonts
- Chinese: GBK 24×24, 16×16
- Alphanumeric: ASCⅡ 9×17, 12×24
- User-defined: Supported
- Code Pages: Supports a wide range including PC437 (std.Europe), Katakana, PC850 (Multilingual), PC860 (Portuguese), PC863 (Canadian), PC865 (Nordic), PC857 (Turkish), PC737 (Greek), ISO08859-7 (Greek), WPC1252, PC866 (Cyrillic #2), PC852 (Latin 2), PC858 (Euro), KU42 (Thai), TIS11 (Thai), TIS18 (Thai), PC720 (Arabic), WPC775 (Baltic Rim), PC855 (Cyrillic), PC862 (Hebrew), PC864 (Arabic), ISO8859-2 (Latin2), ISO8859-15 (Latin9), WPC1250 (Latin 2), WPC1251 (Cyrillic), WPC1253 (Greek), PC1254 (Turkish), WPC1255 (Hebrew), WPC1256 (Arabic), WPC1257 (Baltic Rim), WPC1258 (Vietnamese), MIK (Cyrillic), PC755 (Latin 2), Iran, Iran II, Latvian, ISO-8859-1 (WestEur), ISO-8859-3 (Latin 3), ISO-8859-4 (Baltic), ISO-8859-5 (Cyrillic), ISO-8859-6 (Arabic), ISO-8859-8 (Hebrew), ISO-8859-9 (Turkish), PC856, PC3848 (ABICOMP), MONGOLIAN, VISCII.
Barcode
- 1D: UPC-A, UPC-E, EAN8, EAN13, CODE39, CODE93, ITF, CODEBAR, CODE128
- 2D: PDF417, QR code
Graphics
- Supports varied density bitmap and download bitmap printing.
- Max size of each bitmap: 40K
- Total size of bitmap: 256k
Detection Sensors
- Standard: Paper end sensor, cover open sensor, paper near end sensor
- Option: Black mark sensor
LED Indicator
- Power LED (Green): ON (printer works well), OFF (printer powered off)
- Error LED (Red): Flash (error state), OFF (normal state)
- Paper LED (Red): ON (paper end state), OFF (normal state)
Power Supply
- Input: AC100V-240V
- Output: 24V 2.5A
Paper
- Paper Type: Specified Thermal Paper
- Paper Width: 58+1-0 mm / 80+1-0 mm
- Paper Thickness: 0.050~0.090mm
- Roll Paper Diameter: Max. OD ø83mm
- Paper Load: Easy-loading structure of upward open cover
- Paper Cut: Manual tear or Auto-cutter
Physical Specifications
- Operating Condition: 0℃~40℃, 20%~85%RH
- Storage Condition: -20℃~70℃, 5%~95%RH
- Dimensions: 197*145*146mm
- Weight: 1.8kg
Reliability
- TPH Lifetime: 150km
- Cutter Lifetime: 2,000,000 cuts
Software
- Driver: Windows XP/Vista/7/8/10/POSReady/Linux CUPS/OPOS/JavePOS
- SDK: WinCE, Win Mobile, Android, iOS
Usage Features
Installation
The printer can be installed horizontally or wall-mounted (optional kit required). It should be placed on a flat, stable surface, away from heat sources, water, direct sunlight, or dust. The tilt angle should not exceed ±10° in the print feed direction for inclined installations.
The printer uses specified thermal paper. Paper loading involves opening the top cover, removing any used paper core, adjusting the paper guide according to the paper roll width (58mm or 80mm), loading the paper roll in the correct direction, pulling out some paper, and closing the cover. The thermosensitive layer of the paper should face upwards.
LED Indication and Beeper
LEDs indicate power status (Green), error conditions (Red flash), and paper status (Red ON for paper end). A beeper provides audible warnings for various events:
- "Beep, Beep--, Beep" for cover open.
- Silent for paper sufficient or paper near end.
- "Beep Beep Beep" for paper end.
- "Beep—, Beep—" for cutter jam.
The printer also has a thermal print head temperature detection. If the print head temperature exceeds 65°C, a warning is issued. If it exceeds 80°C, the printer stops until the temperature drops below 60°C.
Power Connection
Ensure the printer's power switch is off before connecting the AC adapter to the printer, the power cord to the AC adapter, and then to the outlet. Always pinch the shell of the power adapter when disconnecting to avoid cable damage.
Interface Cable Connection
Ensure the printer's power switch is off. Connect the interface cable (USB, Serial, Ethernet) to the matched port on the printer and secure it, then connect the other end to the host computer.
Cash Drawer Connection
The cash drawer interface supports 24V cash drawer devices (max 0.8A current for 510ms). Ensure the printer is off before connecting the cash drawer cable.
DIP Switch Settings
DIP switches allow configuration of various printer parameters, including:
- Serial Interface (RS-232C): Automatic line feed, handshake (XON/XOFF or DTR/DSR), bit length (7 or 8 bits), parity check (Yes/No, EVEN/ODD), and baud rate (2400 to 115200 bps).
- USB and Ethernet Interfaces: Multi-byte characters (English/Chinese), bell control (Disable/Enable), auto cutter (Disable/Enable), busy conditions (Receive buffer full/Printer off-line Receive buffer full), printer density (Reference form 2), and printing dots quantity (512/576).
- Auto Cutter Enable/Disable: Can be set to disable or enable the auto cutter, or ignore auto cutter errors for continuous printing.
Print Test
- Self-Test: Performed by pressing the paper feed and power buttons simultaneously. It prints current settings and status.
- Windows Driver Program Test: After installing the Windows Driver and setting the interface, a "Print Test Page" can be printed from the driver program.
- Hexadecimal Dumping: A diagnostic function to print all received commands and data in hexadecimal format, useful for troubleshooting software problems. Activated by opening the cover, turning on the printer while holding the FEED button, then closing the cover.
A utility tool is provided for advanced configuration and testing, compatible with various Windows operating systems. It allows:
- Printer Management: Add, modify, or delete printer configurations.
- Connection Test: Verify printer connection to the computer.
- Printer Test: Includes self-test, cutter test (partial cut), print test text (with language selection), 1D/2D barcode printing (UPC-A, QR code, PDF417 with module size and error correction level settings), and printing available code pages.
- Command Test: Send text or hexadecimal commands to the printer, with an option for sending recycle printing.
- Manage Images: Download images (BMP format recommended, max 40K per bitmap, total 256K) to the printer's memory, set print alignment (left, center, right), and delete images.
- Code Page Setting: Select and set the desired code page.
- Download Fonts: Download custom fonts to the printer.
- Parameter Setting: Configure Arabic Character Transform (e.g., WPC1256).
- Advanced Settings:
- Function Setting: Configure long beeping after cutting (disable or use printer buzzer with adjustable times and interval), and buzzer volume (very low, low, standard, loud).
- Reduction Paper Setting: Adjust margins, vertical spacing, line feeds, and barcode height.
- DIP Setting: Read and write printer parameters for auto line feed, internal buzzer control, auto cutter, busy conditions, print density, DPI mode, language mode, baud rate, data length, parity check, and ADDC.
- Paper Width Setting: Select paper print width.
- Ethernet Setting: Configure IP address (Auto Assignment IP or Static IP Mode).
- USB Port Setting: Set up virtual serial port.
- Length Of Print: Displays the total length of paper printed by the print head.
- Cut Paper Config: Set whether the printer automatically cuts paper after the cover is closed.
Maintenance Features
Cleaning and Maintenance
Regular cleaning is essential to maintain print quality and prolong printer life.
- Caution: Always turn off the printer and wait 2-3 minutes for the print head to cool down before cleaning. Avoid touching the heated portion of the print head and protect it from static damage or scratches.
- Cleaning Head: Use a cotton swab with medical alcohol to clean the print head from the center to the edges. Allow alcohol to evaporate completely (1-2 minutes) before use.
- Cleaning Sensors, Roller, and/or Paper Path: Open the printer cover, remove paper, and use a dry cloth or cotton swab to remove dust or foreign substances. For adhesive substances, use a cotton swab soaked in medical alcohol. Ensure complete evaporation of alcohol before use.
- Frequency: Clean parts whenever print quality or paper detection degrades.
Removing Jammed Paper
- Warning: Do not touch the hot thermal print head.
- If the printer cover can be opened: Turn off the printer, open the cover, remove jammed paper, reload the paper roll, and close the cover.
- If the auto cutter is jammed and the printer cover cannot be opened: Turn off the printer, open the front cutter cover, turn the knob until the cutter returns to its normal position, close the front cover, then open the top cover and remove jammed paper.