51
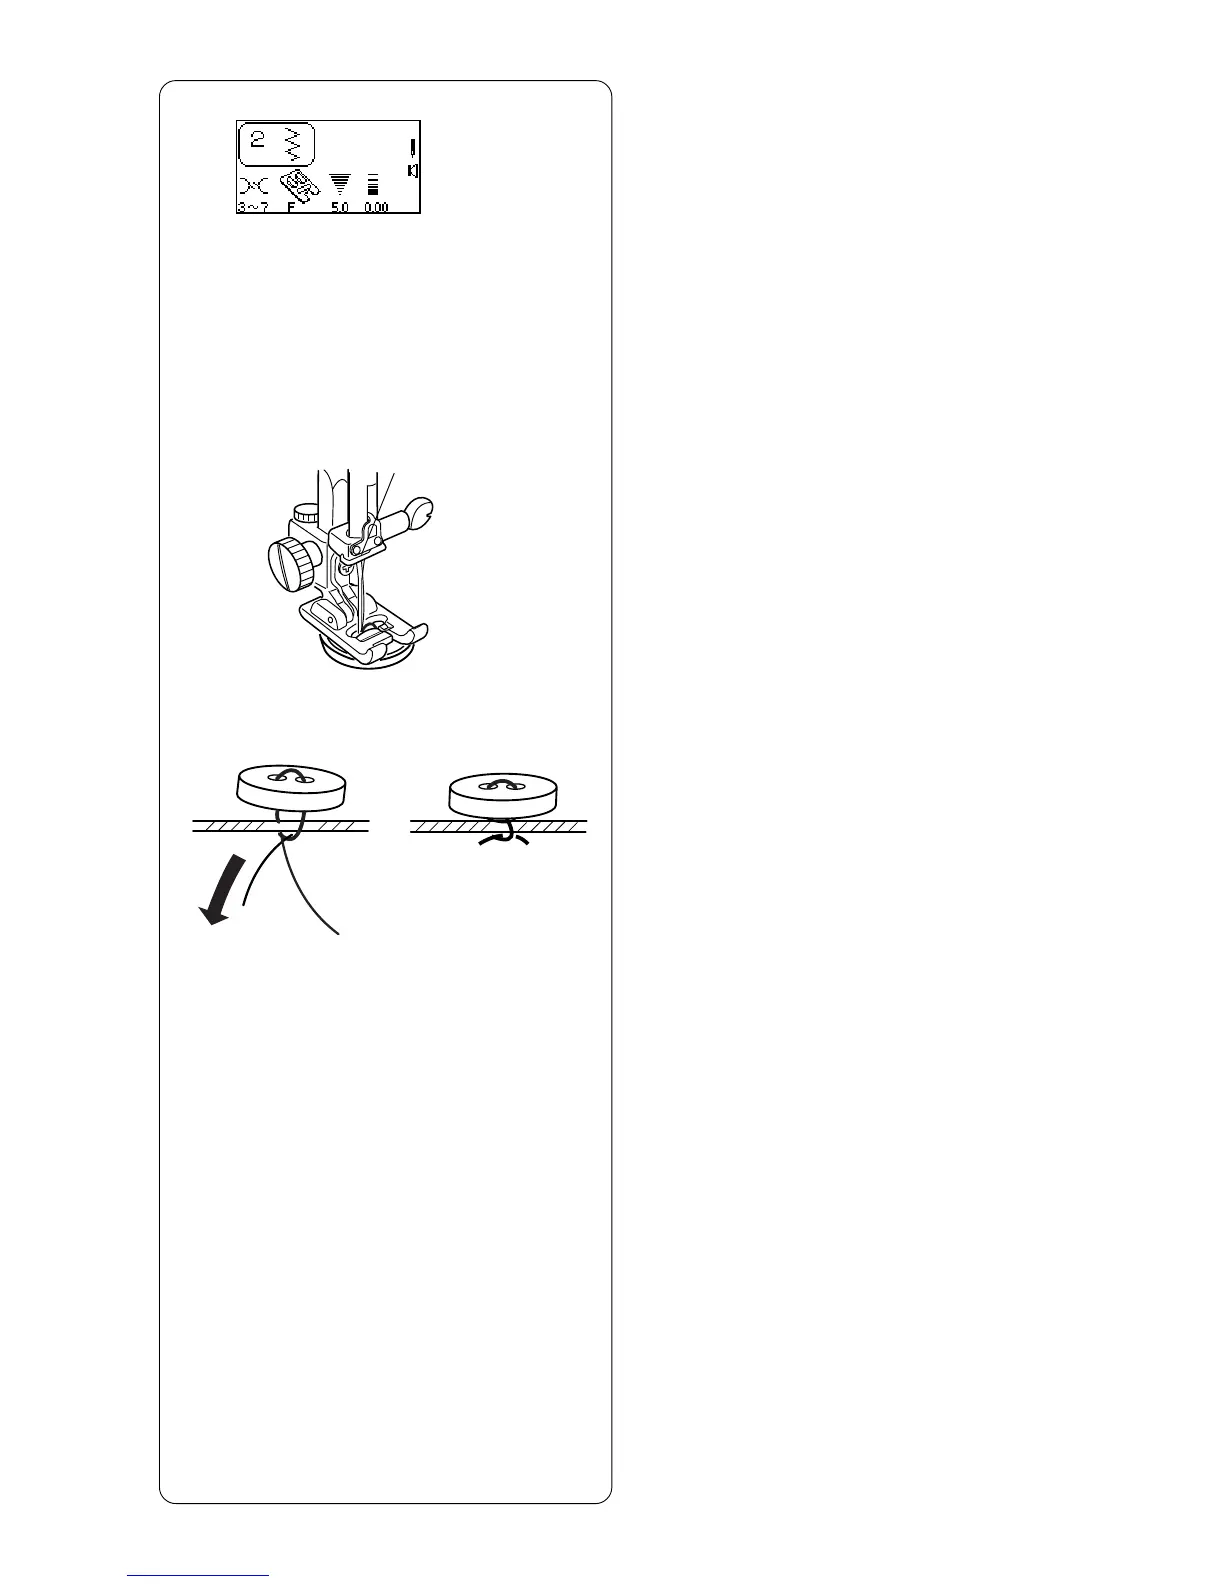
How To Sew On a Button
Hand sewing buttons to a garment is very
timeconsuming.
Sew them on in one quick, easy step.
Select 2.
Attach satin stitch foot F.
Drop the feed dog. See page 16.
• Set the stitch width according to the position of
the holes in the button.
Mark button placement on fabric. Use washable
glue or transparent tape to temporarily secure the
button. Place the button and fabric under the
presser foot. Match the holes in the button to the
horizontal slot on the presser foot.
Turn the flywheel by hand until the needle is down
inside the left hole of the button. Lower the presser
foot.
Turn the flywheel by hand to position the needle
above the right hole of the button. Press the “Stitch
Width/Needle Position” key to adjust the needle
over the right hole.
NOTE: The LCD screen will display a warning to
raise the feed dog. Simply ignore and start sewing
again.
Stitch several times.
After you finish sewing, cut the thread leaving 10-15
cm (4-6˝) of thread at the button.
Pull the thread to the reverse side of the fabric and
tie the threads.
Raise the feed dog after sewing on buttons.
NOTE: The optional Sewing on Button foot grips the
button better and also allows you to create a thread
shank.