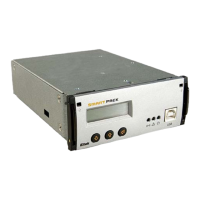
3 Installation of Smartpack Controller
16 User’s Guide Smartpack Monitoring & Ctrl Unit,
350003.013, v5-2006-11
3. Installation of Smartpack Controller
Safety precautions
Get acquantied with the satety precautions on page 2, before installing or handling
the equipment.
Mounting and Removing the Controller
The Smartpack controller incorporates handles that serve both to lock the module
into position and to pull it out of its housing.
Mounting the Smartpack controller
1. Open the handles by
inserting a screwdriver into the holes to release the
spring mechanism
2. Insert the module fully into the power shelf, after
plugging the cables to the rear panel
3. Lock the handles by
pushing the handles up into their housings (locked
position), so that the module is securely locked
Removing the Smartpack controller
1. Open the handles by
inserting a screwdriver into the holes to release the
spring mechanism
2. Remove the module by
using both handles to pull the module loose gently;
support from underneath; unplug the cables connected
to the rear panel
Figure 18 Smartpack controller’s locking mechanism
Removing Blind Panels
Release the panel’s upper left and right corners by inserting a small screwdriver
into the panel’s upper left gap, and carefully press down and out to release the
locking tabs. Repeat on the upper right gap. Refer to the Flatpack2 system’s quick
start guide for more information.
Smartpack
controller
Handle in locked position
Hole to release the
handle’s spring
mechanism
Handle in
unlocked
osition
Device
hazard
CAUTION: Do not hand-carry the controller by its handles. Cables are
plugged to the controller’s rear panel. Open the handles before inserting the
controller into the power shelf.
Mount blind panels in unused module locations.
Electric
shock

 Loading...