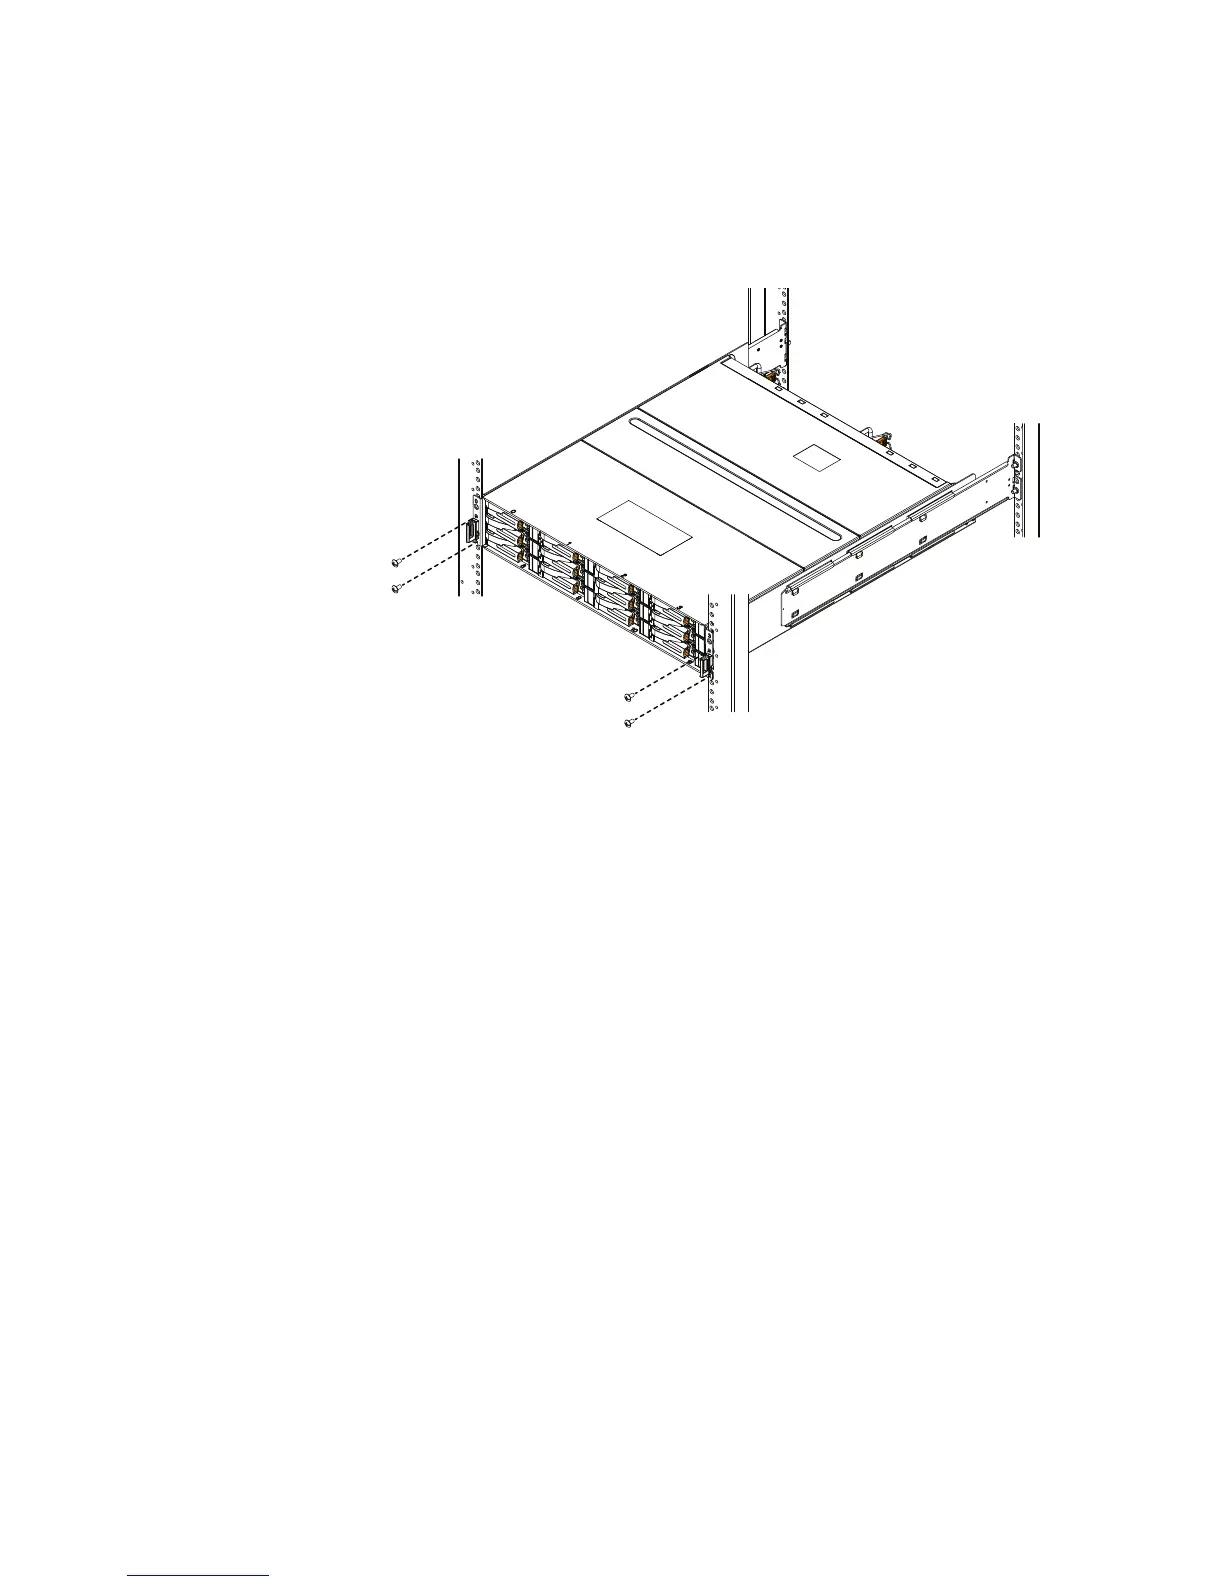
2. Secure the front of the enclosure to the front vertical channels of the cabinet using
four screws (two per side) into the DPE bracket screw holes and into the cabinet as
shown in Figure 10 on page 22. It may be easier to install the screws working in a
diagonal pattern, such as bottom left and top right, bottom right and top left.
Figure 10 Securing the enclosure to the front of the cabinet
3. Once the DPE is in place, tighten all the screws.
Install the DAE rails
Among the DAE components is a rail kit. The rail kit will contain either a set of snap-in
rails or a set of adjustable rails. Either set of rails can be used. To install the rails, follow
the instructions that are specific to the type of rails in the kit.
Install 2U DAE rails
The following procedure shows you how to install 2U DAE rails.
Procedure
1. Install the 2U DAE rails into the cabinet.
The DAE rails should be installed above the topmost component in the cabinet. The
rails must be aligned carefully so that they are level front to back and with the
companion rail left to right.
Refer to Figure 11 on page 23 while performing the procedure that follows.
a. Insert the adjustable rail slide and seat both alignment pins into the rear channel
of your cabinet.
b. Extend the rail and align the front of the rails.
2. Insert one screw in the lowest hole of the front and two in the back of each rail.
Rack and install
22 EMC VNXe2 Series VNXe3200 Installation Guide