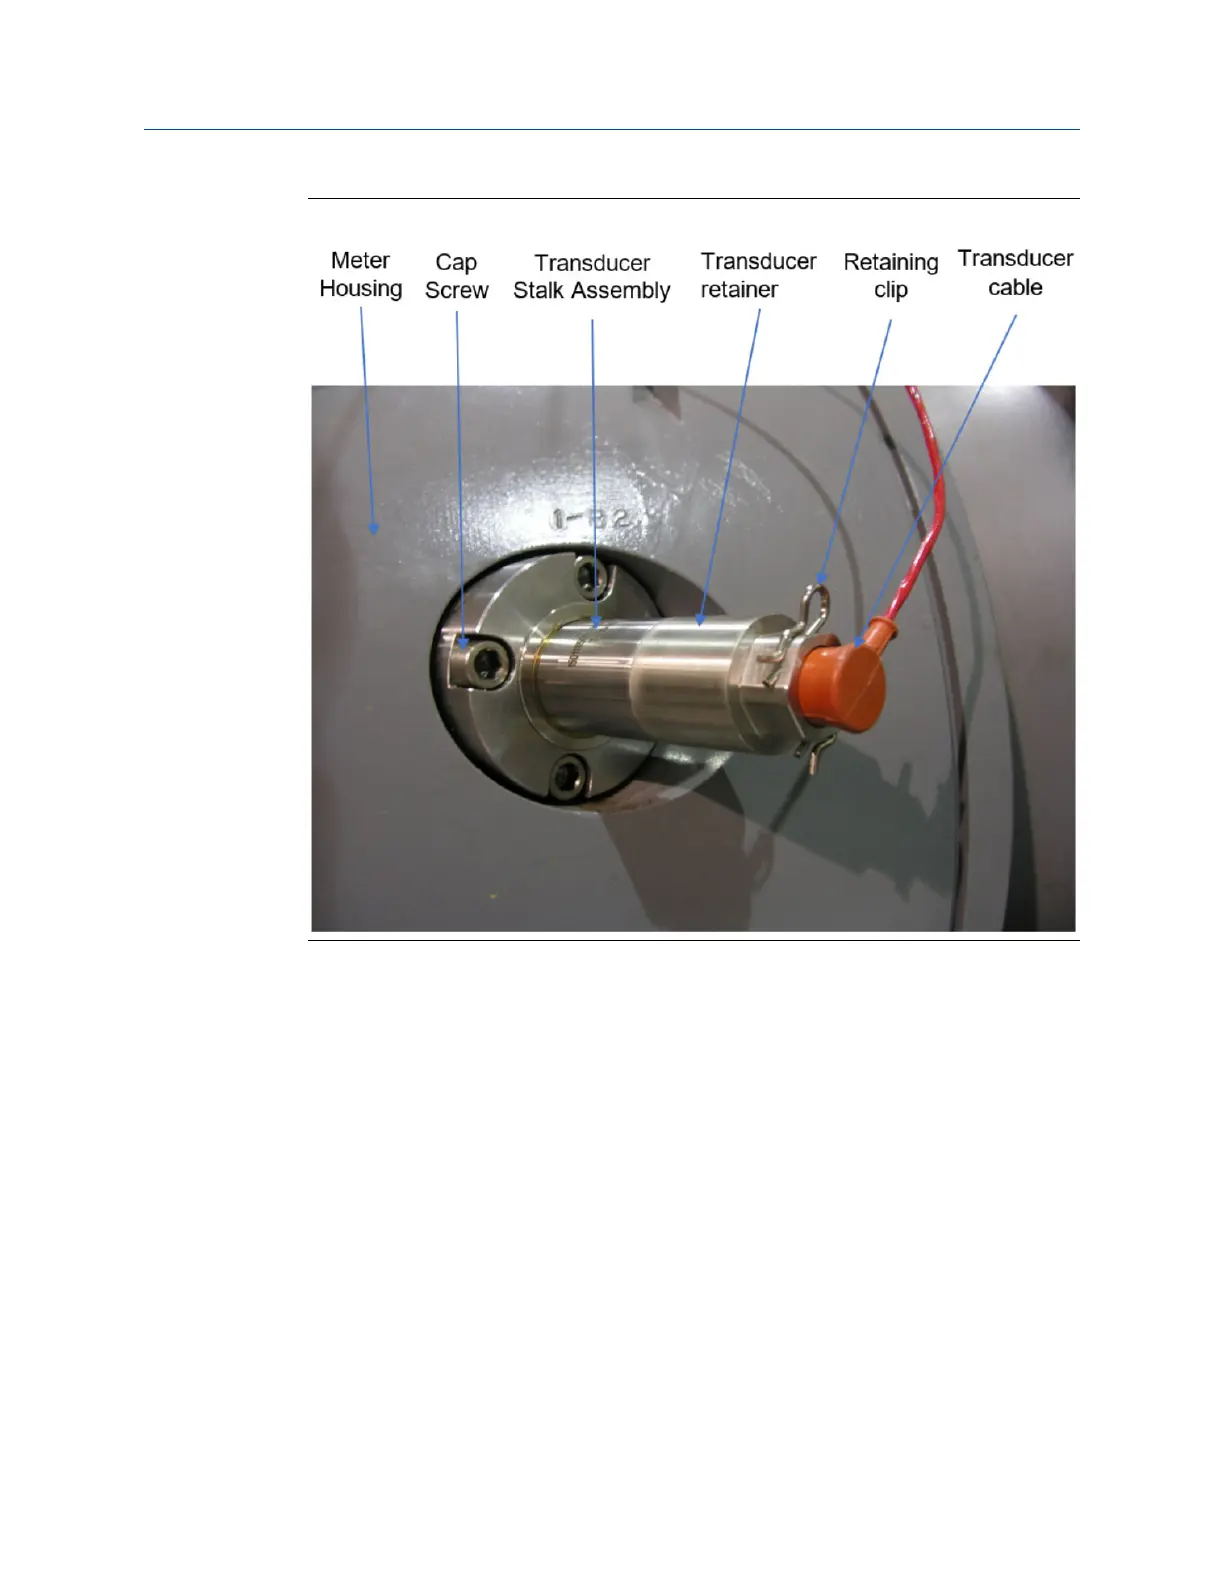
Figure 3-8: Transducer assembly installed in a meter body
Procedure
1. Blow the line down according to the site standard operating procedures.
2. Ensure that the line pressure is down to atmospheric pressure prior to disassembly.
3. Disconnect transducer cabling from the transducer assembly by removing the
retaining clips and pulling the cable plug straight out. Do not twist or rotate the
plug.
4. If the transducer housing is planned to be serviced or replaced, loosen the
transducer retainer one quarter turn by turning the retainer counter-clock wise with
a 1 1/8" wrench. DO NOT remove the transducer retainer at this time.
5. Remove the four or six 3/8" cap screws holding the T-200 transducer assembly on
the meter body.
6. Carefully pull the T-200 transducer assembly out of port hole without damaging the
transducer housing.
7. Mark the port number, i.e. A1, ... D2, on the transducer stalk if not labeled already.
Place the T-200 transducer assembly in a safe place to avoid any damages to the
assembly.
Meter repairs Maintenance and Troubleshooting manual
August 2021 P/N 3-9000-791
58 Models 3415, 3416 and 3417 GUSM

 Loading...


