- 131 -
Chapter 6. Connection
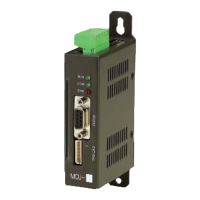
4) MCU-EL
Ext. I/O *
24V GND
24V
TxD+
RxD+
TxD-
RxD-
FS+
FS-
CS1+
CS1-
CS2+
CS2-
RESET+
RESET-
CLK+
CLK-
MCU-Mx
MCU-EL
1
2
*1)
1
2
3
4
5
6
7
8
9
10
11
12
13
14
15
16
EXT-IO
Power
*2)
Output COM.
DC 24V
Power
IO2
OUPUT5
Input COM.0
INPUT7
OUPUT0
INPUT0
INPUT1
INPUT2
INPUT3
INPUT4
INPUT5
INPUT6
INPUT8
INPUT9
INPUT10
INPUT11
Input COM.1
OUPUT1
OUPUT2
OUPUT3
OUPUT4
OUPUT6
OUPUT7
OUPUT8
OUPUT9
INPU T0
INPU T1
INPU T2
INPU T3
INPU T4
INPU T5
INPU T6
INPUT7
INPU T8
INPU T9
Input COM .0
Input COM.1
INPU T10
INPU T11
INPU T12
INPU T13
INPU T14
INPU T15
INPU T16
INPU T17
INPU T18
INPU T19
OUTPUT0
2
3
1
20
21
22
4
5
23
24
25
26
27
28
29
30
31
32
33
34
35
36
37
6
7
8
9
10
11
12
13
14
15
16
17
18
19
OUTPUT1
OUTPUT2
OUTPUT3
OUTPUT4
OUTPUT5
OUTPUT6
OUTPUT7
OUTPUT8
OUTPUT9
OUTPUT10
OUTPUT11
OUTPUT12
OUTPUT13
Output COM.
24V GND COM.
24V GND COM.
24V COM
IO1
12
13
25
24
11
23
4
17
5
18
6
21
8
7
20
19
10
22
9
1
14
2
15
3
16
24V GND COM.
24V COM.
24V GND COM.
ON
1
2
3
4
S.G
5V
Note)
*1) Set an ID as follows before inputting power.
Extended I/O 1: 1 & 2 ON, 3 & 4 OFF
Extended I/O 2: 1 & 2 OFF, 3 & 4 ON
Be careful because there may happen an I/O malfunction when setting other ID than above.
Do not set an ID after inputting power.
*2) All input ports can be inputted with NPN or PNP configuration. Therefore, 24V or 24V GND
can be connected to the input pin(COM).