eMKW-TD0054-21- Page 39
left corner to see the shortcuts table under the help guide, or press F12
on your keyboard.
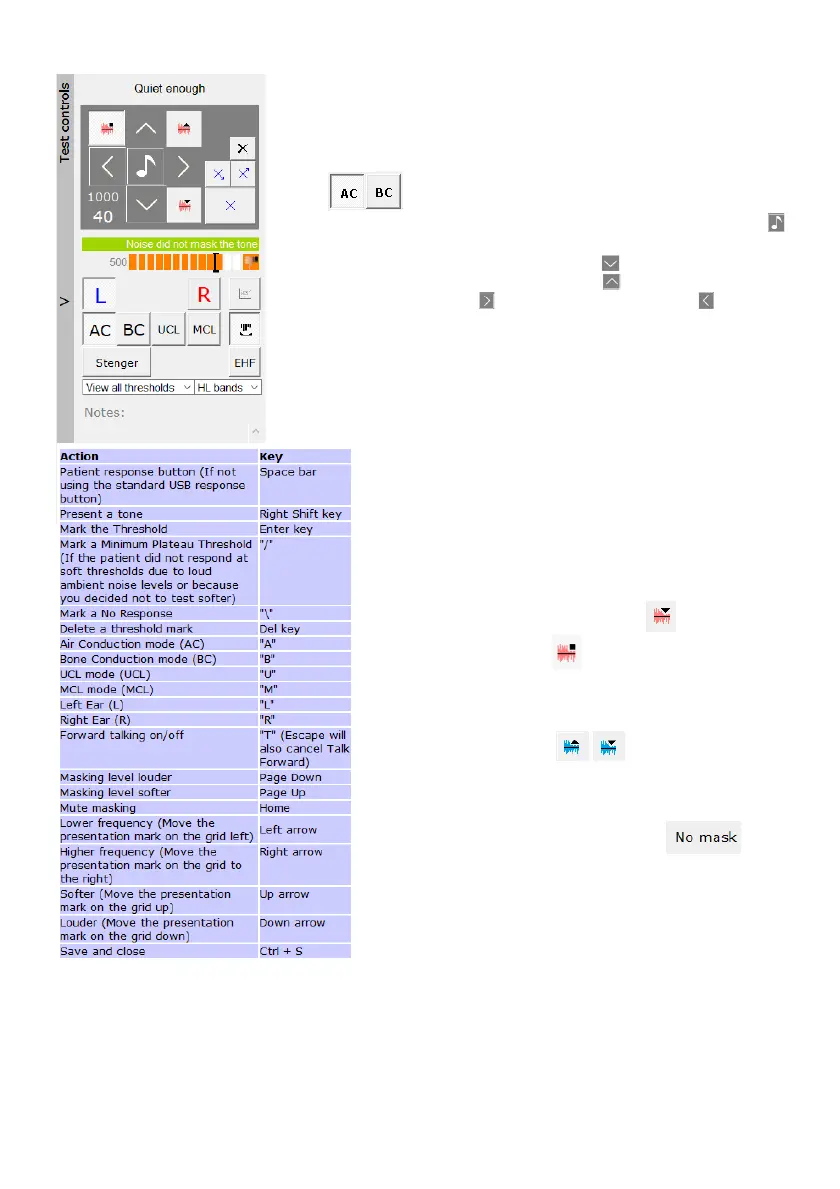
Presenting Tones
To switch between air conduction and bone conduction testing, click AC
or BC.
To present a tone at the set frequency (1000) and intensity (40), click
.
To increase intensity (to make it louder) click .
To decrease intensity (to make it softer) click .
To increase frequency click , to decrease frequency click .
To switch between left (blue screen) and right (red screen) click on the
blue L or red R.
After a tone is presented, the white bar will become coloured as you
wait for the patient to respond. It will fill up green and show a thumbs
up if the patient responds in time.
If the patient was too slow it will turn orange and show a
thumbs down (indicated in the image alongside). If the
patient presses the response button without a tone being
presented, a grey spot will mark the screen, indicating a
false response.
Masking
Use masking keys to move the masking level down, and
onto the test screen to begin masking.
Stop masking by clicking:
Red icons mask the right ear, while the pure tone is
presented to the left ear.
Blue icons mask the left ear, while the pure tone is
presented to the right ear.
The KUDUwave will automatically mask the ears when
performing bone conduction tests, unless this is removed
for manual tests macros.
During Bone conduction testing, select if you
would like to determine unmasked threshold levels (non-
ear specific), and to determine if there’s a need for masked
bone conduction thresholds.