Service Parts Replacement
© 2019 EMP, Inc. 15
Service Parts Replacement
WARNING: To avoid serious personal injury, possible death, or damage to the vehicle, disconnect the
main negative battery terminal and/or switch off the battery disconnect switch first before removing or
installing any components.
WARNING: To avoid burn injuries, allow time for the engine to cool to a safe working temperature
before removing or installing any components.
CAUTION: To avoid potential damage to the wiring and/or hoses, route all wires and hoses away from
any sharp edges, moving objects, and heat sources.
CAUTION: All wires should be secured every 12–18 inches. All zip ties must be placed over wire
loom/convoluted tubing and not over bare wires.
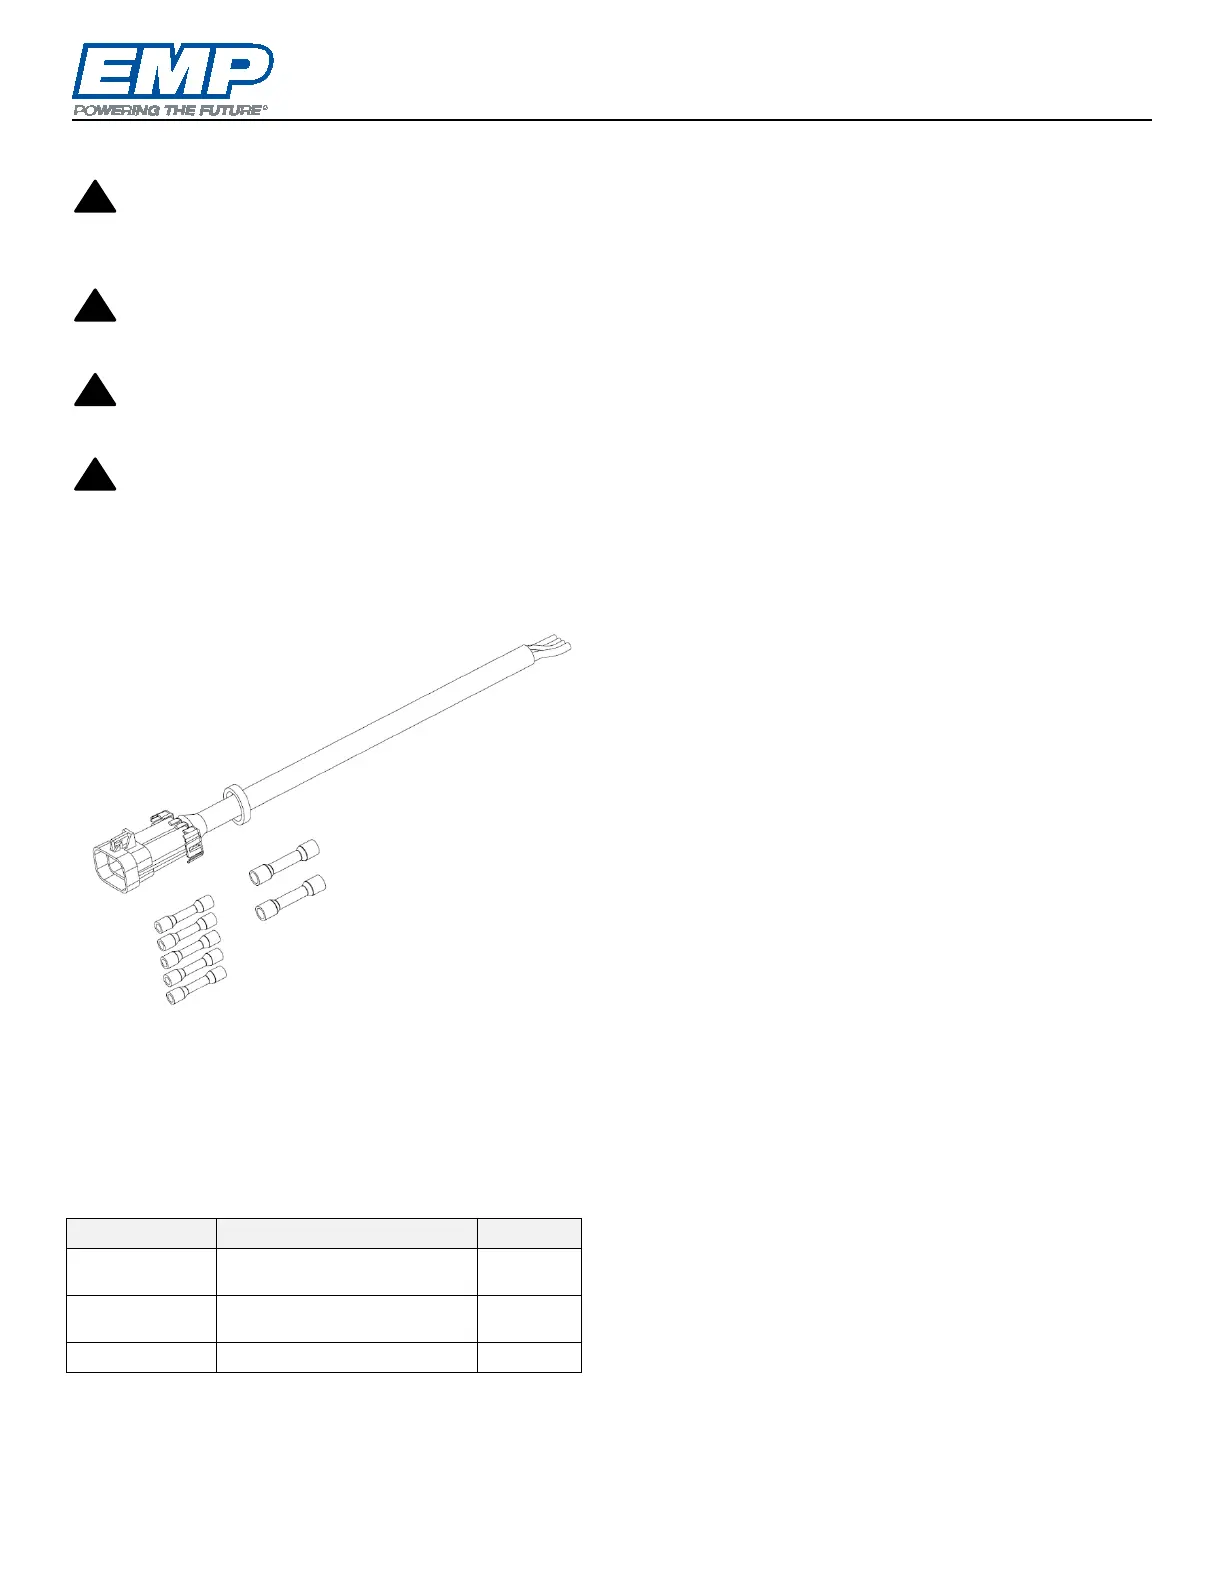
R20L Component Controller
Connector
NOTE: It is very important to use the correct
Molex butt connectors when replacing the
component connector.
Refer to the component connector section for
component wire sizes and colors.
Harness Replacement Kit 1370036077
3250002166
12–10 AWG Molex Butt
Connector
2
3250036079
16–14 AWG Molex Butt
Connector
5
1. Cut/remove any zip ties that are securing the
component to the system.
2. Disconnect the component connector from the
main system harness connector.
NOTE: To avoid damaging the wires and/or pin
connections, do not pull back using the wire
harness to disconnect the connection. Wiggling the
connector body will help in freeing the connection.
NOTE: Ensure the harness connector electrical
sockets remain free of dirt to ensure a solid
electrical connection when reconnecting to the
components.
3. Using a pair of wire cutters, cut the component
wires one-by-one, so the cut wires are
staggered lengths. Staggering the wire lengths
spaces out the butt splices. The repaired
harness should maintain the 13” length of the
component lead.
4. Using a pair of wire strippers, strip 3/8” of the
protective wire coating off of the component
wires and the connector replacement wires
ensuring not to cut through the wires – (14
places).
5. Examine the wires to ensure no corrosion. If
corrosion is present, cut the wire back farther
toward the component. Corrosion that has
carried through the wires into the component
indicates that corrosion is likely present on the
controller board as well and the life of the
controller may be compromised.
6. Fully insert the component wire into the proper
butt connector and inspect to ensure there are
no wire strands protruding outside the
connector.
7. With the wires fully inserted, crimp the wires in
place using a compatible crimper.
8. Cut the replacement harness wires to match the
staggered cuts made on the component wires