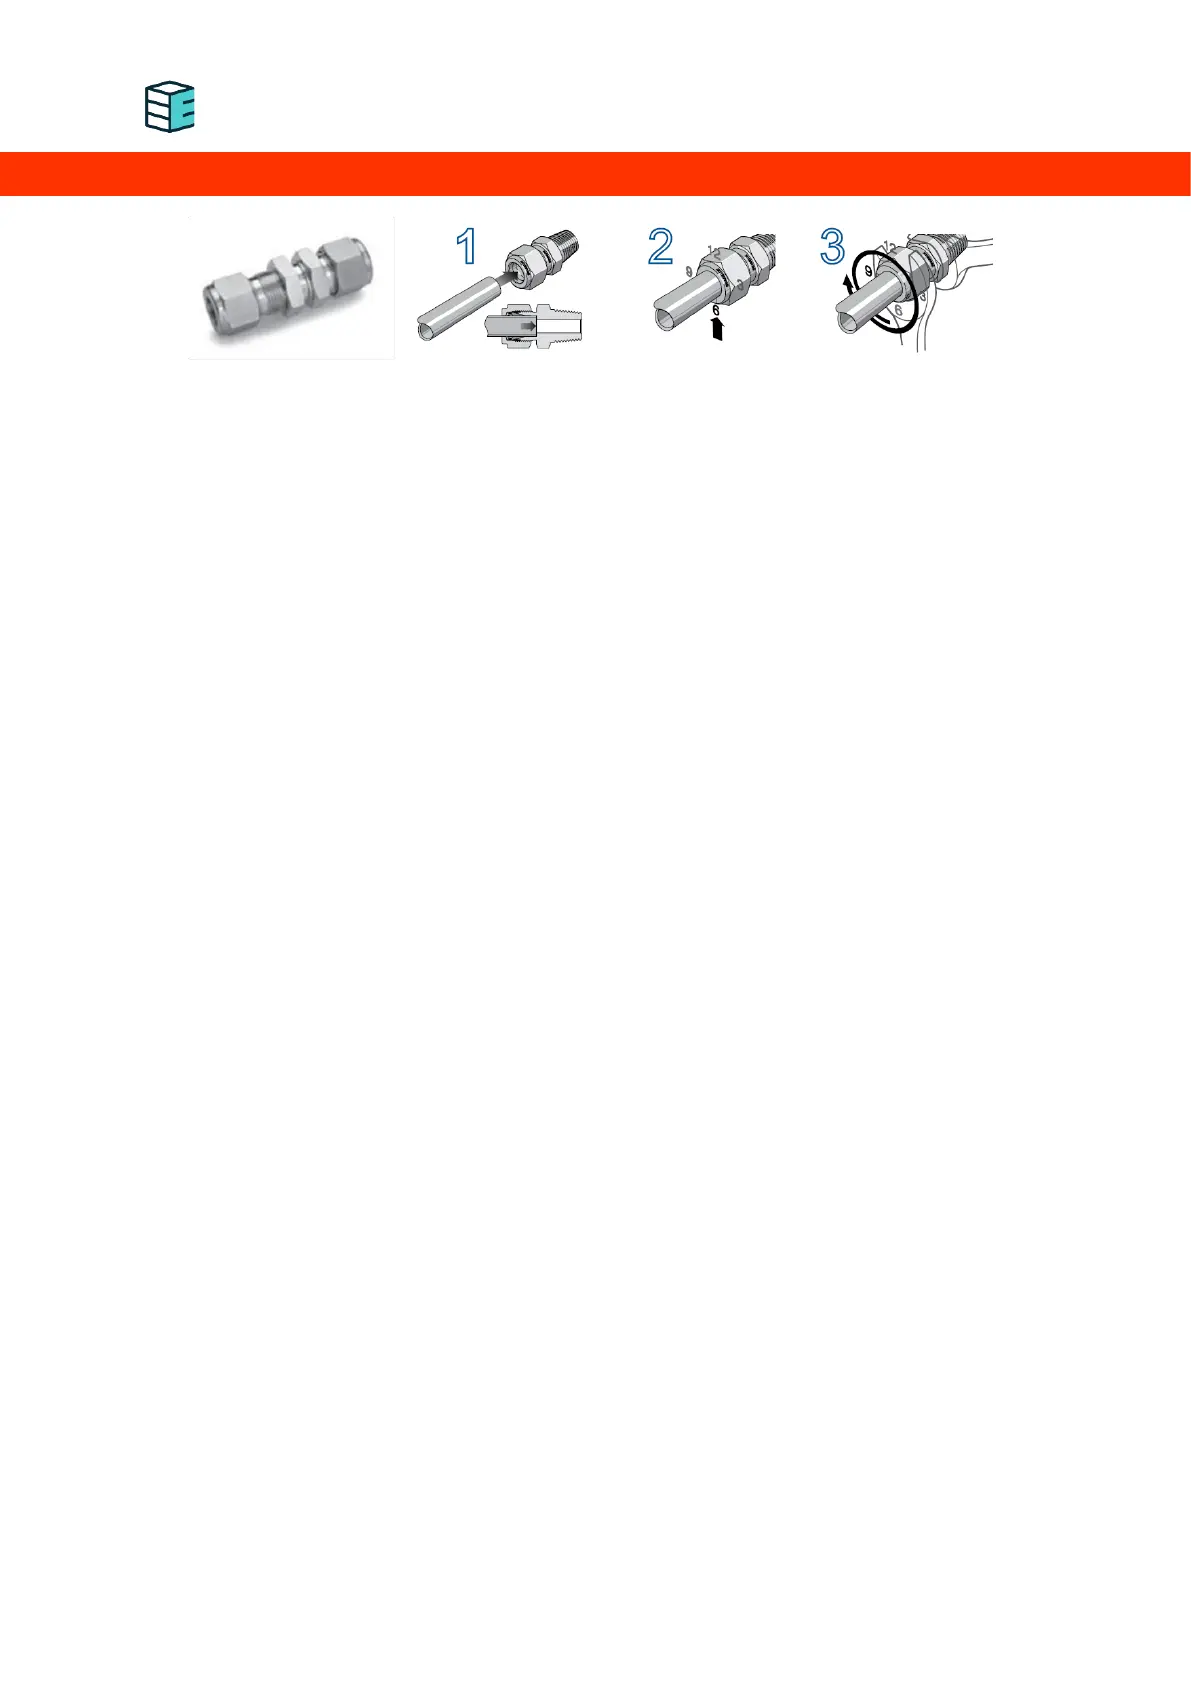
1. Fully insert a ¼” stainless steel tube into the bulkhead union, with the nut and ferrule in place on
the fitting.
2. Rotate the nut finger-tight, then mark the 6 o’clock position on the nut.
3. Hold the fitting body steady on the device using the 5/8” open key wrench.
4. While holding the fitting body steady, tighten the nut one and one quarter turns to the 9 o’clock
position with the 9/16” open key wrench.
5. To ensure a leak-proof connection is made, another quarter-turn of the nut (to the 12 o’clock
position) is recommended.
Always check each connection for leaks! Metal to metal fittings can be used but remounting them is
not recommended due to possible leakages. For more information, please refer to Appendix I below.
4.4.1 HYDROGEN OUTLET CONNECTION GUIDE (H2 OUT)
Connect the H
2
Out port, located at the bottom left of the front panel, to a hydrogen storage or the
Enapter Dryer. It is recommended to fit a shut-off valve between the tank and the dryer to be able to
isolate each component during maintenance.
Multiple electrolysers can be connected to a common line by combining the electrolysers in a 19” rack
via a common output line to the left of the devices and then connecting this H
2
line with the lines of
other racks. Adapting the pipe diameters to the maximum output is required.