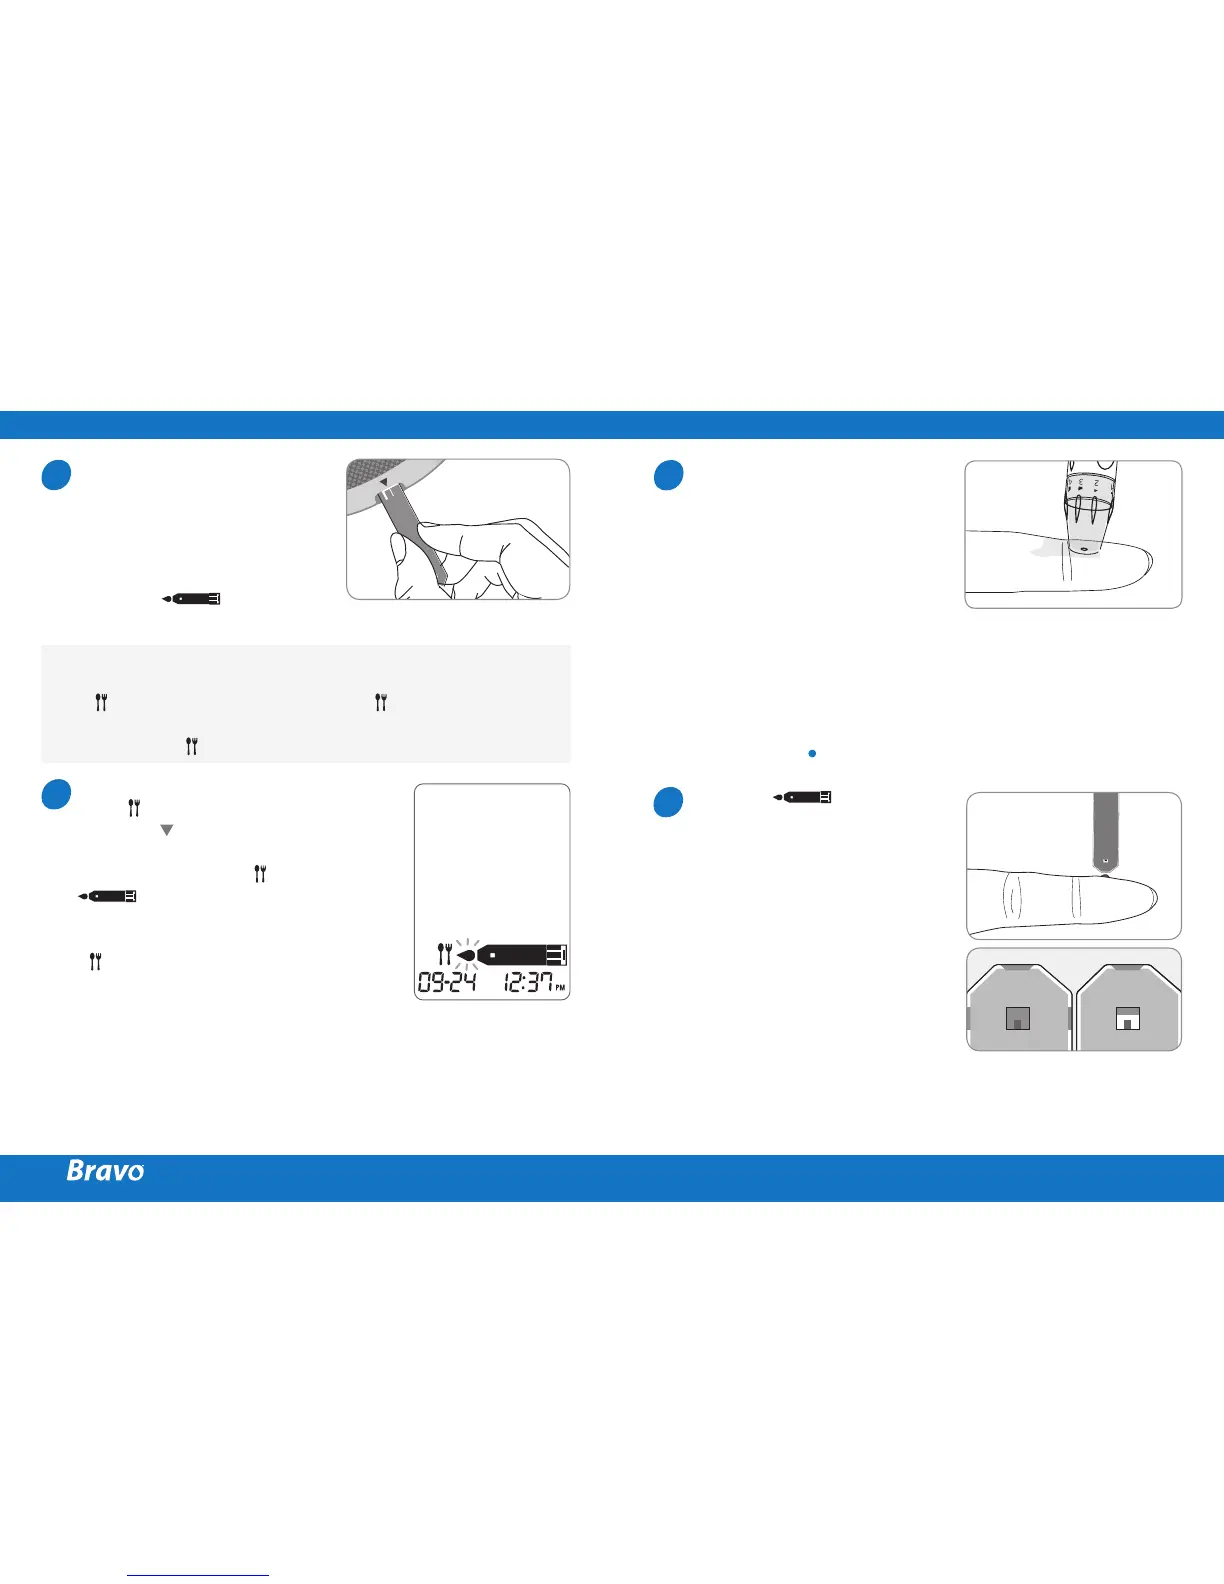
Insert a test strip with the
contact bars facing upwards
into the meter’s test strip
port. Push the strip in gently
until the meter beeps. Be
careful not to bend the test
strip. The symbol
will appear on the screen.
If you want to attach a post-meal
flag (
) to a test result, press
and hold for 3 seconds after
inserting the test strip.
The post-meal flag ( ) and the
symbol will appear on the
screen. The test result will also be
displayed with the post-meal flag
( ).
If you do not want to save the
result as a post-meal test, move
on to the step 8 after the step 6.
Flagging Post-meal Test Results
The meter allows you to flag a result of a post-meal test
with
icon. The post-meal test flag (
) can be attached
just before applying the blood sample. Once you attach the
post-meal flag (
) to the test results, it cannot be deleted.
6
7
Obtain a blood sample using
the lancing device. Place the
device against the pad of
the finger. The best puncture
sites are on the middle or
ring fingers. Press the release
button. Remove the device
from the finger.
Wait a few seconds for a blood
drop to form.
A minimum volume of 0.5
microliter is needed to fill the
confirmation window. (Actual
size of 0.5 µL: )
After the symbol
appears on the screen, apply
the blood sample to the
narrow end of the test strip
till the meter beeps. If the
confirmation window is not
filled before the meter finishes
counting down then discard
the test strip and insert a new
one.
If confirmation window is
not filled in time because
of abnormal viscosity or
insufficient volume, Er4
message will appear.
8
9
PREPARING THE METER AND TEST STRIP APPLYING BLOOD SAMPLE
Good
Sample
Insufficient
Sample