CONTROL SOLUTION TESTING
1
2
Shake the Bravo™ Control
Solution bottle before each test.
Remove the cap and squeeze the
bottle to discard the first drop.
Then wipe the tip with a clean
tissue or cloth. After the
symbol appears on the display, apply the solution to the
narrow edge of the test strip until the meter beeps. Make
sure the confirmation window fills completely.
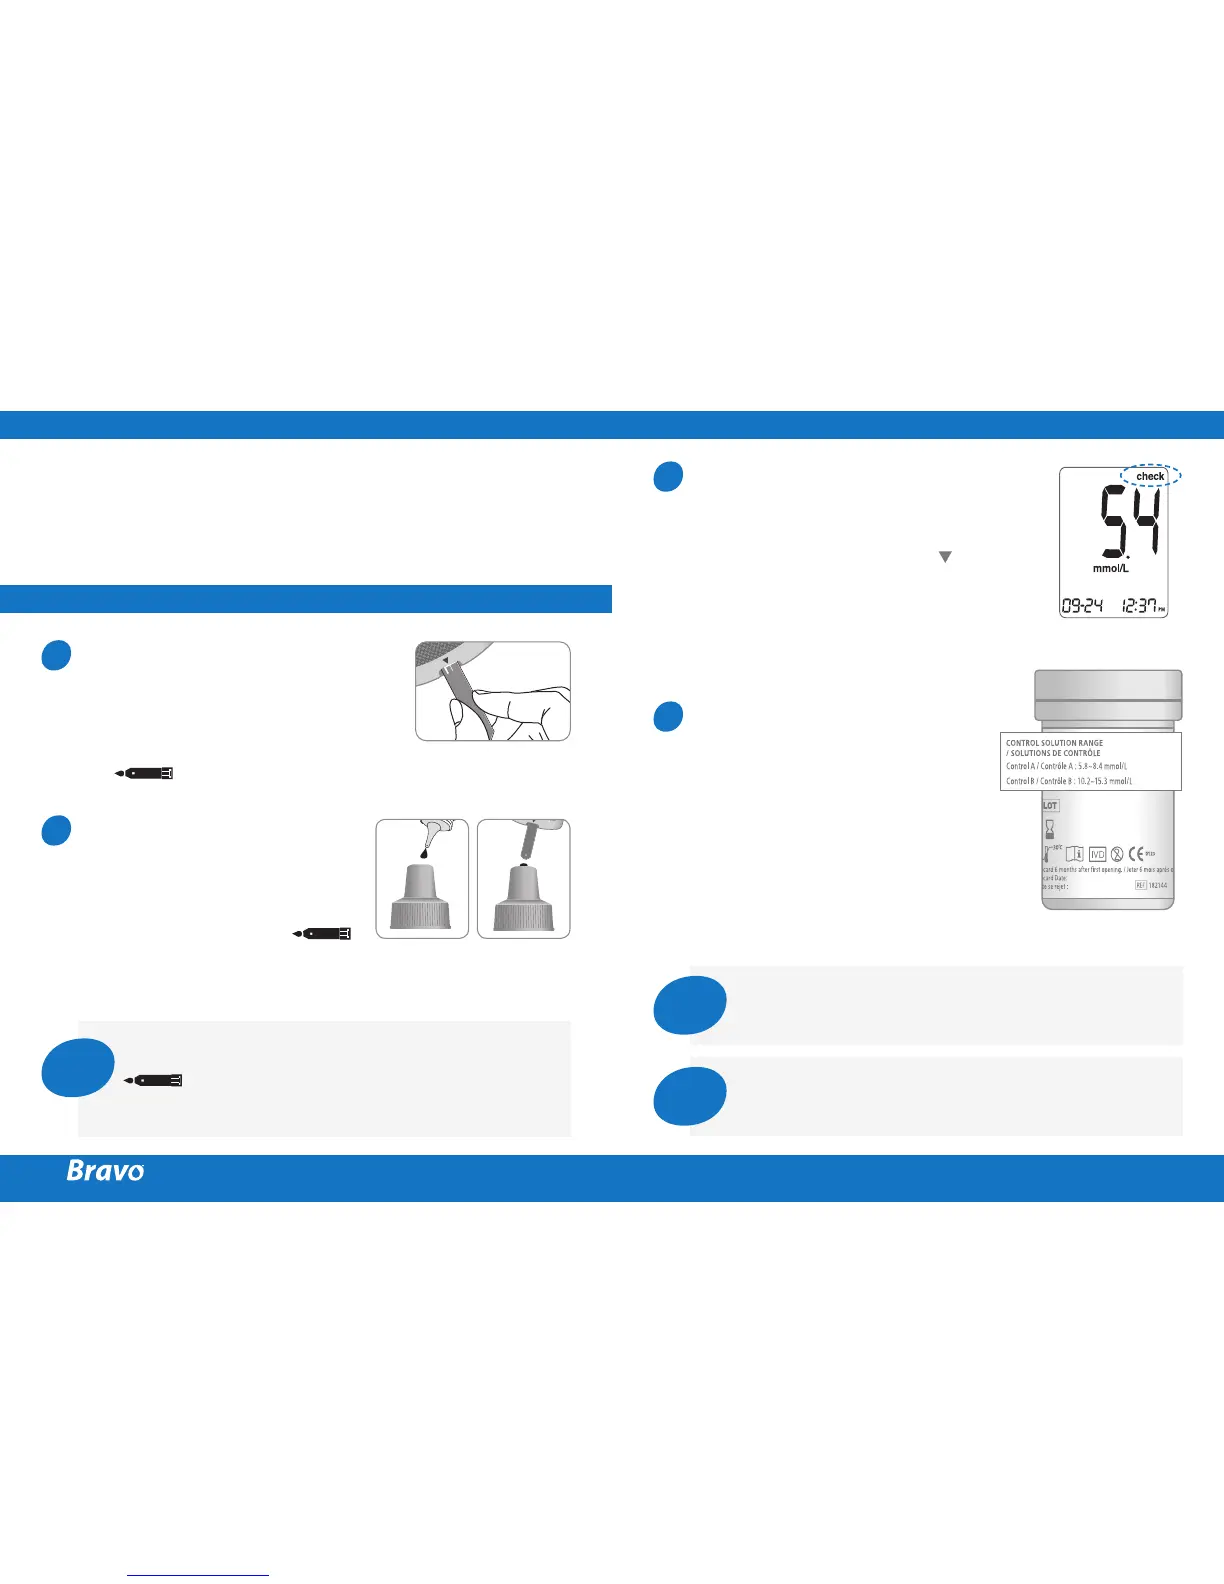
Insert a test strip into the meter’s
test strip port, with the contact
bars facing upwards. Gently push
the test strip into the port until
the meter beeps. Be careful not to
break the strip while pushing it in.
The symbol will be displayed
on the screen.
A test result will appear after the
meter counts down from 5 to 1.
After your control solution result
appears on the display, press for 3
seconds till the ‘check’ appears on the
display. When the ‘check’ is displayed,
the result is not stored in the meter’s
memory and is not included in the 14-
day averages.
Compare the result displayed
on the meter to the range printed
on the test strip vial.
The result should fall within that
range.
Used strips should be discarded
safely in disposable containers.
3
4
Note
The meter may switch off if the control solution
sample is not applied within 2 minutes of the
symbol appearing on the screen. If the
meter turns off, remove the strip, reinsert, and
start from step 1.
Caution
The range printed on the test strip vial is for the
Bravo™ Control Solution only. It does not have any
connection to your blood glucose level.
Note
The Bravo™ Control Solution can be purchased
separately. Please contact your authorized
Endomedical™ sales representative.
test results and you feel that the meter or test strips are not
working properly,