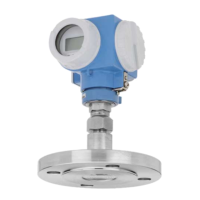
2.2 Mounting instructions with diaphragm seal (PMC 631, PMP 635)
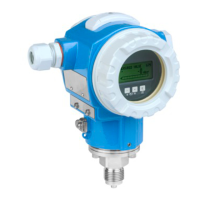
Cerabar S
with diaphragm seal
– PMC 635
– PMP 635
The Cerabar S with diaphragm seal is
screwed in, flanged or clamped,
depending on the type of diaphragm seal.
•
The protective cap of the diaphragm
seal should only be removed just before
mounting in order to protect the
diaphragm.
•
The membrane of the diaphragm seal of
the Cerabar S must not be pressed in or
cleaned with pointed or hard objects.
•
The diaphragm seal and the pressure
sensor together form a closed and
calibrated system which is filled with
filling fluid through a hole in the upper
part. The following rules should be
observed:
– This hole is sealed and not to be
opened.
– The device may only be rotated on
the surface provided on the
diaphragm seal instrument and not on
the housing.
Level measurementFor level measurement the Cerabar S must
always be installed below the lowest
measuring point.
•
The instrument should not be installed
within the flow of material, in the outlet
of the tank or at a place in the tank
where pressure pulses from agitator
blades may occur.
•
Calibration and function testing are
easier to carry out if the Cerabar S is
mounted downstream from a shut-off
valve.
Mounting with
temperature spacers
The use of temperature spacers is
recommended for continuous extreme
product temperatures.
•
Note when mounting that the
temperature spacer increases the
maximum height by 100 mm.
•
Due to the hydrostatic column in the
temperature spacer, the increased
height also causes a zero point shift of
approx. 10 mbar.
See Chapter 5.1, pages 26 and 27 for
information concerning position
calibration (display only) or zero-point
correction.
0 - 10 bar
BA187Y16
Figure 2.6
When screwing in the Cerabar S
with diaphragm seals, turn by the
diaphragm seal only, not by the
housing.
0 - 10 bar
BA187Y12
0 - 10 bar
A + 100
100
BA187Y13
Figure 2.7
Information on the maximum
installation height A is given on
pages 57…58
Cerabar S 2 Installation
Endress+Hauser 13
 Loading...