8.3 Exchanging the sensor module and electronics
Warning!
If the device is operated in an explosion hazardous area of type EEx ia, please note the
following:
•
Only specially trained personnel or E+H Service is allowed to replace the sensor
module and electronics.
•
Comply with prevailing standards, national explosion protection regulation and
safety instructions (XA…).
•
After replacing the sensor module and electronics, make sure that the dielectrical
strength between the intrinsically safe circuit and the housing is 500 V AC.
Caution!
The electronic module is an electronic component. Electrostatic discharge can affect the
operation of the instrument or cause damage to its electronic components. Contact
should be made with a grounded object before handling the electronic module. Switch
off power supply.
Changing the electronics
Removal
•
Open the cover to the display compartment
•
Remove the display
•
Remove the plug from the electronic module
•
Unscrew the mounting ring and remove
•
Remove the electronic module
Mounting
•
Insert the electronic module
•
Fix the mounting ring
•
Plug in the connectors, noting size and coding
•
Attach display of cover and screw down the cover to the display compartment
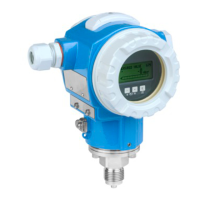
Changing the sensor
module
Removal
•
Remove the complete electronics and electronic box from the housing (see above).
•
Position the bracket and smooth face on the sensor module parallel to each other.
Remove the stud, undo the screw and lift out the bracket. When unscrewing the
sensor module, carefully rotate the cable with it.
Mounting
•
Insert the cable with plug into the display compartment.
•
Screw in the sensor module right to the stop, taking care to turn the cable with it.
•
To ensure that the Cerabar S can be fully turned when mounted, turn the unit in the
other direction by one complete turn.
•
Position the bracket and smooth face parallel to the sensor module.
•
Secure the bracket with the stud and screw.
•
Mount the electronics and electronic box and insert the plug, noting size and coding.
Warning!
4
...
2
0
m
A
Te
s
t
1
2
3
0-10BARABS
0
1
2
3
4
5
6
7
8
9
A
B
C
D
E
F
Switch off
power supply
Mounting ring
Electronic module
Caution!
Electronic component
Sensor module
Electronics box
BA187Y62
Bracket
Stud
Screw with nut and
rivet captured in
bracket
Caution!
8 Maintenance and Repair Cerabar S
50 Endress+Hauser
 Loading...