Incorrect connection, incorrect supply voltage
Safety risks for staff and incorrect operation of the device
‣ Check that all connections have been established correctly in accordance with the wiring
diagram.
‣ Make sure that the supply voltage matches the voltage indicated on the nameplate.
6.2 Switching on
Familiarize yourself with the operation of the transmitter before it is first switched on.
Please refer in particular to the "Safety instructions" and "Operation" sections.
After power-up, the device performs a self-test and then goes to the measuring mode.
Now calibrate the sensor in accordance with the instructions in the "Calibration" section.
During commissioning, the sensor must be calibrated so that the measuring system can
return precise measurement data.
Then perform the first configuration in accordance with the instructions in the "Quick start-
up" section. The values set by the user are kept even in the event of a power failure.
The following function groups are available in the transmitter (the groups only available in
the Plus Package are marked accordingly in the functional description):
Setup mode
•SETUP 1 (A)
•SETUP 2 (B)
• CURRENT INPUT (Z)
• CURRENT OUTPUT (O)
•ALARM (F)
• CHECK (P)
•RELAY (R)
• TEMPERATURE COMPENSATION (T)
• CONCENTRATION MEASUREMENT (K)
•SERVICE (S)
• E+H SERVICE (E)
• INTERFACE (I)
Calibration mode
• CALIBRATION (C)
A detailed explanation of the function groups available in the transmitter can be found
in the "System configuration" section.
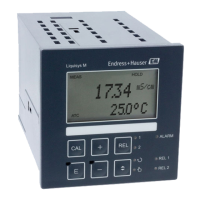
C07-CLD132xx-07-06-00-en-003.eps
Fig. 20: Example for display in setup mode
 Loading...