Installation Heating jacket for Promass A, E, H, I, M, S, P
8 Endress+Hauser
3.2.3 Orientation
3.3 Installing the heating jacket
3.3.1 Mounting kit
Note the following points:
• Screws, nuts, etc. are included in the scope of supply.
• Dimensions and required space Page 13 ff.
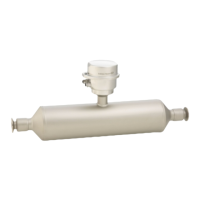
Promass M, I
Join the two half-shells of the heating jacket by nuts and bolts.
#
Warning!
With large nominal diameters, a support may be required due to the heavy weight of the sensor and
the heating jacket. Never use the feed and return pipes of the heating system to support the heating
jacket!
The weight data for the sensors are listed in the "Technical data" of the corresponding Operating
Instructions.
Promass A
Join the plate of the heating jacket on the sensor by nuts and bolts.
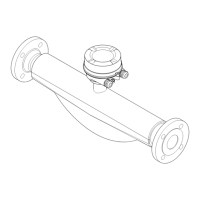
Promass E, H, S, P
Join the two plates of the heating jacket by nuts and bolts.
#
Warning!
With large nominal diameters, a support may be required due to the heavy weight of the sensor and
the heating jacket. Never use the feed and return pipes of the heating system to support the heating
jacket!
The weight data for the sensors are listed in the "Technical data" of the corresponding Operating
Instructions.
Vertical Horizontal Horizontal Inclined Inclined
Transmitter
at the side at the top
at the
bottom
at the bottom at the top
Sketch
a0004572
a0004576 a0004580
A0008136
A0008137
Recommendation Recommended
Recommended
(m)
Recommended
(n, o)
Recommended
(m, p)
Recommended
(n, o, q)
T = Process connection heating jacket
m This orientation is not suitable for fluids with entrained solids.
n This orientation is not suitable for outgassing fluids.
o This orientation is not suitable for low fluid temperatures.
p Depending on medium temperatures.
q Depending on heating medium.
T
T
T
D
T
T
E
T
T