EasyManua.ls Logo

Endress+Hauser Proline Promass E TB2 HART User Manual

Endress+Hauser Proline Promass E TB2 HART
116 pages
To Next Page IconTo Next Page
Page #1 background imageLoading...
Page #1 background image
Operating Instructions
Proline Promass E TB2
HART
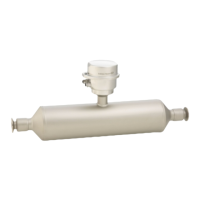
Coriolis mass flow measuring system
BA01027D/06/EN/06.10
71112405
Valid as of version
01.00.zz (Device software)

Table of Contents

Questions and Answers:

Endress+Hauser Proline Promass E TB2 HART Specifications

General IconGeneral
SeriesProline
ModelPromass E TB2
ManufacturerEndress+Hauser
Measurement PrincipleCoriolis
Communication ProtocolHART
Ingress ProtectionIP66 / IP67
Device TypeMass Flow Meter
Temperature Range-50°C to +150°C
Process Temperature Range-50°C to +150°C
Ambient Temperature Range-40 to +60 °C
Output Signal4 to 20 mA HART
Housing MaterialStainless steel
Wetted Parts MaterialStainless steel 316L
Outputs4-20mA HART, Pulse/Frequency
CertificationsATEX, IECEx

Summary

Operating Instructions

1 Important document information

Information on document purpose, function, and related documentation.

1.2 Document conventions

Explains safety, electrical, tool symbols, and notation used in the manual.

2 Basic safety instructions

2.1 Requirements for the personnel

Outlines qualifications and authorizations for personnel performing tasks.

2.2 Designated use

Defines the intended application and limitations of the measuring device.

2.3 Workplace safety

Covers safety measures for working on or with the device.

2.4 Operational safety

Details safety aspects during device operation, including modifications and repairs.

2.5 Product safety

Confirms the device's adherence to safety standards and regulations.

3 Product description

3.1 Product structure

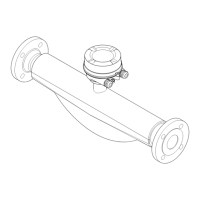
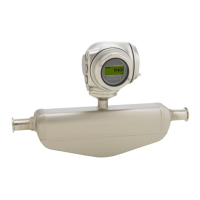
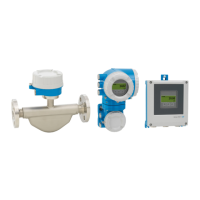
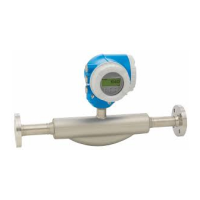
Illustrates the main components of the measuring device.

3.2 Registered trademarks

Lists trademarks associated with the product and its components.

3.3 Patents

Lists patent numbers relevant to the product.

4 Incoming acceptance and product identification

4.1 Incoming acceptance

Steps to verify correct delivery and condition of the product.

4.2 Product identification

Details how to identify the transmitter and sensor using nameplates.

5 Storage, transport, packaging disposal

5.1 Storage and transportation conditions

Guidelines for proper storage and handling to maintain device integrity.

5.2 Transporting the product to the measuring point

Instructions for safely moving the device to its installation location.

5.3 Disposal instructions for packaging

Information on environmentally friendly disposal of packaging materials.

6 Mounting

6.1 Mounting requirements

General requirements, positions, and environmental considerations for installation.

6.2 Mounting the measuring device

Detailed steps for physically installing the device and components.

6.3 Post-mounting check

A checklist to ensure correct installation after mounting.

7 Electrical connection

7.1 Preparing the measuring device for the electrical connection

Required tools and cable specifications for connecting the device.

7.2 Connecting the measuring device

Step-by-step instructions for connecting cables.

7.3 Ensuring the degree of protection of the measuring device

Procedures to maintain IP protection after connection.

7.4 Post-connection check

A checklist to verify electrical connections.

8 Operation options

8.1 Overview of operation options

Introduces methods for device interaction and control.

8.2 Structure and function of the operating menu

Explains the organization and philosophy of the operating menu.

8.3 Access to the operating menu via the local display

Details navigation, display elements, and functions via local interface.

8.4 Access to the operating menu via the operating tool

Describes device operation using external software tools.

9 Integrating a device via HART protocol

9.1 Overview of device description files

Information on obtaining and using device description files for HART.

9.2 Device variables and measured values

Maps device variables to measured values.

9.3 Other settings

Configuration options for HART protocol.

10 Commissioning

10.1 Function check

Verifies installation and connection before startup.

10.2 Switching on the measuring device

Instructions for powering on the device.

10.3 Setting the operating language

Procedure to select the user interface language.

10.4 Configuring the measuring device

Guides through essential setup wizards for standard operation.

10.5 Advanced settings

Covers extended configurations like tag names, units, and totalizers.

10.6 Configuration management

Options for saving, restoring, and managing device configurations.

10.7 Simulation

Enables simulating process variables for testing.

10.8 Protecting settings from unauthorized access

Methods to prevent unintended configuration changes.

11 Operation

11.1 Adjusting the operating language

How to change the device's display language.

11.2 Configuring the display

Customizes how measured values and status are shown.

11.3 Reading off measured values

Guides on viewing current process variables and totalizers.

11.4 Adapting the measuring device to the process conditions

Adjusts device settings for specific process requirements.

11.5 Perform totalizer reset

Instructions for resetting flow totalizers.

11.6 Show data logging

How to view historical measured value trends and event logs.

12 Diagnostics and troubleshooting

12.1 General troubleshooting

Solutions for common display and output issues.

12.2 Diagnostics event on local display

Explains how device errors are displayed and interpreted.

12.3 Diagnostics event in the operating tool

How diagnostic events appear and are handled in external software.

12.4 Diagnostic list

Lists currently pending diagnostic messages by priority.

12.5 Overview of diagnostics events

Details diagnostic events, causes, and remedial measures.

12.6 Event logbook

Provides a history of logged events.

13 Repair

13.1 General notes

Outlines the repair concept and general service notes.

13.2 Spare parts

Information on identifying and ordering spare parts.

13.3 Endress+Hauser services

Contact information for service and support.

14 Maintenance

14.1 Maintenance tasks

Covers exterior and interior cleaning procedures.

14.2 Measuring and test equipment

Information on recommended test equipment.

14.3 Endress+Hauser services

Details maintenance, recalibration, and testing services.

15 Accessories

Accessories

Lists available accessories for the device.

16 Return

Return

Procedures and safety precautions for returning the device.

17 Disposal

17.1 Removing the measuring device

Steps for safely switching off and removing the device.

17.2 Disposing of the measuring device

Guidelines for environmentally compliant disposal.

18 Technical data

18.1 Application

Specifies intended use and suitable fluids.

18.2 Function and system design

Describes measuring principle and components.

18.3 Input

Lists measured and calculated process variables.

18.4 Output

Details output signals, alarm modes, and isolation.

18.5 Power supply

Covers terminal assignments, supply voltage, and consumption.

18.6 Performance characteristics

Specifies accuracy, repeatability, and response time.

18.7 Operating conditions: Installation

Requirements related to the installation environment.

18.8 Operating conditions: Environment

Defines ambient temperature ranges.

18.9 Operating conditions: Process

Specifies conditions for medium temperature, density, pressure.

18.10 Mechanical construction

Details physical dimensions, materials, and weight.

18.11 Human interface

Describes the local display and its operating elements.

18.12 Certificates and approvals

Lists relevant certifications and compliance standards.

18.13 Application packages

Information on optional application packages.

18.14 Accessories

Lists available accessories.

Index

Related product manuals